Tag Archives: Aldi’s

What’s for Dinner Wednesday: Anthony’s Stir Fry in Valerie’s Cast Iron Skillet

29 May
This was a recipe with all the best ingredients.

This was a recipe with all the best ingredients.

Many of you who have been reading this blog since its inception and even those of you who used to read my Sauce vs. Gravy recipe blog way back when, know that recipes mean more to me than a good meal.

To me a good recipe is one that means something to me because of a connection that I have to it, whether it is from a family member or a friend, whether it’s a dish I ate at a memorable event or maybe even stems from a family tradition that we hold near and dear.

Recipes connect me to others and to memories of others.

Today’s recipe is from my friend Anthony. Anthony owns Reel to Real Recording Studio here in Cranston and we will sometimes bump into each other at local events, but we are friends on Facebook so we “see” each other on there all the time.

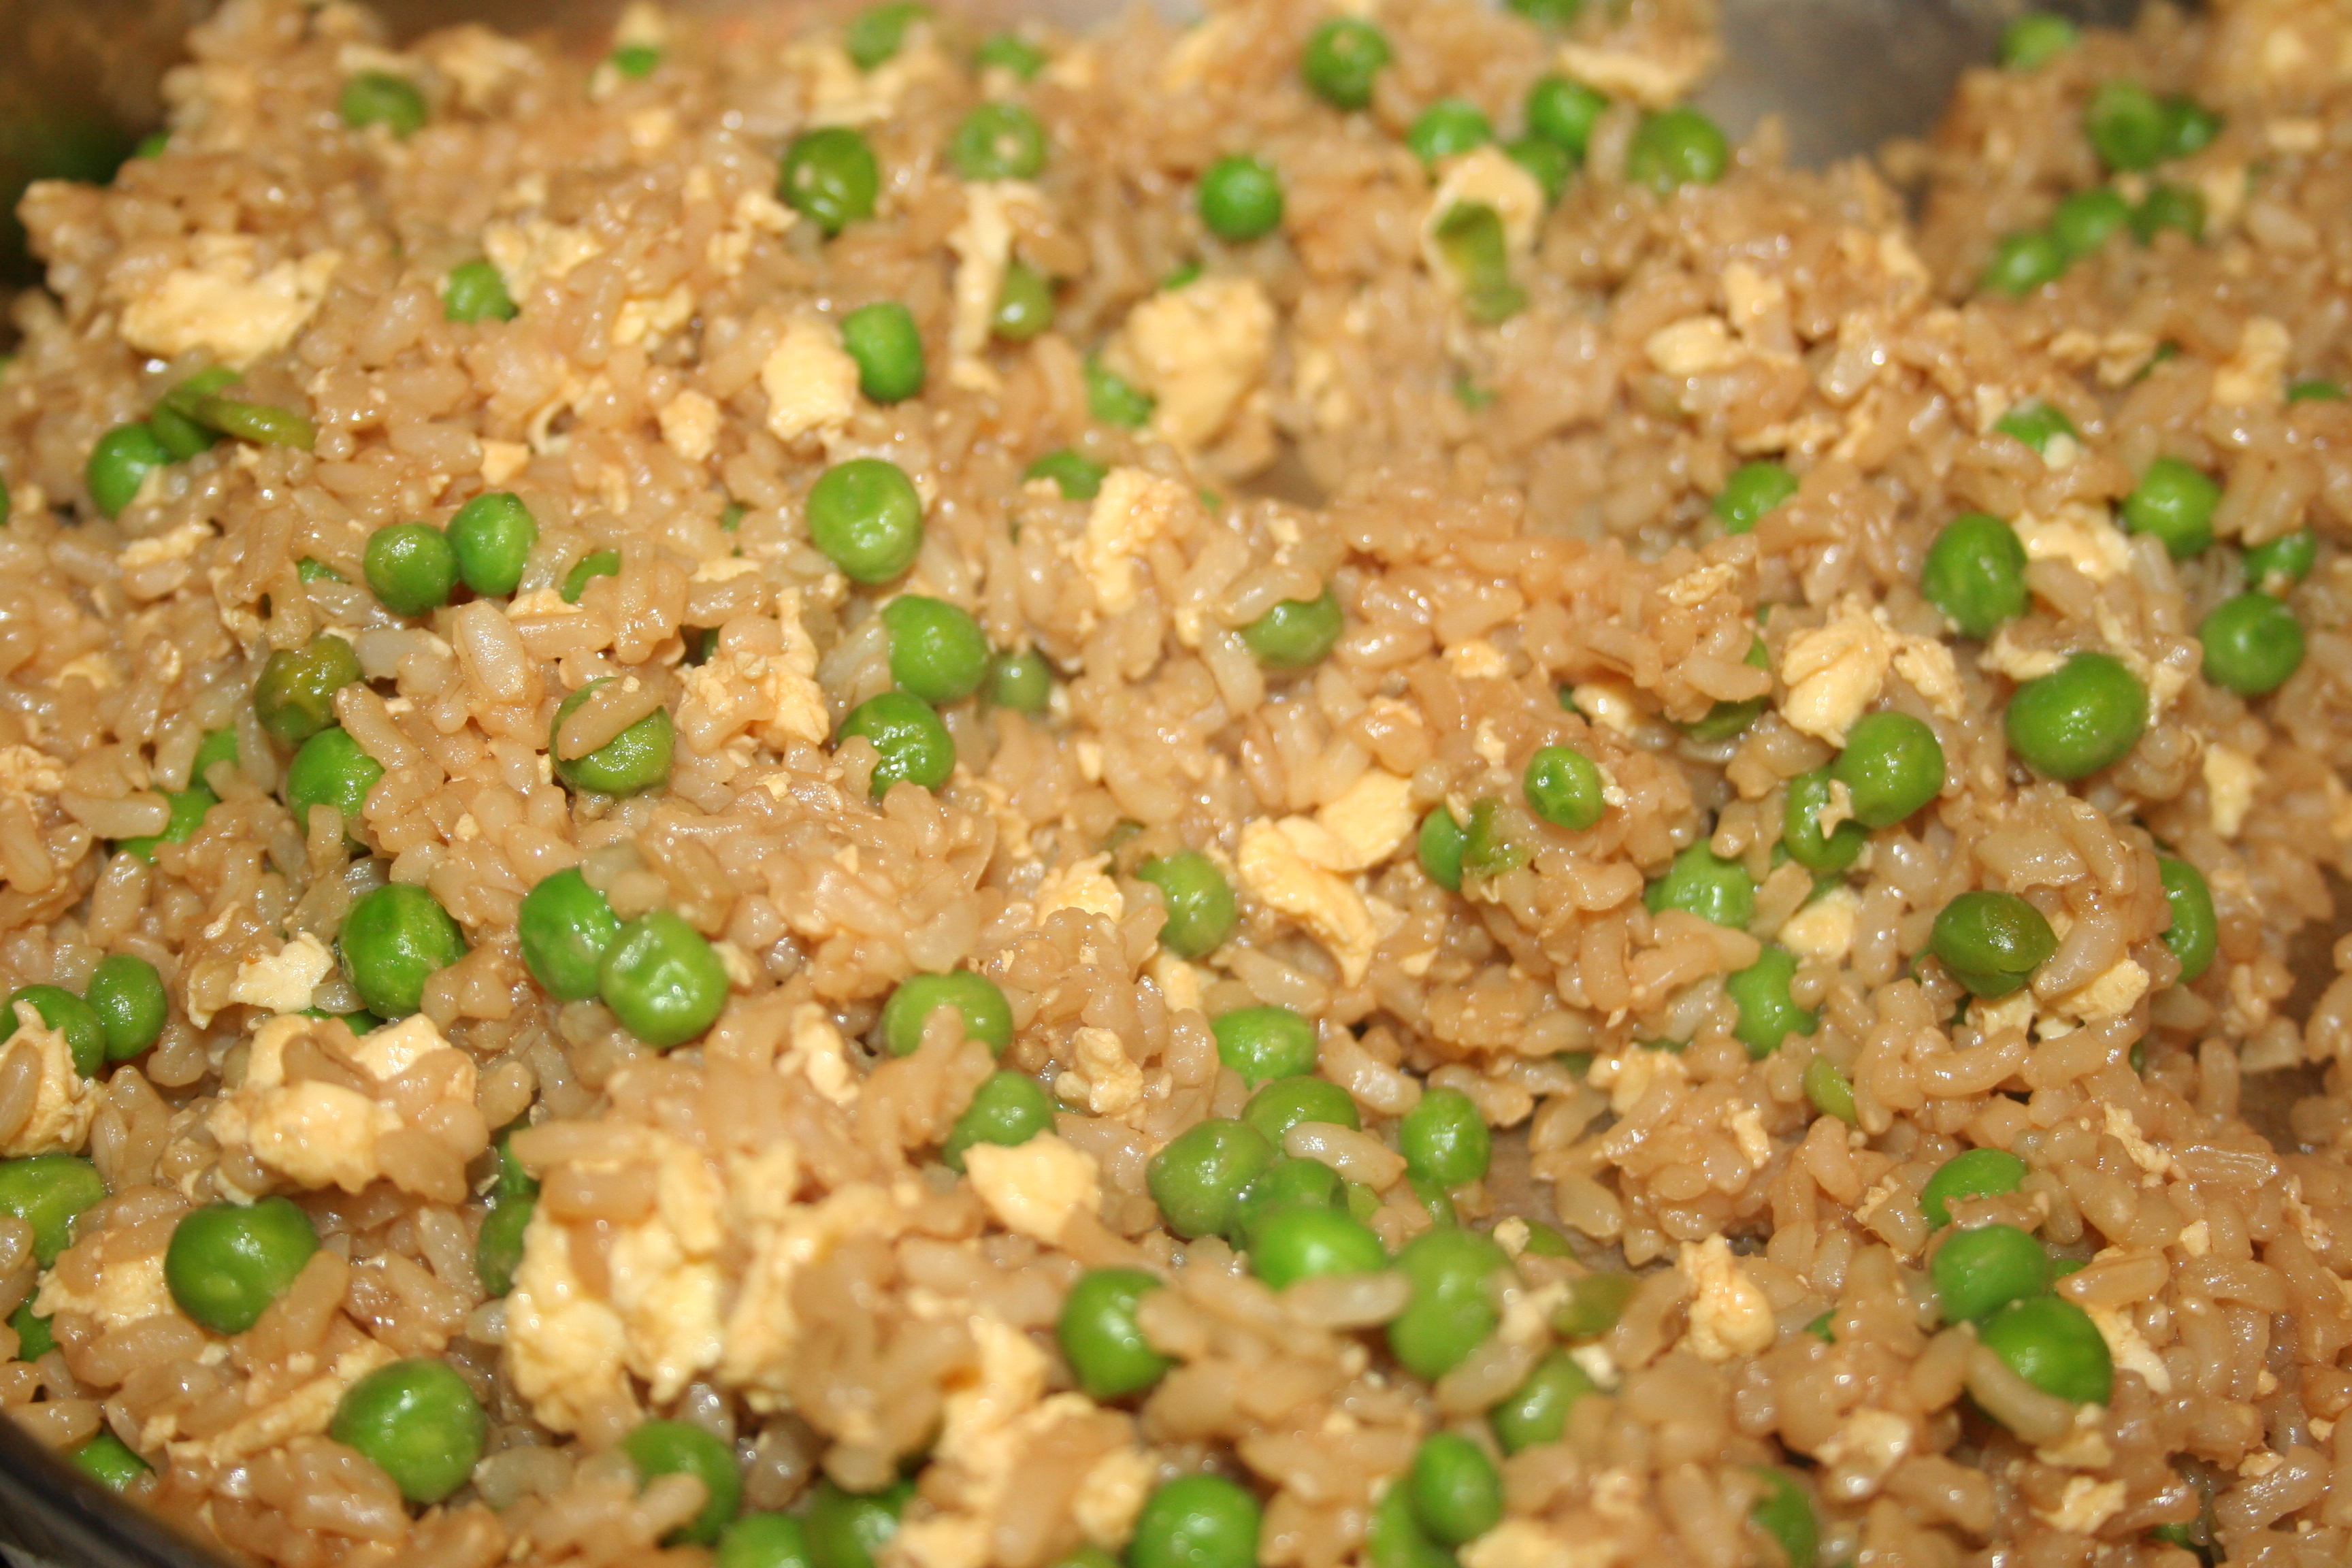
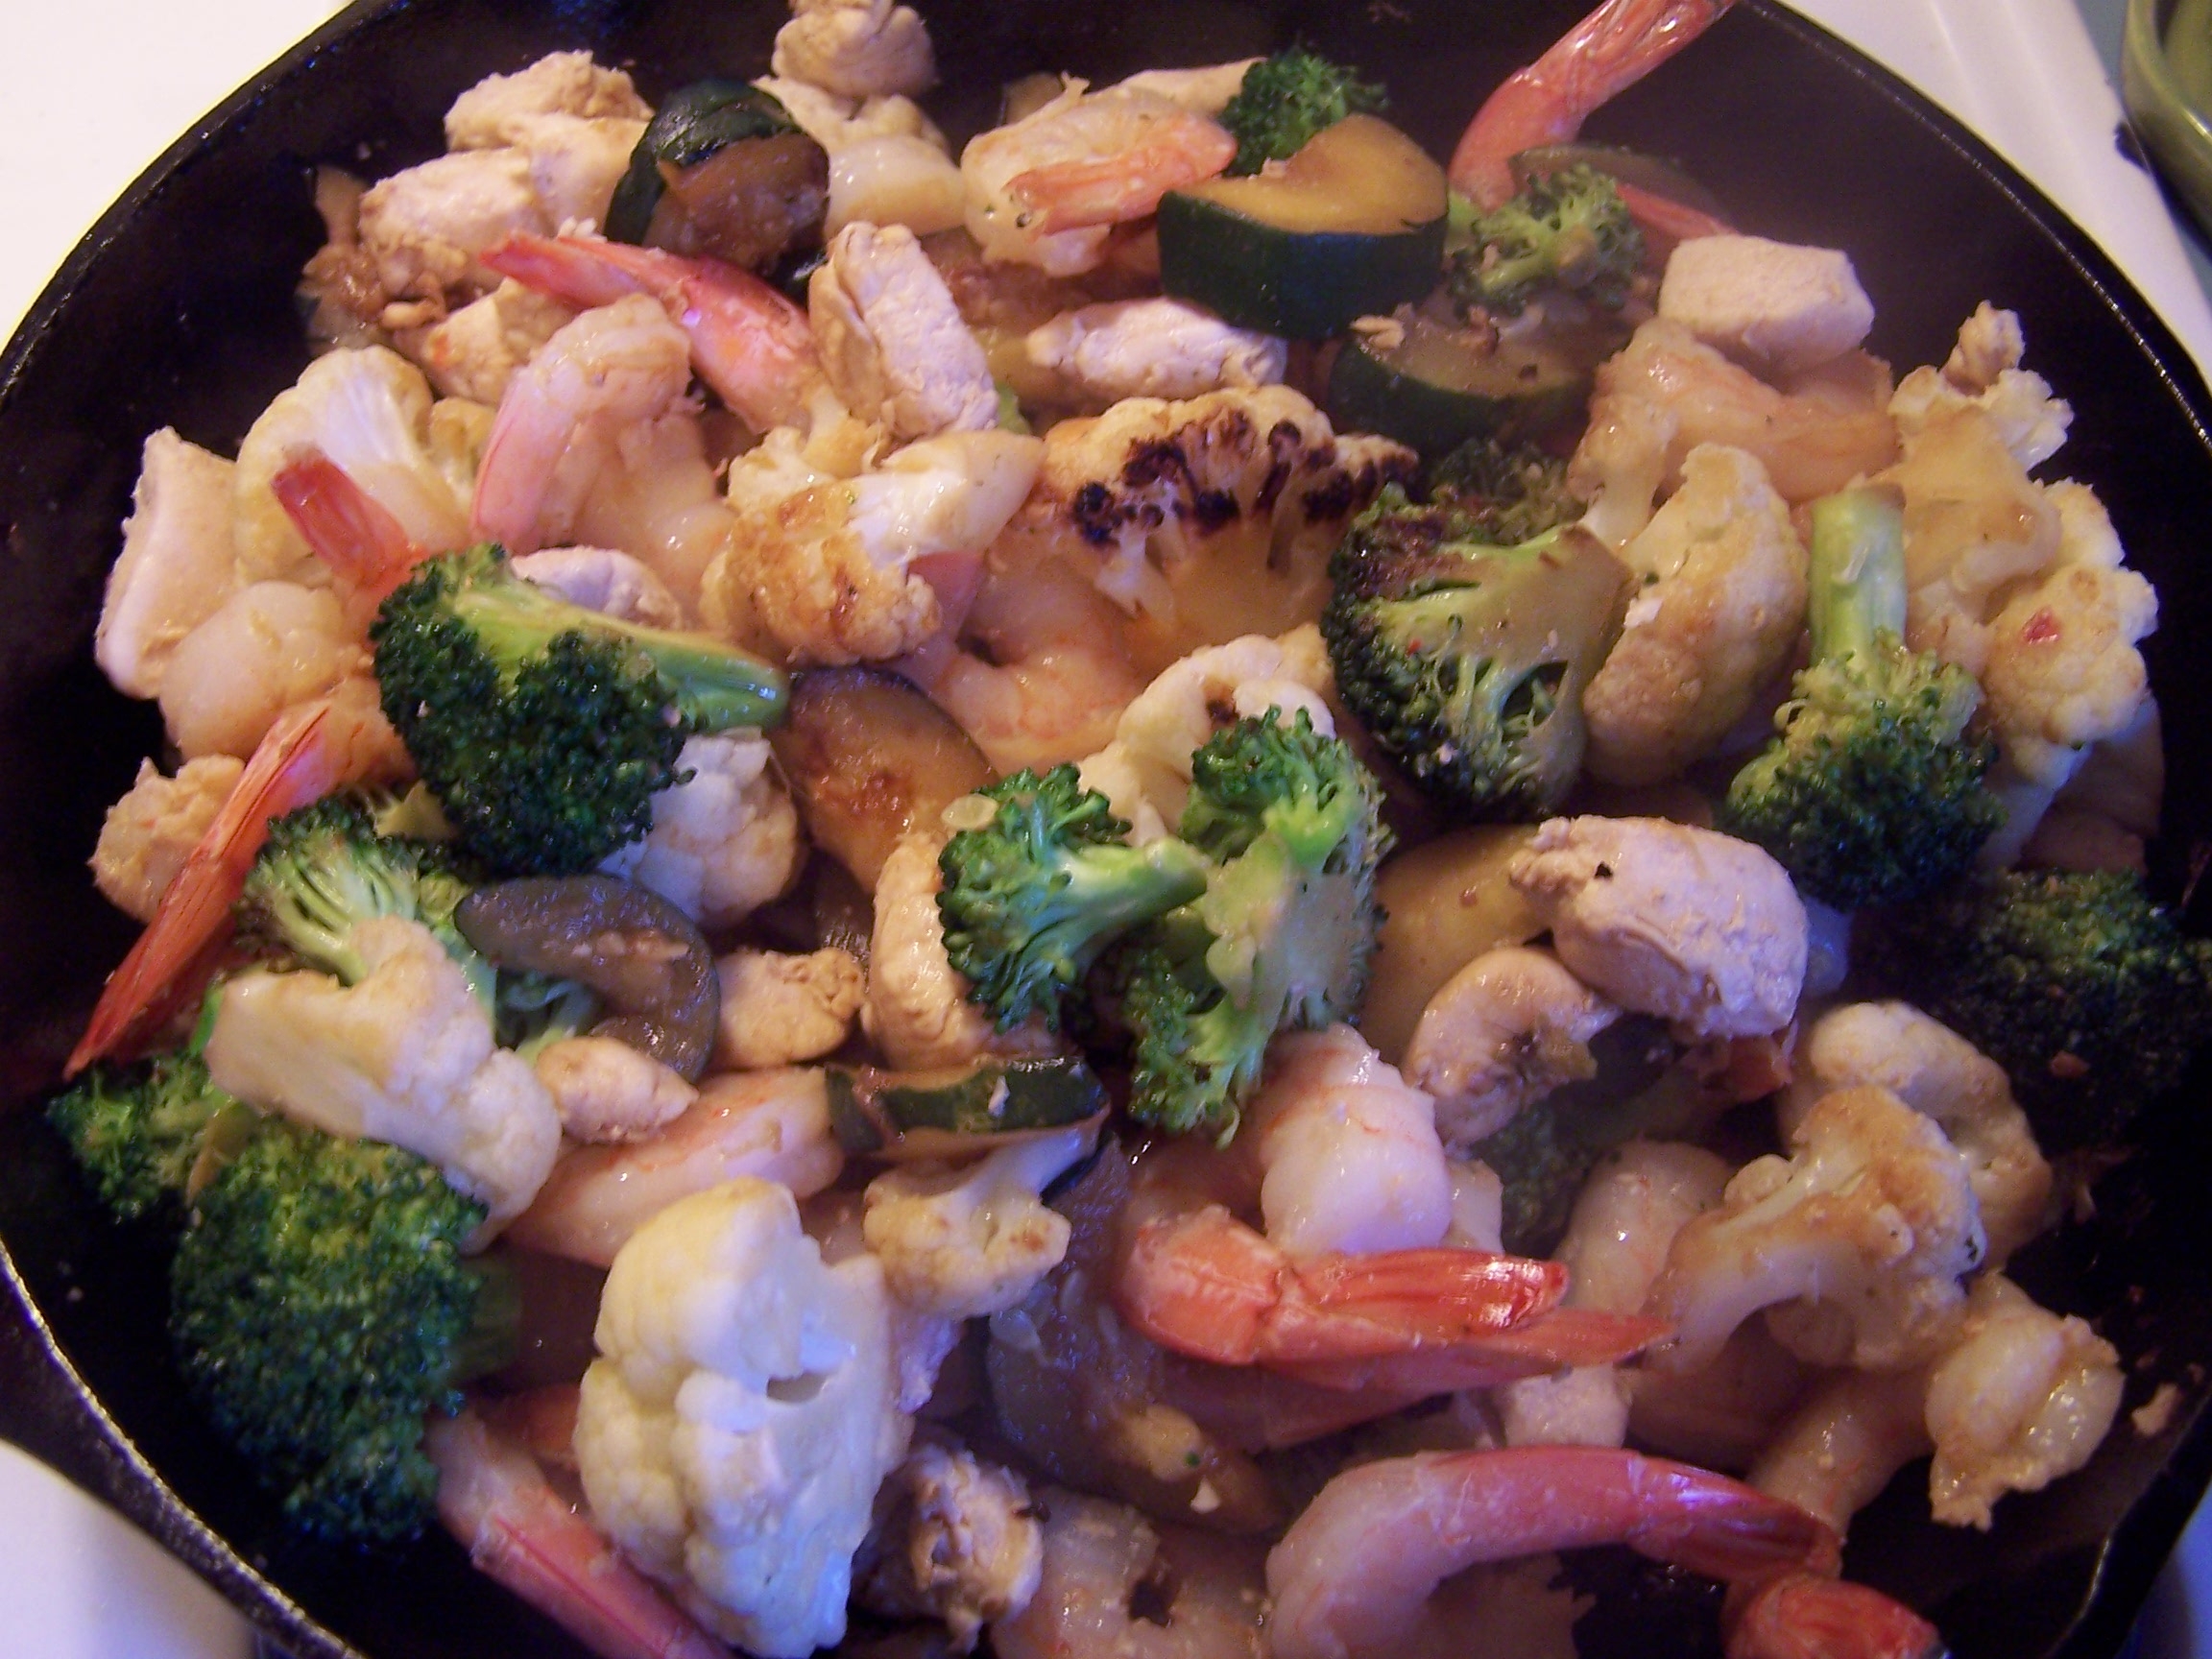
Recently, Anthony posted a photo on Facebook of a stir fry he was making for dinner at his house. It looked delicious. I had to have it and I asked him if there was anything special in the stir fry as far as a sauce, but he said it was simple: olive oil in the bottom of the pan, and Worcestershire sauce mixed in while cooking, basically made to your liking. Anthony listed some ingredients he will often throw into his stir fry, including chicken or shrimp,  zucchini, broccoli, and cauliflower.

The next time I went to the store, I bought chicken AND shrimp, zucchini, broccoli and cauliflower. I couldn’t wait to get home to make our dinner that night. There was going to be something in this dish that everyone loved.

Even better, I was going to be using our new cast iron skillet, given to me by my cousin Valerie just a few weeks ago. When Val asked me if we had a cast iron skillet, I said that we didn’t, and she said she had an extra one that she would bring to me when she came down for Alexandra’s First Communion.

When she arrived, she gave me the pan and along with it, an envelope with my name on it. Because we were having the party, I didn’t get to read Valerie’s note until the next day, but when I did, I almost cried as I read.  In the letter, Valerie told me the story of the skillet and how she’d found it while shopping with her brother in-law during their annual summer consignment shop shopping trips. She mentioned that it’s just she and he who love these shopping trips. Her husband and his sister are not fans of the “junk” that Val and John bring home.

The story of my cast iron pan makes everything I cook in it, including Anthony's Stir Fry, that much more special.

The story of my cast iron pan makes everything I cook in it, including Anthony’s Stir Fry, that much more special.

The skillet was part of a set of three, “dusty, rusty, neglected diamonds in the rough,” Valerie wrote. She told me of how she and John bought the pans and took them home. She knew that these treasures only needed “a good home, a hot bath, and someone to make them feel useful again, things we all want.”

Valerie cleaned and seasoned our skillet for us, giving us the last of the three rescued trio of pans in the set that she and her brother in-law had found last summer.

“Good, old, seasoned cast iron is a treasure. it is a work horse in the kitchen. It holds the heat well, cooks evenly, is the original ‘non-stick’ cookware. it makes mean fried eggs, crusty hash browns and frittatas to die for,” Valerie said.

Last week, my new cast iron skillet made a fabulous stir fry, Anthony’s Stir Fry, and it was delicious.

Good friends, good pans, and treasured family members. I am blessed to have them all.

Give Anthony’s Stir Fry a try with your favorite ingredients in it.

And if you have a cast iron skillet of your own, definitely use it.

Fun Friday: Mozaik 48 Piece Mini Dessert Set

17 May
These were so much fun I just had to feature them for a Fun Friday post!

These were so much fun I just had to feature them for a Fun Friday post!

A few weeks ago we hosted our daughter’s First Communion at our house. Besides cake, we had several other desserts and today I wanted to feature one of them.

My friend Paula had sent me this cute little 48 piece mini dessert set in the mail,  a set from Mozaik. When she saw it in a store near her, she said she thought it would be perfect for First Communion, and she was right.

Around the same time, the girls and I had attended an event at our local library that I covered for the newspaper. Advertised as a Teen Cooking Challenge, the kids had to each create their own healthy trifles, using pudding, whipped cream, and fresh fruit.

Trifle picture

I never imagined that I’d find my First Communion dessert at a kids’ cooking event at our local library!

When I saw the kids’ trifles, I knew I’d found my dessert, simple as it was, for First Communion.

And when I say simple, I mean really.simple.

The desserts I made were in two variations: Jello Sugar Free, Fat Free instant cheesecake flavored pudding or chocolate flavored pudding, prepared using skim milk, and topped with a low fat topping from Aldi’s that’s like Cool Whip. I topped the cheesecake desserts with fresh strawberries and the chocolate desserts with fresh blackberries.

Yup. That’s it!

Each little cup has a matching little spoon, which made for a really cute, yet seemingly elegant, healthy dessert! They were such a hit, there were just a couple of them left over at the end of the day.

There are so many cute ideas that you could use this set for, both desserts and appetizers. Picture a healthy veggie dip in the bottom with a few celery, zucchini and carrot sticks sticking out, or picture individual shrimp cocktail sauces with a few shrimp. Perfect, right?

Right.

And that, my friends, is my Fun Friday post for today!

Enjoy your weekend!

What’s for Dinner Wednesday: Sweet Hawaiian Crock Pot Chicken

15 May
This was a great crock pot recipe, and I'd definitely make it again!

This was a great crock pot recipe, and I’d definitely make it again!

I will apologize in advance that I do not know where this recipe originated. Don saw it online and sent it to me in an email. I later also saw it online on a friend’s page, she was sharing it from a recipe exchange page called Renee’s Exchange.

What I do know is that we tried the recipe and liked the recipe and I’d make it again. I had to do mine on high for less time because I got a late start, but it still came out great. We had enough leftover to serve a second night and it was just as good the second time around.

We served ours with couscous and sauteed zucchini the first time and over brown rice with a side of green beans the second time.

The only thing I cannot figure out is that the original picture that I saw showed the chicken very glazed and crispy, with the glaze sticking to the chicken. Ours was very juicy rather than a glaze. Still very tasty, but different than what I expected.

The ingredients are simple and the directions…even more simple! Give it a try on your next crock pot night!

Sweet Hawaiian Crock Pot Chicken:
Ingredients:
1 cup pineapple juice
1/2 cup packed brown sugar
1/3 cup light soy sauce
2 pounds chicken breast tenderloins  (**I used an entire 2.5 pound bag of frozen tenderloins.)

Directions:
Add all ingredients to the crock pot and cook on low 6-8 hrs and they should just fall apart. Enjoy!

Fun Friday: Blueberry Banana (no flour) Muffin

3 May
These made a great , healthy after school snack!

These made a great , healthy after school snack!

I love it when I find new recipes to try out. I follow so many foodie pages on Facebook that I’m always getting great ideas for new things to try.

A few weeks back, I came across a post from The New Modern Mama blog where she talked about trying some new muffins at her house. They sounded good to me and I had everything for them so the next day I tried them at my house. They were great!

I made them for an after school snack and then there were leftovers for the next morning as well. I made a few changes:

*I used nonfat vanilla yogurt, not greek yogurt.

*I used Truvia rather than Stevia and followed the measurement guidelines on the Truvia package.

*I had both “quick” Steel Cut Oats and the regular kind. The quick kind are softer and I thought they’d blend easier, so I used those.

*Although I used my blender, if I made them again, which I hope to, I’d use a food processor. My blender had a hard time.

They were good, they were something new and different and everyone loved them. This recipe is a keeper for us, for sure. I hope you’ll try it too! I know that you can try other fruits in the recipe besides blueberries, so next time I just might do that!

Thanks to the New Modern Mama for sharing!

Next time I'd try these in the food processor instead of the blender.

Next time I’d try these in the food processor instead of the blender.

Blueberry Banana No Flour Muffins
From The New Modern Mama

Ingredients:

  • 2 overly ripe bananas
  • 2 eggs
  • 2 1/2 cups steel cut oats
  • 1 single serving cup, low fat, greek yogurt {I used vanilla}
  • 1 cup of blueberries
  • 3/4 cups of sugar or stevia
  • 1 1/2 tsp baking powder
  • 1/2 tsp baking soda

Method:

  1. Preheat the oven to 400 degrees.
  2. Put all of the above ingredients into a blender except for the fruit.
  3. Blend ingredients until smooth {you may have to scrape down the sides and do this several times}.
  4. Pour blended ingredients into a bowl and stir in blueberries.
  5. Pour muffin mix into greased tin.
  6. Bake for 20 minutes.

This made exactly 12 muffins.

My new addiction: Four Ingredient Nutella Mug Cake

26 Apr
Nutella is not new, but there's this great little treat that I make with it, which I'm addicted to!

Nutella is not new, but there’s this great little treat that I make with it, which I’m addicted to!

For the longest time, I knew that Nutella existed, but I never bought it.

Yes, seriously. It was not on my all-the-time shopping list.

That was in my old life. My pre-Nutella addicted life.

Recently, Elizabeth came home and said how her good friend had a Nutella sandwich for lunch at school. It got me thinking. There’s so many things you can make with Nutella, and it might be a great treat for the kids’ lunches and mine, on occasion.

Let me just say, it’s a slippery slope, that Nutella. One lunchtime treat has led to many jars of Nutella in my shopping cart.

I love it for breakfast, for lunch, with strawberries, with bananas, with peanut butter and for a late night snack.

I think about it all the time.

And I keep finding bigger jars of it. I first started out with a small jar. I’d buy two at a time. Then I found an even BIGGER jar at Target. I’m on my second one of those. But I hear there’s an EVEN BIGGER jar available at BJ’s. I’m afraid to go see. I’d join just to buy it.

So one day, my friend Paula sends me a link she’d found to a Four Ingredient Nutella Mug Cake. She found it on a blog called Kirbie’s Cravings.

Four ingredients. One of them being Nutella.

Check.

Check. Check. Check.

I had all four ingredients.

I’ve made a mug cake before from a different recipe for a coffeecake, and didn’t love it. Never posted it.

This, I love.

I think I’ve made it four times in two weeks or so.

It takes all of five minutes to mix up, if that.

It takes all of one minute and 30 seconds to cook in my microwave.

I kid you not.

So today, for my Friday post I share with you my newest addiction: the Four Ingredient Nutella Mug Cake from Kirbie’s Cravings.  Now pay attention when you read her blog post about this cake. She has taken a lot of ingredients out of her original recipe, which used to be over 1000 calories. Now it’s just over 500 calories. That’s still a lot. But knowing it *used* to be more, doesn’t that make it sound like a bargain?

Yes!! It does!

And she recommends sharing it.

I don’t choose to go that route.

She also recommends waiting to eat it until it cools.

I don’t do that either. I can barely get it out of the microwave and I’m getting my spoon.

I recommend topping it with whipped cream or something like that. My whipped cream is fat free. In fact, most of what we eat is low fat or fat free, so I don’t really feel terrible eating this on occasion.

Multiple occasions.

Here’s the recipe. Try it out!

Four Ingredient Nutella Mug Cake

from Kirbie’s Cravings

Ingredients:

4 tbsp flour
1/4 tsp baking powder
1/4 cup Nutella
3 tbsp fat free milk

Directions:

Combine all ingredients into an oversized mug. Mix with a small whisk until batter is smooth. Cook in microwave for about 1 minute. Sharp knife inserted should come out clean and top of cake should look done rather than gooey. If cake is not cooked in one minute, add an additional 20 seconds. Let cake cool in mug completely before eating.

Totally Addicting.

Totally Addicting.

What’s For Dinner Wednesday: Brussel Sprouts

24 Apr
Until the other night, I had never had brussels sprouts.

Until the other night, I had never had brussel sprouts.

Ewwww….brussel sprouts!!!

Isn’t that what everyone always says? When people want to come up with the grossest vegetable to make you eat, isn’t it always brussel sprouts?

I guess I’d always just taken their word for it because in my whole life I had never had a brussel sprout until two nights ago. I think I just always assumed they’d be gross because everyone says so. It wasn’t until recently when someone said, “They’re just like baby cabbages,” did I realize that I might actually like them, as I like cabbage.

I took the next step: I bought some at Aldi’s.

Then I forgot I had them until my daughter was home sick, watching Cupcake Wars on TV and one of the challenges was to incorporate brussel sprouts into the recipe.

GASP!

“I have those in the fridge,” I said to Elizabeth.

We decided to give them a try. I looked up recipes and came up with this one for roasted brussel sprouts. Sounded basic, easy, and delicious.

Don came home from work that night and said, “I was talking to someone at work about how to cook brussel sprouts, and she said we should roast them with salt, pepper and olive oil.”

Well that was funny, same recipe I’d come up with.

So we tried them.

I loved them.

I was the only one.

Don liked them, Liz could take or leave them, and Caroline and Alex didn’t like them at all.

Bummer.

However, because I loved them I am posting the recipe. I had the leftovers again, the very next night.

I’d love to know though, how do you cook your brussel sprouts if you are someone who makes them? Please share any good recipes or tips with me.

And, a couple of things to note: Don parboiled them in the microwave first, just to jump-start the cooking. And, he also sprinkled garlic on them before roasting, along with the salt and pepper.

They do look just like little baby cabbages.

They do look just like little baby cabbages.


ROASTED BRUSSEL SPROUTS from AllRecipes.com

Ingredients

Original recipe makes 6 servings Change Servings
1 1/2 pounds Brussel sprouts, ends trimmed, yellow leaves removed
3 Tablespoons olive oil
1 teaspoon kosher salt (we used regular)
1/2 teaspoon freshly ground black pepper

Directions

  1. Preheat oven to 400 degrees F (205 degrees C).
  2. Place trimmed Brussels sprouts, olive oil, kosher salt, and pepper in a large resealable plastic bag. Seal tightly, and shake to coat. Pour onto a baking sheet, and place on center oven rack.
  3. Roast in the preheated oven for 30 to 45 minutes, shaking pan every 5 to 7 minutes for even browning. Reduce heat when necessary to prevent burning. Brussels sprouts should be darkest brown, almost black, when done. Adjust seasoning with kosher salt, if necessary. Serve immediately.

Strawberry Compote for your next breakfast or brunch

22 Mar
We've made this twice already since finding the recipe in a magazine.

We’ve made this twice already since finding the recipe in a magazine.

Being a breakfast/brunch fanatic, when I saw this compote in a FamilyFun magazine recently, I knew I had to try it.  I love compotes of all kinds.  We already have a great recipe for a blueberry compote and one for a peach compote, but I’d yet to try a strawberry compote.

It was shown over crepes, which we love, but right away I could picture it over homemade waffles, over pancakes, french toast and even as a topping for our healthy mini cheesecakes.

The first time I made it, it was a hit right away. I served it with the mini cheesecakes as a dessert, but I spotted a cute little girl who shall remain nameless to protect her identity, eating it right out of a bowl with whipped topping, spoon in hand, no cheesecake in sight.

It was that good.

The second time we made it, it was for crepes, which we are actually having for dinner. We put out a variety of fillings and toppings, (remember our crepes buffet from a past post?) and this strawberry compote was a perfect topper and even a perfect filler, for strawberry banana crepes. I had a combination of fresh strawberries and bananas along with the compote in mine.

Heavenly.

So, with many people choosing the brunch option for the upcoming Easter holiday meal, I thought I’d post this recipe today, in case you decide to include it in your menu. The recipe is delicious, fast and easy, a check plus in my book. I keep a variety of frozen fruits on hand so we used a one pound bag of frozen strawberries from Aldi’s for this recipe.

STRAWBERRY COMPOTE *from FamilyFun, February 2013
INGREDIENTS

1 pound fresh or frozen strawberries, quartered plus more for garnish if desired. (I did not quarter them, as they were frozen.)

1/4 cup sugar

1 tablespoon cornstarch

1 tablespoon lemon juice

Super-easy directions make this a great recipe for a busy day.

Super-easy directions make this a great recipe for a busy day.

DIRECTIONS

1.) In a medium saucepan, stir the strawberries and sugar together. Let the mixture stand until the fruit’s juices release, about 30 minutes. (If you are using frozen strawberries, heat them with the sugar over medium heat until they’re defrosted, about 2 minutes *mine took longer.*)

2.) In a small bowl, whisk together the cornstarch and lemon juice. Combine them with the strawberry mixture. Simmer the sauce on medium-low until it thickens, about 10 minutes, then set aside.

See what kinds of things you can think of to serve this with!

Again, mine took a little longer to thicken, but here is what it looks like when it's done, so cook until it is thickened. You'll be able to tell.

Again, mine took a little longer to thicken, but here is what it looks like when it’s getting thicker, so cook until it is thickened. You’ll be able to tell.

What’s For Dinner Wednesday: Light Vegetable Fried Rice

20 Mar
This Vegetable Fried Rice was a huge hit!

This Vegetable Fried Rice was a huge hit!

We all love Chinese food, but it’s not something we get very often. I was thrilled when I recently found a recipe on the Red Barn Blog for a homemade version that was healthy. I actually believe the post was a guest post on the Red Barn Blog by the Budget Gourmet Mom, a blog I also follow.

I decided to try it a couple of weeks ago, although not following the recipe exactly, but rather using it as a guide when making ours. It was such a huge hit, I’ve already made it again. Five thumbs up, both times.

I like this recipe because you can use whatever vegetables you have on hand and throw them in. I can foresee using sugar snap peas or pea pods when I have them next, or throwing in zucchini when I make it again.

Here is the recipe as it’s written by the Budget Gourmet Mom on the Red Barn Blog. I’ve made a note of any changes I made. This was great served with Duck Sauce or with Sweet and Sour Sauce on the side, both of which are nonfat.

This Chinese Fried Rice is great as a side dish for any meal. We last used it when we had pork chops.

This Chinese Fried Rice is great as a side dish for any meal. We last used it when we had pork chops.

INGREDIENTS

  • 2 cups cooked cold white or brown rice
  • 1 tablespoon canola oil  (We used olive oil.)
  • 1 small onion, diced
  • 2 cups fresh vegetables, I used broccoli and carrots
  • 2 large eggs, lightly beaten (We used egg substitute.)
  • 3 tablespoons soy sauce
  • DIRECTIONS
  1. In a large skillet preheat oil over medium-high heat.
  2. Add in the rice and fry, tossing carefully with wooden spoon. Add the vegetables and continue to cook for 7 minutes, stirring occasionally.
  3. Push the rice off to the side of the pan and place the beaten eggs next to the rice. Cook, stirring the eggs until firm. Fold into the rice.  (I cooked my eggs in a separate frying pan.)
  4. Add the soy sauce, toss, and serve.

Thanks to the Red Barn Blog and the Budget Gourmet Mom for sharing this delicious dish!

Springtime Smoothies

15 Mar
A healthy springtime snack!

A healthy springtime snack!

Just the other day I wrote about some of the signs of spring’s arrival that I look forward to: things like the weather changing, longer days and the chance to play outside.

Another thing that happens when the seasons change is that our menu changes a bit too. As the weather warms up our snacks are often cool and refreshing rather than warm and toasty.  Our dinners are often cooked outside and then eaten outside too.

One snack in particular that my kids love is smoothies. I make them at home in the blender all the time, but most especially as the weather gets warmer.

Just the other day I got a request to go through the McDonalds drive through for one of their Shamrock Shakes. Unfortunately, that request had to be denied. However, I knew that at home, I could recreate the same sort of shake in the form of a green smoothie, and it’d be much cheaper and much healthier.

With some Aldi’s Nonfat Vanilla Yogurt, skim milk, ice and some green food coloring, (you could also add in some mint extract for flavoring if you wanted) I was able to create a snack that was lower in fat, calories, sugar and carbs than what the original request had been.

A quick couple of minutes in the blender and you've got your healthy after school snack!

A quick couple of minutes in the blender and you’ve got your healthy after school snack!

To give you some quick comparisons:

One cup of Aldi’s nonfat Vanilla yogurt:

140 calories

0 Fat
0 Saturated Fat

0 Trans Fat

1% cholesterol (5mg)

9% carbohydrates (27g)

22g sugar

13% protein (7g)

(don’t forget to add in your skim milk and if you’d like, some mint flavored extract and fat free whipped cream!)

One McDonald’s Shamrock Shake 11.3 oz. (nutrition information taken from Livestrong.com)

416 calories

15%  Total Fat (9.8 g)

30% Saturated Fat (6g)

12% cholesterol (38 mg)

24% carbohydrates (72.4 g)

18% Protein (9.4 g)

61.5 g sugar

So next time you get a request for that special fast food shake, see if you can recreate something similar at home too! It’s cheaper (especially times three or four people) and it’s better for you!

New cookie recipe: I consider these “Superfoods”

8 Mar

I have a new chocolate cookbook that I received from Caroline for Christmas this year. IMG_0115

It’s fantastic.

I already went through it and tabbed a bunch of recipes, and we’ve already made two of them so far, both were delicious. One of them I am going to share with you today. Elizabeth and I made it together last weekend as a surprise for the rest of the family when they were out.

Overall, many of the recipes in this cookbook are already “healthified,” made with some healthier options. Today’s recipe is one of those healthier option recipes.

In fact, it’s so healthy, I might consider these cookies a “Superfood!”

You laugh (I can hear you) but just look at the ingredients in this recipe, read my post about super foods from last week and read the following blurb that I just read *today* in the March 13 issue of Better Homes and Gardens magazine, that supports my superfood cookie claim:

“When you think ‘superfood,’ you probably picture kale or blueberries. But potent plant goodness comes in liquid form, too. Coffee is the nation’s number one source of antioxidants, accounting for 40% of our overall intake, according to research from the University of Scranton.”

Elizabeth was so excited to be the kid in the kitchen this time around!

Elizabeth was so excited to be the kid in the kitchen this time around!

First, let me just say that reading this thrilled me. I think I probably get more like 50% of my antioxident intake from coffee!

And second, although I’m being humorous, this recipe actually has coffee in it, which is why I drew your attention to that fact.

The cookies were a hard, crunchy cookie, which is the kind I prefer. Everyone here loved them, all thumbs up, and I didn’t think twice about offering them dessert, knowing that I was really providing them with daily doses of antioxidants!!

Below is the recipe. Now keep your eye open for all the healthier choices and you’ll see why these cookies were a superfood in my house!

My new superfood cookies

My new superfood cookies

CHOCOLATE & COFFEE WHOLE WHEAT COOKIES
INGREDIENTS

3/4 cup unsalted butter or margarine (we used I Can’t Believe It’s Not Butter.)

1 cup brown sugar

1 egg (we used egg substitute)

1/2 cup all-purpose flour

1 tsp. baking soda

pinch of salt

scant 1/2 cup whole wheat flour

1 tablespoon bran (We took bran flakes and crushed them up in a ziploc bag and took 1 tablespoon from there.)

1 1/3 cups semisweet chocolate chips

2 cups rolled oats

1 tablespoon strong coffee (I used decaf!)

2/3 cup hazelnuts toasted and coarsely chopped (I skipped this ingredient.)

Using the larger of my two Pampered Chef scoops makes our cookies more uniform.

Using the larger of my two Pampered Chef scoops makes our cookies more uniform.

DIRECTIONS

Preheat the oven to 375 degrees.

Grease two large cookie sheets (I don’t grease, mine are fine.)

Cream the butter and sugar together in a bowl. Add the egg and beat well.

In a separate bowl, sift together the all-purpose flour, baking soda, and salt. Then add in the whole wheat flour and bran.

Mix in the egg mixture, then stir in the chocolate chips, oats, coffee, and hazelnuts.

Mix well.

Put 24 rounded tablespoonfuls of the mixture onto the prepared cookie sheets.

Bake 16-18 minutes or until golden brown. (Ours took less, around 15 minutes.)

Remove from oven, then transfer to a cooling rack and let cool before serving.

Enjoy!!