Archive | Breakfast recipes RSS feed for this section

A new muffin recipe: Bakery Style Banana Bread Muffins

2 Mar

These were a perfect Saturday morning breakfast.

I was recently searching for an applesauce muffin recipe I’d posted a while back when I realized that I never posted the new banana bread muffins I tried in January. It had been an early Saturday morning when I was craving warm muffins straight from the oven. I decided to do a search to see if I could find a new gluten and dairy-free muffin recipe to try.

In my search, I stumbled across a new blog, The First Year Blog, and their Bakery Style Banana Bread Muffin recipe. I had all of the ingredients including the right number of frozen bananas, I didn’t need to do a ton of ingredient conversions to make it fit our needs, and I decided to make them and not mention the name of them. I wondered if they really would taste any different than other banana chocolate chip muffin recipes I’ve tried before.

Sure enough, the first person to taste them mentioned right away that these muffins tasted just like banana bread, which we actually make quite often. I was surprised that it was that evident, that quickly! I didn’t need to say anything. The muffins were definitely different and I do believe it was the tip about letting the batter rest before scooping it into the muffin tins. When you visit The First Year blog to see this recipe, you will notice that she provides lots of other great tips for freezing the muffins, for making them gluten-free, and for creating a high-domed muffin. Be sure to check it out and be sure to peruse the site for other recipes while you’re there!

Now that I’ve remembered this recipe, I’ll have to make it again soon! It was definitely one of my top favorite banana chocolate chip muffin recipes to date!

These were delicious! Thanks to The First Year blog for sharing!


Ingredients

  •  3 large ripe bananas, 1 cup mashed
  •  1/3 cup vegetable oil
  •  1/2 cup sugar
  •  1 egg
  •  
1 tsp vanilla
  •  1 & 1/2 cups all-purpose flour
  •  
1 tsp baking soda
  •  1/2 tsp cinnamon
  •  1/2 tsp salt
  •  optional: 1/2 cup mini chocolate chips

Instructions

  1. Mash the bananas in a blender, mixing bowl or with a potato masher.
  2. In a mixing bowl combine the mashed bananas, vegetable oil, sugar, egg and vanilla extract. Stir to combine with a spatula.
  3. Add in the flour, baking soda, cinnamon, and salt, stir together with a spatula.
  4. If adding chocolate chips, mix them in now.
  5. Cover the bowl with a towel and allow the batter to rest for 15 minutes. During this time, preheat the oven to 425ºF.
  6. Line a muffin pan with muffin liners. Fill the liners to the top with batter.
  7. Bake for 7 minutes at 425ºF, then keeping the muffins in the oven turn the temperature down to 375ºF and bake for 12-14 minutes or until a toothpick inserted in the center comes out clean.

They definitely lived up to their name!

Fun Friday: Baked Apple Oatmeal

31 Jan

This was so delicious on a cold winter day.

It’s the weekend and there’s something so great about having a nice, homemade warm breakfast on a weekend morning. Today’s recipe is a perfect one for this weekend or any day.

We originally had this for breakfast earlier this month on Martin Luther King Jr. Day. Being a Monday morning, I knew we could eat it that day and then have it leftover for breakfast or snacks after school during the week too. and baked oatmeal is something my family requests frequently so I knew they’d enjoy waking up to the smell of this baking in the oven on their day off from school.

My initial plan had been to make the same baked oatmeal recipe I always do, substituting in frozen blueberries for the strawberries. But, we were out of blueberries. Then I thought we had frozen peaches, but we didn’t have enough. So, I started searching for a baked apple oatmeal, since I knew we had a few apples on hand. I’m so glad that I did, as this recipe was completely different than the usual one and everyone loved it. I’d definitely do it again. I did one and one-half of this in order to make it fill a 9×13 baking dish and it was a perfect amount.

We opted to add whipped cream on top (we have both regular and dairy-free whipped cream on hand) and I also tried it with maple syrup on top and that was great too. The oats I used were gluten-free and we used soy milk to make it dairy-free but I’ve also used almond milk to make allergy-friendly oatmeal in the past as well. This recipe also calls for walnuts but we don’t usually keep nuts on hand so I didn’t put any in. I happen to also really like pecans and I think chopped pecans would’ve been a good addition to the recipe as well.

I found the recipe on this site, called Once Upon a Chef, and it’s described as a traditional Amish breakfast casserole, which was a perfect description. It was such a great comfort food and it took about an hour total to prep and bake. I encourage you to check out the site itself because it includes all of the nutrition information also, but the ingredients and instructions for a single recipe are copied here as well. I hope you’ll head on over and see some of their other recipes too.


I made one and one-half recipes in order to have enough for breakfast and for leftovers.

INGREDIENTS

  • 2 cups old-fashioned rolled oats (not instant)
  • 3/4 cup light brown sugar
  • 1 cup chopped walnuts or pecans, divided
  • 1/2 cup raisins
  • 1 teaspoon baking powder
  • 2 teaspoons cinnamon
  • 1/2 teaspoon salt
  • large eggs
  • 2 cups milk
  • 1 teaspoon vanilla extract
  • 4 tablespoons unsalted butter, melted, plus more for greasing the dish
  • 2 tart yet sweet baking apples, such as Honey Crisp, peeled and cut into 1/2-inch chunks (about 2 cups)

INSTRUCTIONS

  1. Preheat the oven to 325°F. Grease an 8 or 9-inch baking dish with butter.
  2. In a medium bowl, combine the oats, brown sugar, 1/2 cup of the nuts, raisins, baking powder, cinnamon and salt. Mix well.
  3. In another bowl, break up the eggs with a whisk; then whisk in the milk and vanilla until well combined.
  4. Add the milk mixture to the oat mixture, along with the melted butter.
  5. Scatter the apples evenly on the bottom of the prepared baking dish. Pour the oatmeal mixture over top and spread evenly. Sprinkle remaining 1/2 cup nuts on top. Bake for 40-45 minutes, until the top is golden and the oats are set. Serve warm or at room temperature.


Our Thanksgiving recipes for you all in one place

25 Nov

These were a delicious after school snack on Friday and breakfast on Saturday.

Happy Monday! For many of us, myself included, this is a short week. I am thankful for the short week as it was such a busy weekend.

I’ve been doing a lot of baking these past few days and digging up some older recipes on my blog. Each time I’ve made something, I’ve made a mental note to repost some of these older recipes, so today I’ve decided to post them all in one place.

The Peanut Butter Pumpkin Chocolate Chip muffins shown here were first posted in 2015, and I made them on Friday afternoon. It had been a long time since I was able to make something for the kids after school, but I had some time on Friday between getting home from one job and heading out to the other. Everyone would be home before me, so I left them with a note that said 1) Yes, these are for you. 2) Yes, you can eat them now. 3) Peanut Butter Pumpkin Chocolate Chip. 4) Yes, they are gluten and dairy-free. 5) Two each. That answered all the questions I knew they’d come in asking me if I were there. They made a great after school snack for them and breakfast in the morning on what would be a busy Saturday with people going in all directions.

Last week, our office had a Friendsgiving, and I decided to make a dessert that I like to make every year, crustless Pumpkin Pie Cupcakes. You serve them with a dollop of whipped cream on top and it’s just like having a little taste of pumpkin pie, minus the crust. I have made these gluten and dairy-free in the past, and I will do that again this week for Thanksgiving. We use a Reddi-Whip dairy-free whipped cream on top. I first posted this recipe in 2012.

These have been a family favorite for years. They can be made jumbo-sized as I did here, or slightly smaller.

Yesterday, my daughter hosted a Friendsgiving at our house. It was a perfect-sized group, not too big or too small, and everyone brought something, which made it manageable for her to host. We made a turkey breast using the Instant Pot, which was phenomenal and cooked in about 40 minutes. In addition, I opted to contribute a gluten and dairy-free option so that our other daughter could have dessert too, even though we had so many others coming. It was not her event, but I knew she’d want to partake in the dessert course. My husband loves these Pilgrim Pies and has been asking for them for a few weeks, so that’s why I chose to make them. I used my Pampered Chef medium scoop to make them but I could have used my small scoop to make even more of them if I wanted to. These have been a favorite for years, and last year my oldest even made a batch to bring back to school with her for all her dorm friends at the end of the Thanksgiving weekend.

One of our favorite Thanksgiving traditions involves this next recipe for Pumpkin Cranberry Bread.  It was a recipe given to me by my mother, and I know that she makes it too. I will start baking up batches of this today and bake several over the next few days. Each batch makes two loaves or one loaf plus three mini loaves. Sometimes I will swap in chocolate chips instead of cranberries for some of the loaves since not everyone loves cranberries. On Thanksgiving morning we slice this up, butter it and grill it for breakfast. When the kids were very small we would line them all up in our bed, pillows propped up behind them and breakfast trays in their laps. They’d eat their bread, drink out of their sippy cups, and watch the Macy’s parade. I have a favorite photo of them doing just that, our littlest one propped up in the middle of the two older ones, and I think of it every time I make this bread.  Now, some sleep through the parade, or we record it to watch later, but we always have the bread. This year we will be at our school’s football game as our youngest is in the marching band and they will be performing. No matter what we do on Thanksgiving morning though, there will always be bread.

The final recipe I will share with you today is also a tradition for our family. It comes from my mother inlaw Marylou and we’ve been making it ever since I had it at her house many years ago. Marylou’s Sweet Potato Casserole is my kind of recipe. It’s got butter and sugar and vanilla and brown sugar. It’s got a root vegetable in there too, so maybe it’s good for you? It doesn’t matter, because it’s Thanksgiving and we eat this just once a year. I am excited to bake this on Wednesday night, but even more excited to eat in on Thursday afternoon. You can make this with nuts or without. In the past, I’ve done both versions, but this year since we have a smaller crowd, most of whom do not like nuts, I will just do one version and skip the nuts.

I hope you all have a blessed Thanksgiving and enjoy some time to relax and reflect. The weeks ahead will again be busy, but it’s the time we get to spend together as well as the special family traditions we’ve established over the years and look forward to every year,  that makes it all worth it in the end.

-Jen

Welcome back recipe: Chocolate Banana Oatmeal Blender Muffins

17 Nov

These muffins made me want to do a blog post asap!

It’s me…

I know it’s been a very.long.time since I did a blog post in January. I’ve been super busy. Everyone is busy, I know, but I’ve been busy enough that I didn’t have any time or even any blog-writing mojo enough to do a blog post.

Last year I had taken on a one-year position working for our state’s Department of Education as a Communications Ambassador in addition to my regular freelance education reporter position. The position ran from the start of August 2018 to the end of July 2019 and it reached its busiest time last winter in January around the time I did my last blog post and lasted thru the end of the position. That busy time ran right into my reporter job’s busy time in April/May/June and I was just swamped. It was a wonderful job though, and I loved it, but between the two jobs and my other family responsibilities, I just couldn’t find the time or energy to do any more writing than I was already doing.

That job, however, gave me the extra experiences that I needed to apply for a new job that our school district posted in July 2019 for a Communications Specialist. The first week of August I got that job and I jumped right in, while still writing for the paper on occasion and doing my usual Mom jobs as well. So I’m finally feeling like I’m getting my feet back on solid ground and I am getting that itch to start blogging again. I’ve recently had some of my readers asking me when I thought I might start writing blog posts again. It was time.

This weekend has been super busy because we’ve been redoing our spare bathroom and I had to work at a school department event this afternoon, but when I came home from that I was starving, so I decided to make some muffins that I had been wanting to try out before I jumped back into helping out with continuing to paint the bathroom. I had seen these muffins come across social media and emailed the link to myself. They were gluten-free and didn’t contain any sugar or added oils, but they did contain things that everyone here loves: peanut butter, chocolate, and oatmeal. Most importantly they contained chocolate chips. What better way to jump back into my Whole Bag of Chips blog than with chocolate-chocolate chip recipe?

Today’s recipe was from a site I’ve never visited before, but I know I’ll definitely be going back. The name of the site is Dinner, Dishes, and Desserts and you can visit her site by clicking here. I highly recommend it, as all the recipes she described in her post sounded great to me! The recipe caught my eye not only for the ingredients but also because it’s all done in a blender. I thought that sounded easy. When I checked my kitchen I had all of the needed ingredients. I haven’t made muffins in a long time, so I was excited to try this out.

Here are the ingredients just as she’s listed them on her site. Other than the chocolate chips, you throw it all into a blender and blend it up!

  • 2 large ripe bananas
  • 2 whole eggs
  • 1 cup peanut butter
  • 3/4 cup old fashion oats
  • 1/2 cup honey
  • 1/2 cup cocoa powder
  • 2 tsp vanilla extract
  • 1 tsp baking powder
  • 1/2 tsp salt
  • chocolate chips

To make this dairy-free I used Enjoy Life mini chocolate chips and I used Bob’s Red Mill gluten-free oats.


Her directions are super easy and the recipe went as directed. I got 17 muffins in total and I cooked them for about 15 minutes. I did check them at 13 minutes but they weren’t done yet.

  1. Preheat oven to 350 degrees. Spray a 12 cup muffin tin with non-stick spray.
  2. To a blender add banana, eggs, peanut butter, oats, honey, cocoa powder, vanilla, baking powder, and salt. Blend until smooth and well mixed.
  3. Scoop batter into prepared muffin tin, filling about 2/3rd of the way.
  4. Sprinkle the top with chocolate chips.
  5. Bake for 13-15 minutes or until a tester comes out clean.
  6. Remove from the oven and let cool for 5 minutes before removing from the pan to cool.

Everyone voted that this recipe was a keeper. I tried to get a photo of how moist and delicious these were but I don’t think it does them justice. I’m sharing it anyway. The recipe recommended doubling the recipe, which I would plan on next time so that I have extras for the freezer. I didn’t have enough of everything on hand to do it this time.

Moist, healthy, allergy-friendly and delicious! A win-win for us!

Enjoy, and welcome back to the Whole Bag of Chips!

Jen

Fun Friday: Dairy-free cream cheese filling for crepes

11 Jan

This was a great new option for our crepe fillings!

TGIF! It’s Friday and it was our first full week back to school. For me personally, it wasn’t a bad week, but for the kids, it was exhausting to be full-on, back at it again after the break.

For today’s Fun Friday post, I thought I’d share a cream cheese filling that I made for our New Year’s Day brunch here at home. We don’t entertain guests that morning, but we generally do a very special breakfast just for our own little family to celebrate the new year. This year we opted to do crepes. We usually put out a variety of fillings including eggs/ham/cheese, bacon, berries, Nutella, peanut butter, bananas, and sometimes we’ll make a hot compote of apples and raisins. This year we also made a chocolate fondue on New Year’s Eve night while we waited for the ball to drop, so we were strategic when shopping for our dipping items for that treat so we’d have some fruits leftover for the next morning’s fillings.

This was a brand I’d already come to trust with a few other products, so that’s how I chose the cream cheese for my recipes.

When I made our Christmas cookies this year, I had one cookie I was particularly nervous about because it had a cream cheese filling and I had yet to try out a dairy-free option for cream cheese. When I bought my cookie-baking ingredients I had yet to do a “trial run” of these cookies, so I just purchased a cream cheese substitute that came from a brand whose products I already liked, and I crossed my fingers, hoping the filling would come out well, and it did. Everyone raved about these cookies, and I was just thrilled. And, relieved.

The cream cheese filling came out so well in fact, that I thought that I would try making a new filling for our crepes, since Nutella is not dairy-free and therefore, it eliminated one of the filling options for some of us.

I went back to the store and I picked up another package of the Daiya cream cheese spread, and I looked up a recipe online for a cream cheese filling for crepes. I assumed it would be pretty similar to the cookie filling, and it was. I found the recipe here, which included the recipe for the crepes themselves as well, and I used just the filling ingredients as my guide, not including berries, although I did have them ready to go:

For the Filling:
  • 1/2 cup granulated sugar
  • 8 ounces cream cheese
  • 1/2 cup powdered sugar
  • 1/2 teaspoon vanilla extract

    When the time came, we had a lot of filling options for our crepes.

    That morning’s brunch was delicious, and I was so pleased with the filling. It worked out very well, and I’d definitely use it again. I am happy with the Daiya cream cheese substitute. They also have a flavored one that I would consider using in my recipes as well, which replaces a staple for one of our favorite chicken recipes over the years, and it’s a recipe I haven’t made in the past year or so.

    I hope you’ll give this cream cheese filling a try too. If you’re not in need of a cream cheese replacement, the recipe is one that ordinarily uses regular cream cheese, so you don’t need to do anything different.

    Have a wonderful weekend and I hope you too, have a Fun Friday!

    You can add a little whipped cream to the top of your crepes, dairy-free or not, and you’ll have quite the treat!

Fun Friday: Old-Fashioned Bread Pudding (dairy and gluten-free)

21 Sep

We’ve been working with some new ingredients most recently, but we’re still turning out some delicious meals and desserts!

Since the spring, we’ve been working with a new set of dietary restrictions, adding in dairy-free to the gluten-free mix. Although it’s been a bit of a challenge (understatement), it’s been an education and it’s been a success overall. We’ve found many good substitutions for the ingredients we used to use, and we’ve been experimenting for many months now and we have found that it’s still very do-able to bake and cook great recipes.

During the summertime, my oldest daughter was having a craving for bread pudding. We had an amazing bread pudding dessert in 2015 at the Grand Canyon that hadn’t been beat in the years since. I have a great cookbook, called “Gluten-Free Bible” which had two different bread pudding recipes in it, and she decided to give one of them a try. We had all of the ingredients for it and when I list the original recipe, I will list our substitutions, but you can see them here in the picture as well.

The funny thing about this particular recipe is that we originally started out thinking it was going to be dessert, but ended up making it for our breakfast because we broke one of the golden rules of recipes and didn’t read it all the way through before starting. Partway through our preparations we got to the “refrigerate for two hours” part and suddenly we were looking at bread pudding for breakfast. I was able to justify this because I felt that the recipe wasn’t much different than an overnight baked french toast recipe. We weren’t eating it every day of the week, so just this once (and the next day with leftovers) it would be just fine for breakfast.

Caroline had been craving a good bread pudding since the Grand Canyon in 2015.

This recipe was quick, easy and delicious, and those are three things we love in a recipe. Other than the prep of the apples and the bread, neither of which took very long, the rest was super-easy, and we definitely would make this recipe again. We used whipped cream on top (both the dairy and the non-dairy kinds) and it was a really fun dessert for breakfast meal.

Here is the recipe as written in my “Gluten-Free Bible” cookbook.

OLD FASHIONED BREAD PUDDING
Makes 6-8 servings

INGREDIENTS

10 slices gluten-free cinnamon raisin bread, cut into 1/2-inch cubes (We used Rudy’s bread.)
1/4 cup (1/2 stick) butter, melted (We used Earth’s Balance sticks, vegan)
2 cups whole milk (We used unsweetend almond milk)
4 eggs
3/4 cup sugar
2 teaspoons ground cinnamon
1 teaspoon vanilla
1/2 cup raisins
1/2 cup chopped dried apples
(We almost added dairy-free chocolate chips to this recipe, but we were ultimately glad we didn’t as it would’ve been more of a stretch to call that a breakfast item once we added chocolate into the mix.)

Lesson learned (again and again): always read the recipe all the way through first.

DIRECTIONS

1: Grease 9-inch baking dish.

2: Combine bread cubes and butter in prepared baking dish; toss to coat.

3: Whisk milk, eggs, sugar, cinnamon and vanilla in medium bowl. Stir in raisins and dried apples. Pour over bread cubes. Cover and refrigerate at least two hours.

4: Preheat oven to 350F degrees. Bake 50-55 minutes or until golden brown and center is set. Let stand ten minutes before serving.

The whipped cream that we buy which is dairy-free is the Reddi-Wip almond cream, but they also sell a coconut cream for those who can’t do almond. I’ve found it at our local Stop and Shop and at our PriceRite.

This was a very, very close second to the bread pudding which we had at the Grand Canyon in 2015. I think that part of that dessert experience was the Grand Canyon itself, and part of it was that it was topped in hot caramel topping, whereas ours was not (but could be!) I was also happy that our daughter who doesn’t like raisins, and hence hadn’t eaten this bread up to this point in time, ended up liking them in the bread pudding recipe. I felt like we’d managed to hide an extra serving of fruit in this meal, the way I used to do when they were all little. I don’t know if it matters that I was hiding it in a dessert. She ate raisins. Mission accomplished.

If you’re looking for a great recipe for fall that is easy, gluten and dairy-free, good for breakfast or dessert, and rivals that which is served at the Grand Canyon, I recommend you give this one a try.

This was so delicious, and great for any time of day or night!

What’s for Dinner Wednesday: A grab-and-go meal for any time of day

12 Sep

A new grab-and-go idea from my friend Gina!

I love social media and the ability to find new ideas from people who’ve either thought of them first, or tried them out first, and been successful.

Recently, our friend Gina had shared that she has successfully made ahead and frozen egg sandwiches as a quick grab-and-go breakfast either for school days or camping trips or whenever they’re most needed. She uses Bagel Thins and her family loves them.

I decided that this school year, as soon as I had some time, I’d try out her idea for my family. I always have great intentions, and I can’t always do something like this all the time, but I figure that any time I can be prepared ahead of time, is better than not.

Eight bacon, egg and cheese sandwiches were ready to go.

This past weekend, I was able to get the Bagel Thins and give this a try, and I was so happy when my daughter was able to grab a quick egg sandwich for her breakfast later on in the week, deeming the meal a success.

Gina’s instructions were simple: be sure each part of the sandwich is fully cooled, and wrap in paper towels for reheating. The Bagel Thins bag makes for great storage in and of itself, so I just cooked, cooled, wrapped, labeled and froze.

As I was cooking, my daughter Liz was so excited and before even trying one out, she requested sausage patties for the next time around, so I knew she had high expectations for this trial. I used precooked bacon to cut down on some of the prep time (one slice cut in half per sandwich), and I used my counter-top griddle to cook the eggs all at once. I was able to cook six and then two. I cooled them all on a cookie sheet, which I’d popped in the oven for a couple of minutes first, just to fully melt the cheese.

I hope that I can continue this meal prep idea as it gives us an additional breakfast or on-the-go meal for those times when we want something filling and don’t have a lot of time to make anything.

Storing these right in the bag was super convenient.

I appreciate the sharing of ideas from all of my family and friends, and I love this idea from Gina. I hope that we can continue to make these throughout the school year, along with other grab-and-go ideas for those busy days and nights. I encourage you to give it a try too, if you’re looking for something new for your own family’s busy schedule.

Have a great week!

Monday Musings: It’s not always about winning

30 Apr

This recipe took at least five tries and a lot of perseverance to perfect.

Early this winter, I saw a cooking contest pass by in my newsfeed on social media. A local New England applesauce brand, Simply Wholesome–recently re-branded with a new name: Our Family Garden– was sponsoring a cooking contest. The participants would receive a six jars of their applesauce (two each of three different varieties) and they could submit as many recipes as they wished, as long as they utilized the applesauce in their recipes, which had to be previously unpublished, original recipes.

We love cooking contests here, we have won several of them between us, and I decided to enter the contest. The winter months are a little bit slower for me work-wise than the spring and there was enough time allotted for some trial and error as I went about figuring out how to create an original-never-been-published-before recipe.

My box of applesauce arrived within a few days of letting them know I’d be entering the contest. I was shocked to find six, full-sized samples of applesauce in the box, along with a jar of their blueberry jam as a gift for entering.

I had already decided that I wanted to try to create an apple pie type of muffin with a streusel topping. I just had to come up with a recipe and incorporate the applesauce. I began researching basic muffin recipes so that I could see what ingredients I needed and approximately how much of each  it takes to make a muffin, a muffin. Then, I added in their cinnamon applesauce, at first adding it in just to the actual muffin mix, to give them the apple pie flavor I was hoping for. As I created my streusel topping, my youngest daughter, who was home and doing a lot of cooking at the time, suggested that I add the applesauce to the topping as well. I thought that was a brilliant idea. I was creating a topping that included brown sugar, butter, quick oats, and now the applesauce too. My entire recipe was gluten free, using gluten free flour and gluten free oatmeal as well.

I made the muffins, following the recipe I’d come up with. We waited with great anticipation for them to come out of the oven. It was very exciting as we watched them cook through the window of the oven.

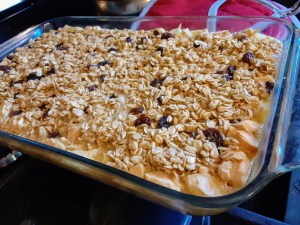
This wasn’t quite the result I’d been anticipating.

As we looked inside though, we saw a big mess. The muffin topping was oozing all over the place. They tasted delicious, but they were a mess. The topping was oozing and the centers were sinking.

Hmmm…not really contest-worthy.

I hadn’t thought about the fact that this really might take more than one try.

My family said the muffins were good enough to try again, so I did.

Again, and again, and again, and again.

Now I’d gone too far in the other direction.

I was determined to get this recipe right. Although the first time I made them they were too wet, by the fourth time I’d added in flour to the topping and now they were too dry, and my kids were beginning to dread coming home to the latest “after school snack” or waking up to a Saturday breakfast “surprise”  of apple pie muffins—again.

“What did you do to them,” one of the kids asked in distress this particular time. “Go back to the way they were, at least they tasted good.”

I was starting to run out of time and out of willing tasters.

I talked with my mom multiple times to get her opinion, and I thought and thought about my recipe ingredients and what seemed to be working and what didn’t.

What was I doing wrong??

Over and over in my mind I thought about all of the times I’d learned about scientists and how their hypotheses weren’t always right and how their experiments didn’t always work the first time around and how the learning takes place in the trial and error process, not necessarily in getting it right the first time around.

I was feeling like a kitchen scientist, albeit a weary one. How long did these scientists take to perfect their experiments??

The contest deadline was coming up. I’d had about two months to get this recipe right and I was not going to give up. I wasn’t even in it for the win any longer, I was in it for the personal satisfaction of accomplishing this task of creating my own recipe for the first (and possibly only) time ever. I wanted it to be good, I wanted my husband and kids to like it and be proud of me, and I wanted to get it right. I like to get things right. I like to give 110 percent all the time.

I gave it one final try. I adjusted my ingredients one last time. I begged my family to give them one last taste.

“I hope you get them right this time, they’re good, but I don’t think I can eat another one any time soon,” my oldest daughter said.

If I didn’t get the topping right this time, I really thought I might give up.

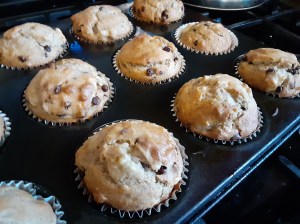
I put what I hoped would be the final batch in the oven, and I held my breath, literally. I’d added in raisins to one of the trays on the advice of my mother and two of my kids who like them, and left one without, for the one who doesn’t.

I watched them cooking in the oven. The topping seemed to be doing what it was supposed to be doing, spreading out without oozing over, and didn’t seem overly dry.

Could it be that I’d finally gotten the right balance of every ingredient down??

It seems that it could. I’d figured it out. I think I cheered out loud.

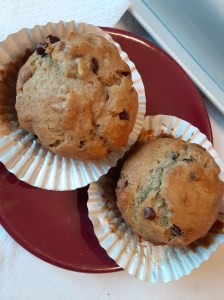
I pulled them out of the oven, and everyone took a bite. Again, I held my breath and waited for their responses.

Five thumbs up from my family.

Perfection.

Apple Pie Muffins with a Sweet Streusel topping for the win.

Except I didn’t win.

Not exactly.

I didn’t win one of the top three cash prizes that seemed attractive at the time I started out in this process.

But, I won a lot more than that. I can proudly say that I have created a recipe, my very own recipe, that was delicious, and most importantly I did not give up. I never anticipated this would take this long. I generally don’t have the patience to stick with something this long and see it through, but I could not let this one go, and I’m glad I didn’t.

Additionally, I have to say, we fell in love with this applesauce. I submitted a second recipe to the contest for Zesty BBQ pork chops which also utilized one of the varieties of applesauce, and my kids were going through the six jars like crazy, each variety was just as good as the last. I always have been a homemade applesauce kind of girl, and I have never purchased an applesauce my family has loved this much. I’m glad that we don’t live far from the Big Y markets in Massachusetts where it is going to be on the shelves under the new branding. It’ll be worth the ride just over the state line to get more. Not to mention, I recently ordered a case of their jams, as my youngest daughter finished the entire jar of blueberry jam on her own. When I heard that there were two other varieties, I decided to place an order for them.

In the end, I gained much more from this experience than I ever imagined I would have, and I have no regrets about entering, or about not winning.

Sometimes it just not about the win, it’s about the journey.

Apple Pie Muffins with Sweet Streusel Topping
by Jennifer L. Cowart

Apple pie muffins
*to make gluten free, use 1:1 gluten free all-purpose baking flour

2 cups all-purpose flour
½ cup sugar
1 tablespoon baking powder
½ tsp salt

2 eggs, beaten
1 cup milk
1/3 cup Touch of Honey Applesauce With Cinnamon

2 apples peeled, cored and diced
Optional: use only one apple and add in 2/3 cups raisins.

Sweet Streusel Topping
*to make gluten free, use gluten free oats and gluten free flour.

¼ cup butter, softened
1 cup brown sugar
1/4 cup quick oats (not instant) uncooked
1/4 cup flour
1/3 cup Touch of Honey Applesauce with Cinnamon

Directions

1) Preheat oven to 425 degrees Fahrenheit. Spray 24 muffin tins with nonstick cooking spray.

2) In a large bowl whisk together flour, sugar, baking powder and salt.

3) Add in eggs, milk and applesauce. Mix until well combined.

4) Add diced apples (and raisins, if desired) and mix well.

5) Put approximately two tablespoons of batter into each muffin tin, until ¾ of the way full. Set aside. **If there are empty muffin tins, fill with water, ¾ of the way full.**

6) In a separate bowl, mix together streusel ingredients.

7) Add one teaspoon of topping to the top of each portion of batter, spreading across top of batter.

8) Bake for 15-18 minutes or until toothpick inserted into center of muffins comes out clean.

Best served warm.
Makes 18-24 muffins.

Finally!


The unexpected healing power of the kitchen

7 Feb

Baked oatmeal is one of our family’s favorite meals for breakfast, or any time of the day.

Happy Wednesday, everyone! It’s the middle of another week, and February is flying by.

We have had a busy few weeks here, and I’ve been unable to post as frequently as I’d like to. However, today’s post was one I just had to make the time for.

Three weeks ago today, our youngest daughter hit her head getting into the car, after slipping on some slush in a parking lot. Although all of us have bumped our heads getting into the car at one time or another, this bump turned out to be different. She hit it just the right way and ended up with a concussion.

It’s our first concussion from any of our kids and neither of us have ever had one. However, with all of the new emphasis on the proper treatment of brain injuries and brain damage, we knew of many kids her age who have had them. What we did not know, however, was just how long a recovery it could be. Each injury is different. Some recover in a matter of days, others in a matter of weeks, still others take many months and there is no way to know which kind you have until you’ve fully recovered.

When it first happened, a friend of mine whose daughter has had several sports injury concussions warned me, “She’s going to be SO bored.” She was SO right. There is not much they can do. No screen time, no reading, very little writing, no bright lights, no loud noises. Sometimes even normal-level noises seem too loud.

Initially she didn’t want to do a ton. For the first five days or so she was spending her waking hours in total darkness, sometimes listening to a book, sometimes sleeping. About a week in however, as she started to feel slightly better, she was awake more. She’d already listened to about 20 hours of audio books and was downloading eight more. She could listen to a TV show in the background, but not watch it. She was bored out of her mind. We each tried to find things to entertain her. Her sisters would do her nails, her hair, her makeup. They’d listen to a movie with her. We’d take her for rides. She’d clean her own room. Then we’d find her cleaning a sister’s room. She was bored, bored, bored.

“When I am sitting here doing nothing, I am stressed,” she said to me more than once. “When everyone is doing something, and I can’t do anything, it makes me crazy.”

I get that.

However, as time went on, the one thing she could do, and truly enjoyed, was cooking. One week in, she was asking to make something in the kitchen–anything at all, she didn’t care what. She could measure, mix and stir, and watch something bake, and then she could share it with everyone as they came home at the end of the day. All I had to do was read out the ingredients to her as she went along.

Here, finally was something she could do. She had a new apron and a new purple cooking set, courtesy of a Christmas gift from her oldest sister, and she was going to put it all to good use. Although our kitchen renovation project from the summer is still awaiting the next round of its finishing touches, it’s fully functional, even though it’s not fully beautiful.

She made baked oatmeal for our weekend breakfast one week, and homemade stove-top oatmeal for an after school snack another week. She made green pancakes for breakfast and then purple ones another time for dinner. She made cupcakes from scratch with homemade frosting and she made a carrot bread with glaze. She chattered on and on about fractions as she measured: double 1/8 and  it’s 1/4 and half it to get 1/16 and on and on and on.

As she cooks, she’s in her happy place and her stress about all she’s missing out on momentarily disappears. The lights are low, and the things she can’t do turn into something she can do and enjoys doing. Never have I been more thankful that we’ve raised our kids to know their way around the kitchen. Not only is it a life skill, but for the past few weeks it’s truly been a life saver. It’s had a healing power that I had never thought about.

In the coming weeks she should be continuing to feel better and better, and I hope that when she looks back on this period of time, she’ll not only remember the rough patch she’s been through, but also think back on some of the bright spots mixed throughout the weeks, such as the time she spent in the kitchen creating, mixing, measuring and relaxing.

In her happy place during what has proven to be a very challenging time.


Introducing ‘Forget the Flour’….a new blog from a new favorite blogger

10 Jan

I have a new favorite blog, and I definitely have a new favorite blogger.

If you live life gluten free for any reason, you need to check out “Forget the Flour,” my daughter’s new blog. You can go and visit by clicking here. It might just become your new favorite blog too.

Here’s the back story to how this blog was born:

Early in the fall of 2015, it was determined that our youngest daughter could no longer have gluten in her diet. She had just begun the fifth grade and we had spent the summer on an epic, five-week cross country camping vacation, trying to figure out what was continuously making her so sick, and had been throughout most of the spring before.

If you’re a longtime reader of The Whole Bag of Chips, you have since seen my recipes evolve over time to now include notations with the ingredients as to how we have gone about making our recipes gluten free, if they were not already.

It has not been an easy few years. I have a shellfish allergy, and I’d like to say that I can relate to her struggles, but I truly can’t. I’m much older, first off, so I can weather some of the “trauma” of missing out on favorite foods at favorite events better than a tween. Additionally, shellfish is not contained in my every meal, or at every party, sleepover or at every restaurant I go to.

To say that being gluten free, being young AND gluten free is challenging would be an understatement.

Our third Thanksgiving, Christmas and New Year’s Eve all just passed, and it’s always important to make sure we have food for her to eat everywhere we go, and as we sometimes find out, even if we think something is going to be gluten free where we are headed, she finds out the hard way it may not have been, or that cross-contamination may have taken place.

However, for every challenge, there are a lot of successes. Thankfully, we are a family of cooks and we love to try out new recipes. Our kids have all been cooking since they were old enough to roll cookies or to stand on a stool at the kitchen counter and pick beans. We have a love for cookbooks, food magazines, food videos online, food show on television and anything related to cooking and eating. Therefore, we’ve discovered some great new recipes, and we’ve cheered (literally) when we’ve been able to make an old favorite into a new gluten free favorite so as not to give them up.

We’re lucky too, that we live in an internet age where we can find help online, we can Google anything and get a helpful answer about ingredients and substitutions. We are also lucky that in past years the amount of information and availability of ingredients has exploded from what it once was. We even have an allergy-free bakery in our city and we spend a great deal of time there.

Additionally, we have wonderful friends and family. I can’t be more thankful to those who have turned their own recipes into gluten free for her, or to those friends who have chosen to keep things on hand for when she’s there, or to cook entire gluten free meals just because she’s there (and I’m getting a little teary just thinking about it.) I have sent bags of gluten free food with her, only to see them come back with her after an event or visit, and to hear her happily describing all she was able to eat, along with everyone else.

All of that said, one might think a kid could get depressed having to deal with all of this on top of regular life, and she definitely has her moments of frustration and of sadness at times, and we feel terrible about it when she does. However, rather than wallowing in the latest disappointment or challenge, as some might, our daughter asked just the other night if she could create a blog for sharing what she’s learned in the past three years and going forward. It took me just a second to think about it and say yes, and it took her even less time to share with me the one she’d already created, but not published, complete with her first post draft all typed up. She just needed a name that wasn’t already taken, since there are many gluten free blogs out there already. Somehow, and I’m not sure how, she came up with Forget the Flour, and I love it. It wasn’t taken, and so, her blog was born.

She posted her first two posts one night earlier this week and the blog hits just exploded. Although it’s still young, the blog has already received almost 1000 hits in just a couple of days’ time. I told her I have some blog-hit envy already.

I think that as a younger blogger, her perspective is slightly different than those who are blogging about living an adult life gluten free, and I hope it will be a valuable perspective to others as she shares her favorite products, recipes and restaurants, as well as some of her not-so-great experiences in the hopes of preventing them from happening to others.

So if you haven’t yet, go on over and visit Forget the Flour and check out the first couple of posts. Sign up to follow it too, so that you don’t miss a moment of gluten free goodness.

I was thrilled to see this beautiful new blog pop up on my computer screen earlier this week. However, I can promise that not all of the almost 1000 hits were from me.