
Alex’s project had gone viral.
Last April we began renovations on our house that would allow each daughter to have their own bedroom for the first time ever. Choosing colors and themes and decor became the topic of many a conversation.
So the day Alexandra came out of her room and announced that when it was her turn for a new room, she wanted a 50 States Bedroom you might think we wouldn’t be shocked, but we were. For months she’d been saying she wanted purple walls and a horse-themed room. Now, she wanted ocean-blue walls and a cross-country theme. According to my mother-in-law, the two had concocted the new theme for her room over the phone one day and Alex was sold on the idea.
Once we knew this new room theme was a keeper, I told Alex I would put a request for postcards from all of the states out to my friends and family on Facebook and see what we could collect that way first. Whatever we couldn’t get, we’d find another way of getting them. The postcards would later be used as a border around her room after the blue paint went on the walls.
I put the request out in mid-March, right around her birthday, explaining the 50 States Bedroom idea. Once I did, the postcards started rolling in. The first week or so she was receiving handfuls a day. My father-in-law, on his end, put out a request to all of his friends and family around the country as well, and stated that her birthday was coming up, too. It was so much fun receiving postcards that said, “Your grandpa wanted us to wish you a Happy Birthday from North Carolina,” or whatever state the cards were coming from. In years to come, when Alex looks at the messages on the cards, she’ll read things like, “I went to high school with your daddy,” “I went to the White House with your sister,” or “Vermont has great maple syrup,” and many other fun and exciting messages from all over the country. One cousin sent us 27 postcards from a cross-country trip she’d taken years ago. Her personal collection was now Alex’s. That gesture from a cousin we had never met, meant so much to us.

We received over 14 feet of postcards from all over the world to be used in Alex’s new room.
Before we knew it, we had received over 150 postcards literally from all over the world. Postcards came in from the east coast, west coast, London, Canada, St. Maarten and Alaska. It was amazing. We all looked forward to the arrival of the mail each and every day. I did my best to go on Facebook often and thank those who sent or requested postcards, and I’d give an update of what we had gotten so far and what we were still missing. By April vacation week we were down to just nine states left and we were ready to empty out, clean out and paint the room over the week. Alex and her daddy went to the store and she picked out the color of paint that she wanted, and the process began.

I had forgotten that underneath the “little kid” border was the baby border we’d hand stamped on the walls before Caroline was born.
It was a little sad, I must say, when Don began scraping away at the border we put up in 2005, only to discover the border of Snoopy and Woodstock that we had hand-stamped in 1999 as we prepared for the birth of our first baby. When all of the wallpaper border was down, and the stamped art remained, there was a small lump in my throat, and a part of me wanted to say, “No! Let’s just keep this! Let’s go back.”
But I know, you can’t ever go back.
So the new paint color went on the walls over the nursery yellow and the pink and blue border, over years of picture holes and sticky tape marks, making the room look fresh and new with the great color that Alex had picked out. In two days’ time Don had transformed the room to a big girl room, and we moved the furniture back in, setting it up in a new layout.
As the postcard mail began to trickle down and we had just a few states left, I took the whole lot of them to our local learning store, Lakeshore Learning Store, to be laminated. We also laminated some maps that she wanted in her room as well. We had a Rhode Island map which has hung in our basement for years, that she wanted on her wall. She particularly likes the fact that it has the dates 2006-2007 on it and she points it out to whoever comes into the room. We had a world map in one of the kids’ rooms that was not being used, and I ordered a special US map from the Highlights Magazine “Which Way USA” club, that we had now enrolled her in. The laminated postcards stretched from our sliding glass door in our dining room to the coffee table in our living room, about 14 feet in length and about two feet across.
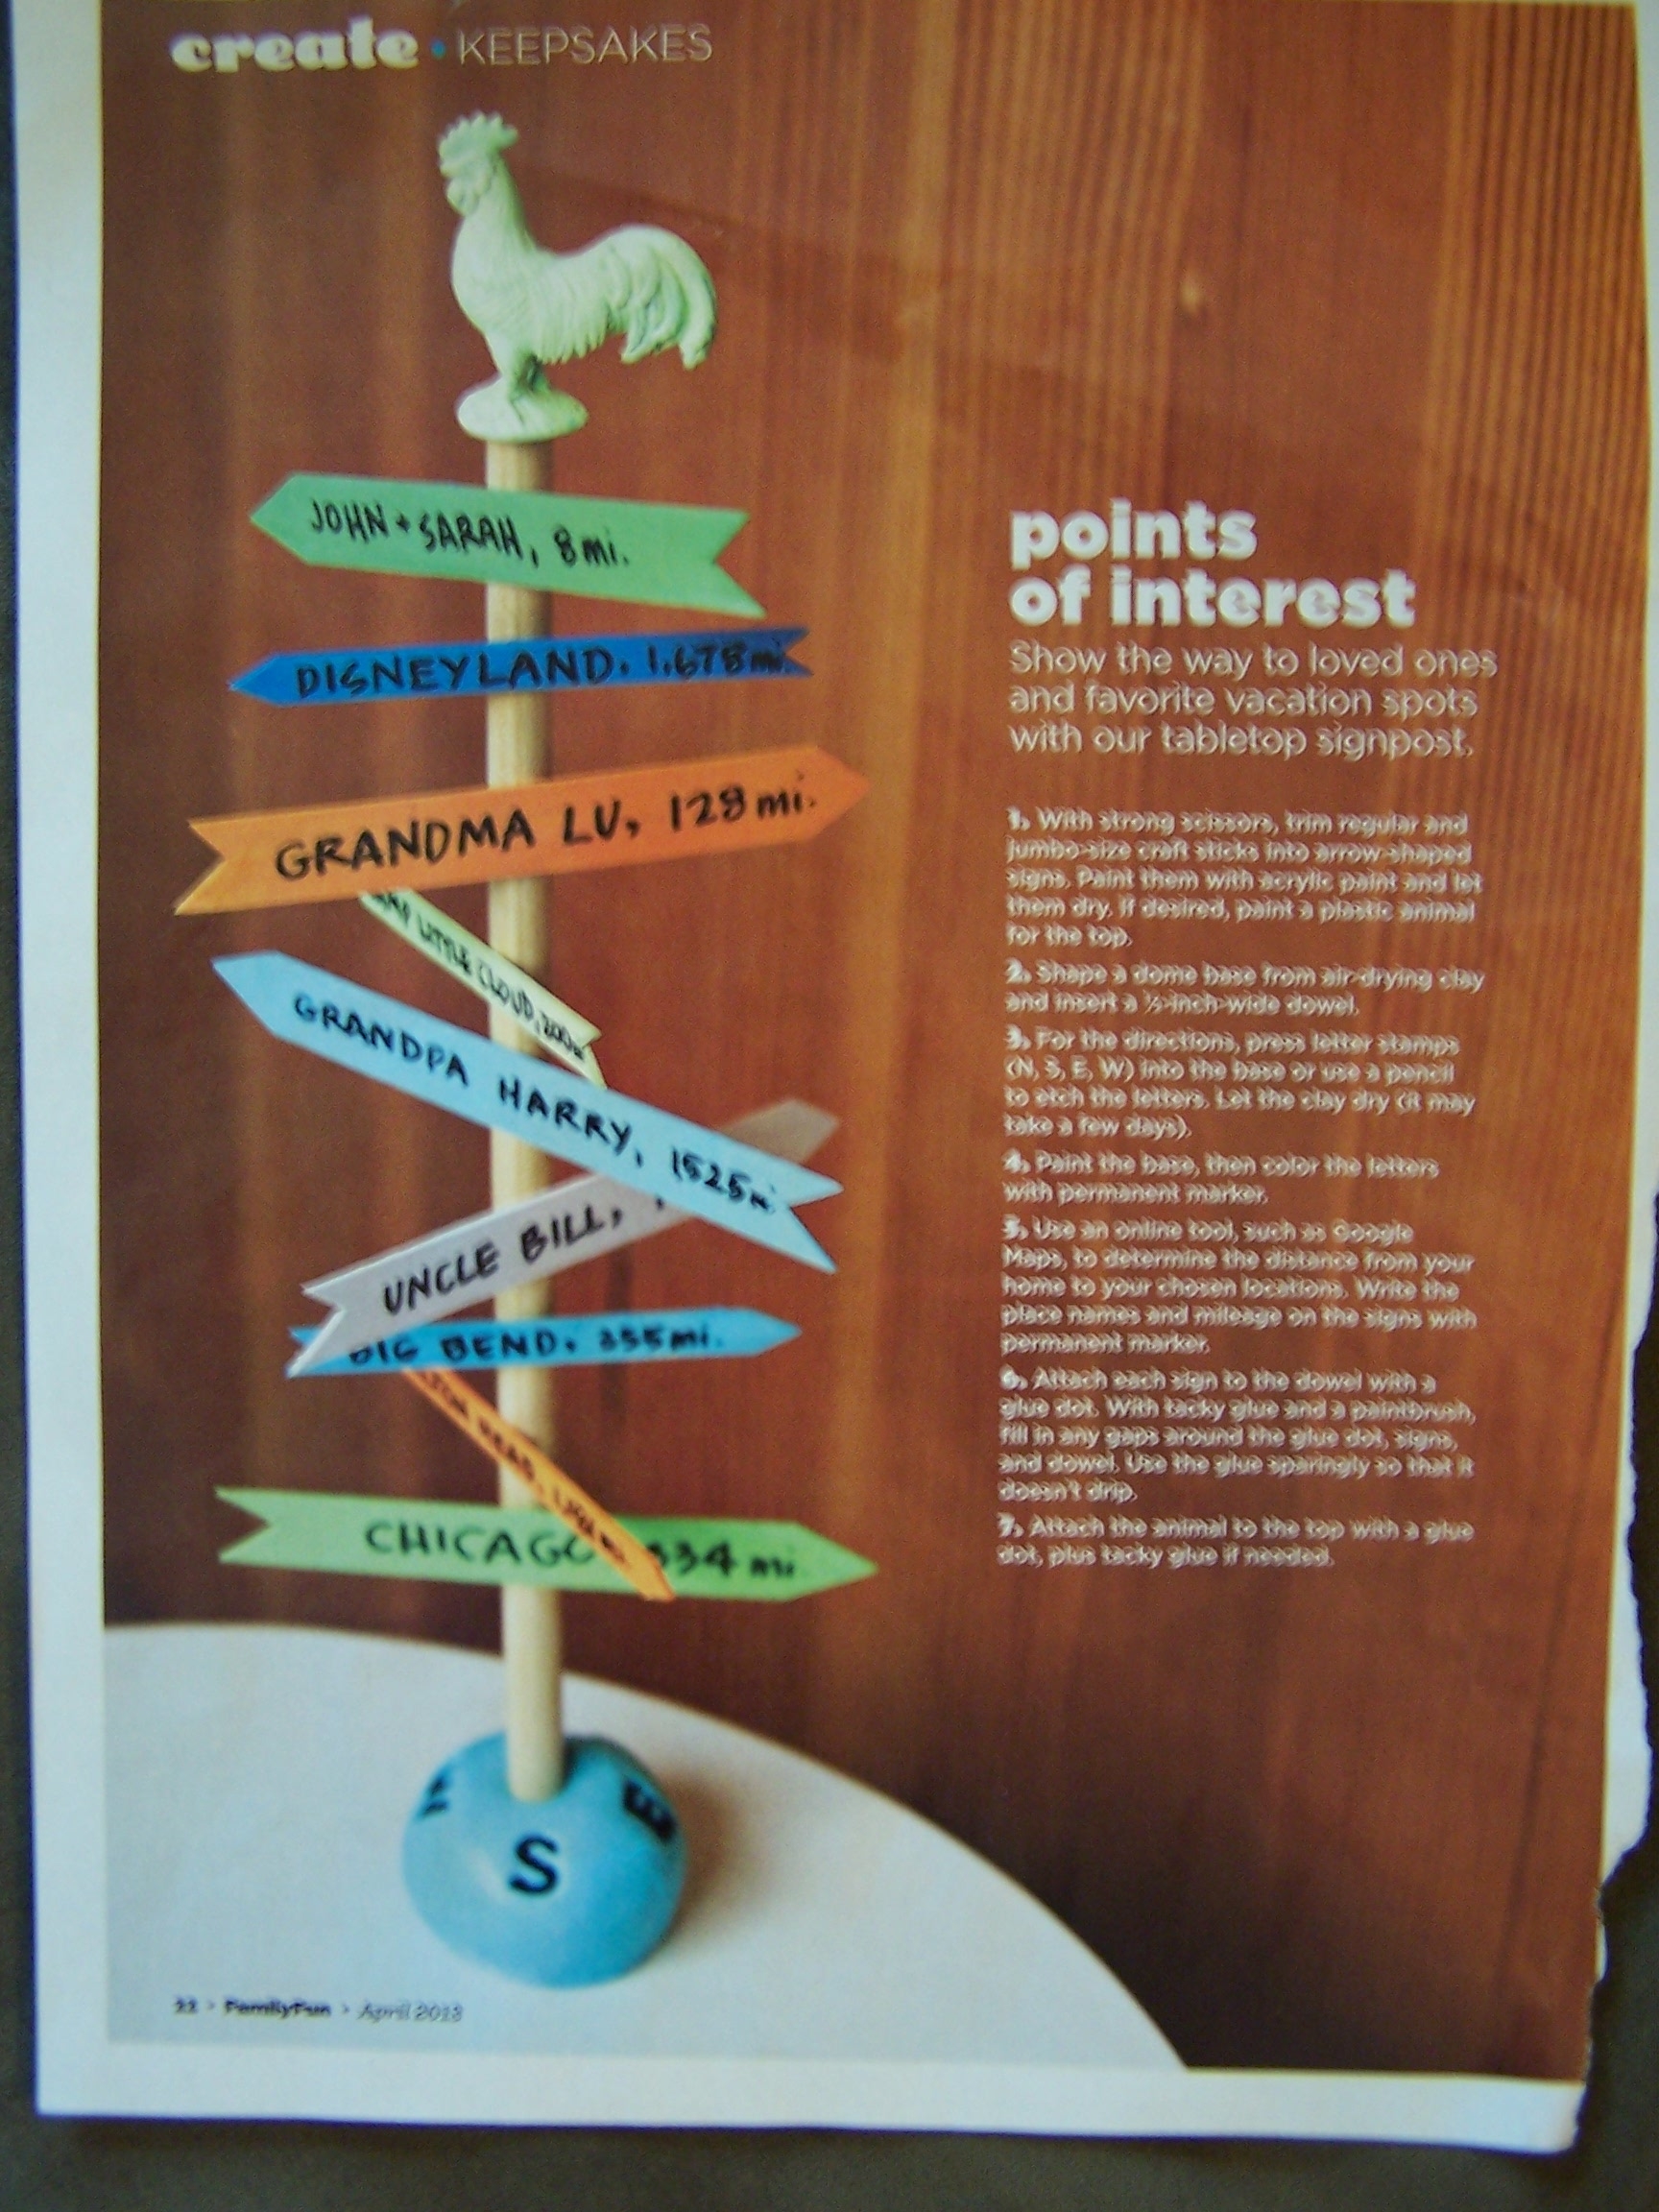
I found this cool project in FamilyFun magazine, that I just had to replicate for Alex’s walls.
I went to Hobby Lobby one afternoon and found huge letters that were on sale for half off: N, S, E, W in pink and blue sparkly colors and Don put them up on her walls, using a compass so that they were really placed accurately pointing North, South, East and West. I found a cool project in FamilyFun Magazine while sitting in the doctor’s waiting room one day, and I had to replicate it on her wall. I knew the perfect spot. Alex noticed a blanket in the trunk my car that I’d made for the kids years ago, a 50 States blanket with a map of the country on it. We washed it and brought it up to her room and placed it at the bottom of her bed, which was still awaiting a back-ordered, horse-themed “bed in a bag” set. She found a globe at the book store, and used some gift money to purchase it. The room was coming together in our minds, and on the walls, piece by piece.
Finally, it was time. I took the huge roll of postcards and began cutting them apart. I filled an entire wicker basket with them. I found some double sided foam tape at Walmart, specifically designed to keep the paint on the walls in tact, and Caroline and I placed little pieces in the center of each laminated card, being careful not to cover the messages on the cards if at all possible. And then, on Mother’s Day afternoon, I began placing each one on the wall.
As I did this, I was struck by the awesomeness of this whole project, from the idea itself to the connections it has given Alex to our family, our friends, our past and our present. The postcards have special stamps on them, special postmarks, and special messages. They are priceless and yet the cost of them was so minimal.

Adjacent to the North Wall is my version of the FamilyFun project, with postcards to match.
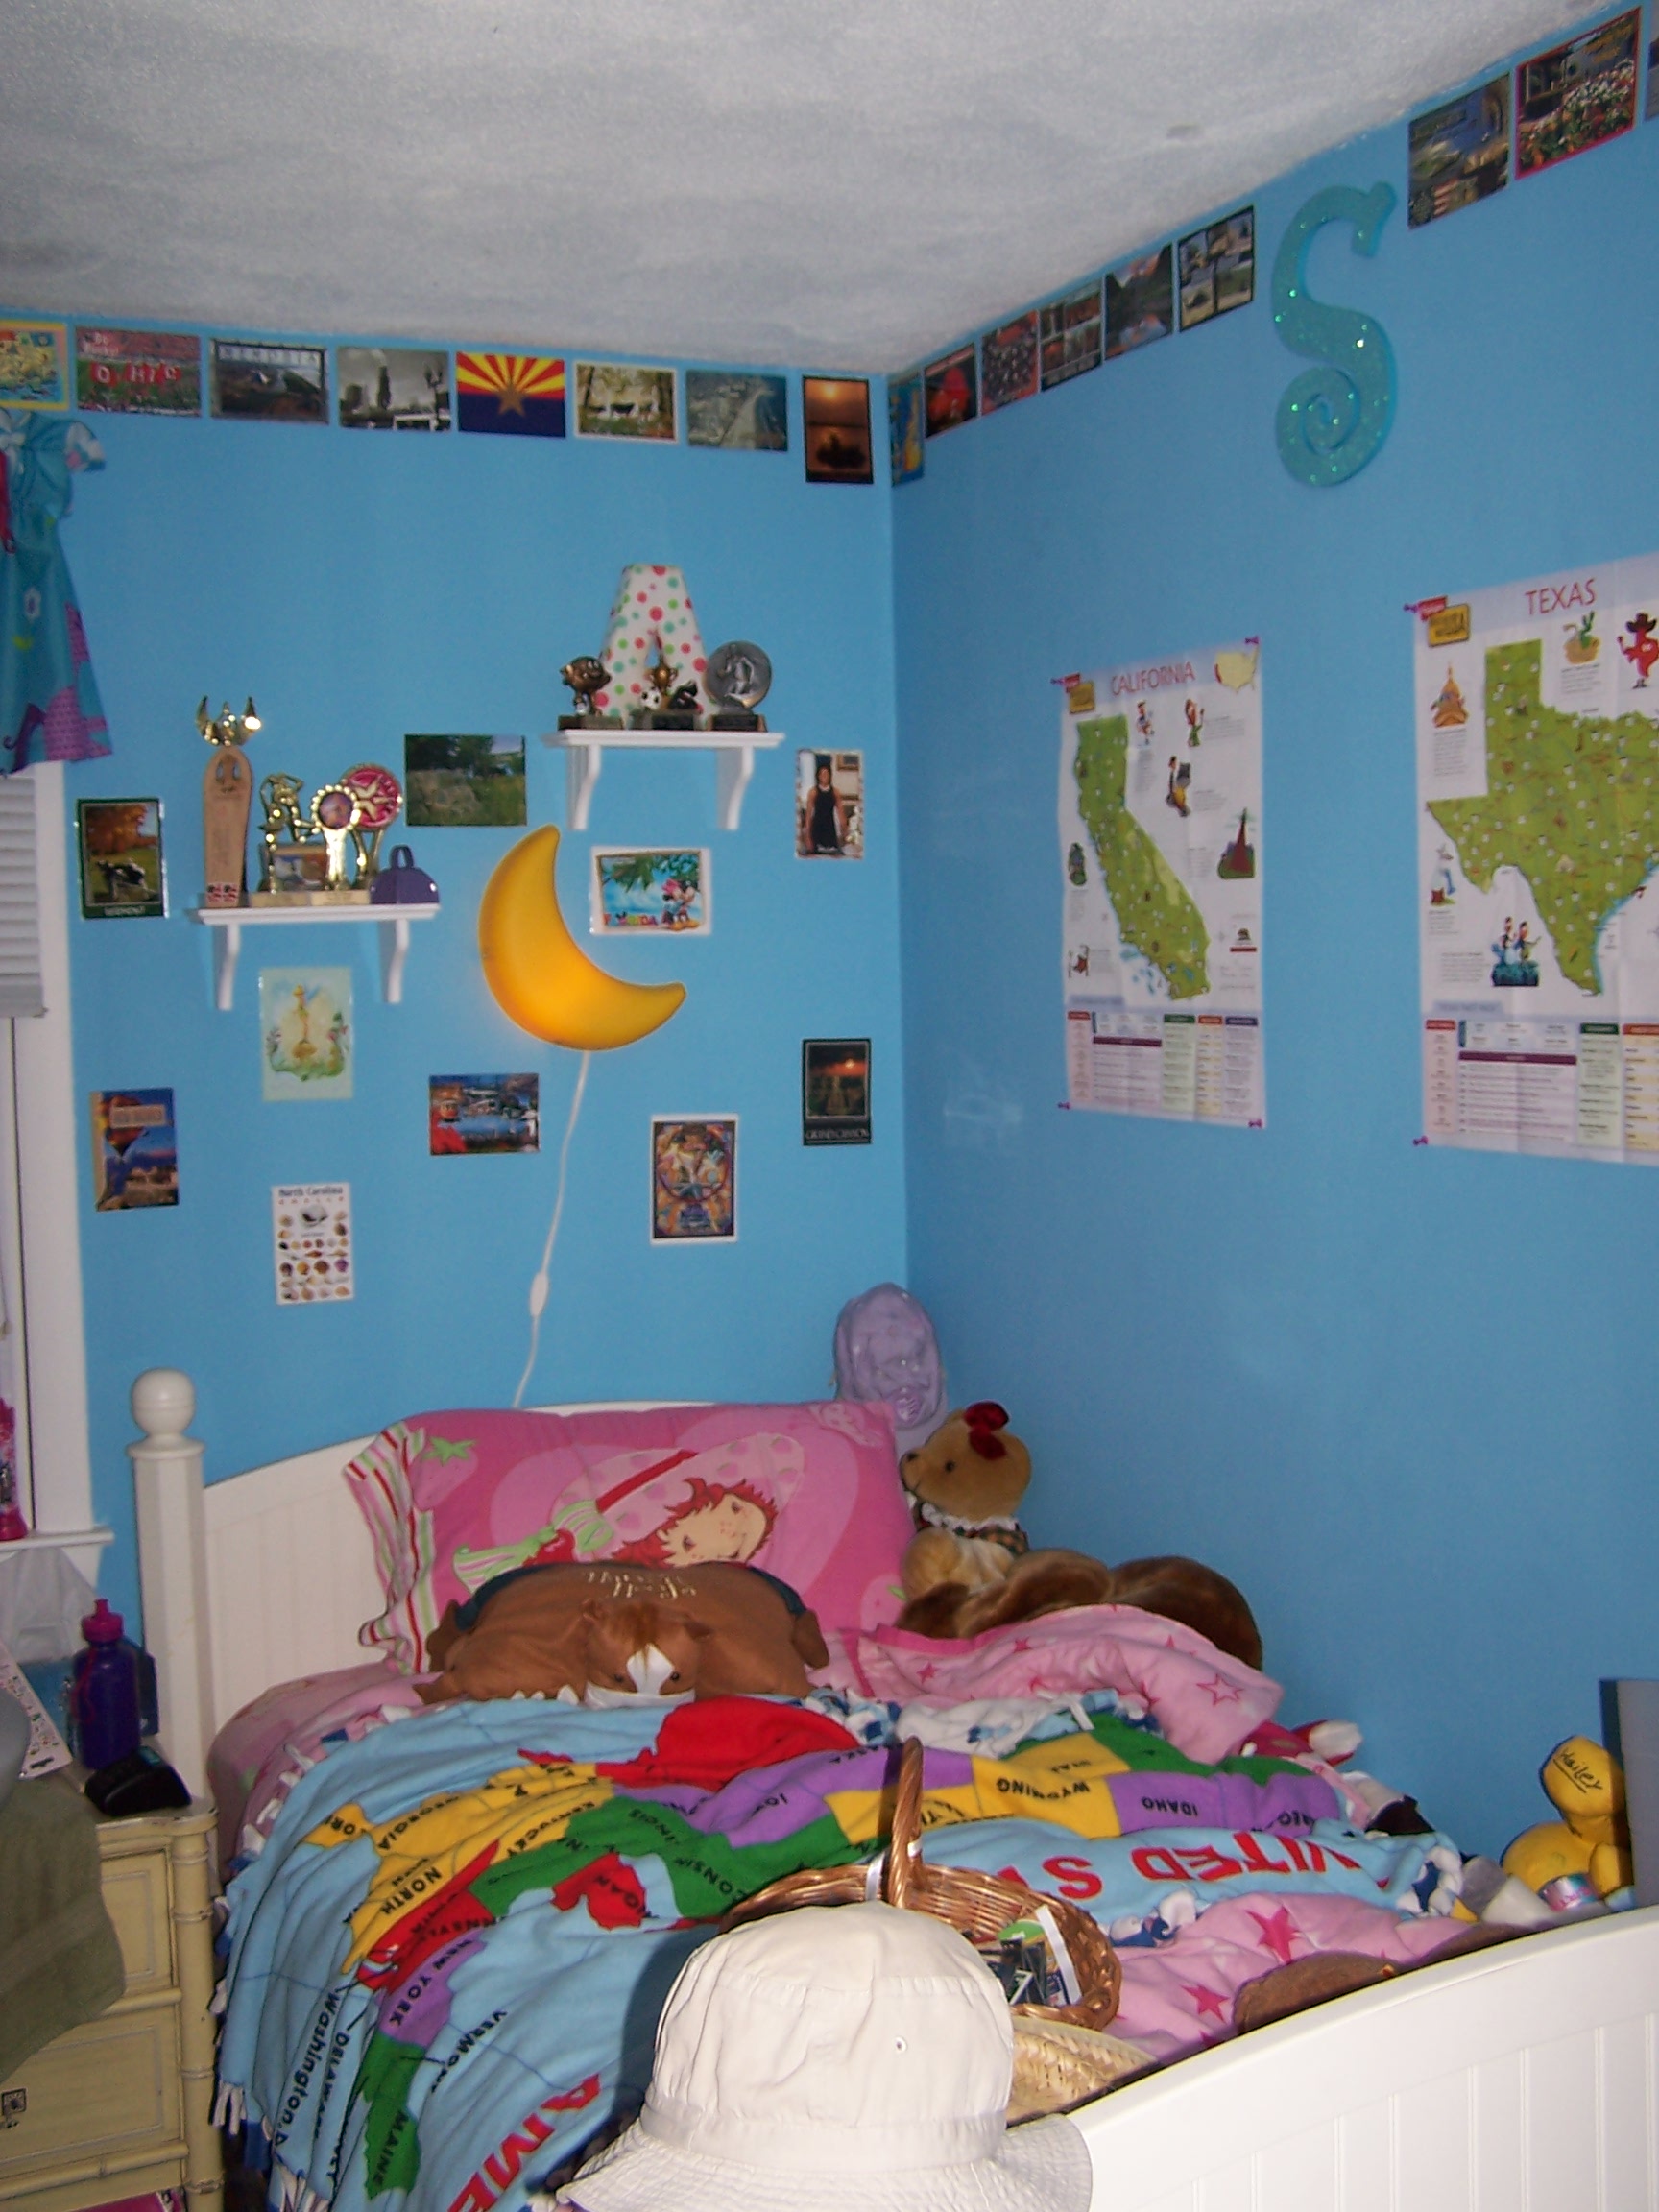
Alex has decided that the South Wall over her bed will show maps of two “featured states” as she receives them from the “Which Way USA” program through Highlights Magazine.
And so, as I finish up this blog post and I show you the photos of the finished walls, I want to say thank you to everyone. Thanks for sending Alex her postcards, for spreading the word to your families and friends all over the country and the world, and thank you for taking the time to make a little girl’s day, every day. On the night that the walls were finished, she walked into her room, looked up at the walls, and she slowly turned around and around. The look of amazement on her face was one I will never forget.
And I more than appreciate it.
Thank You.
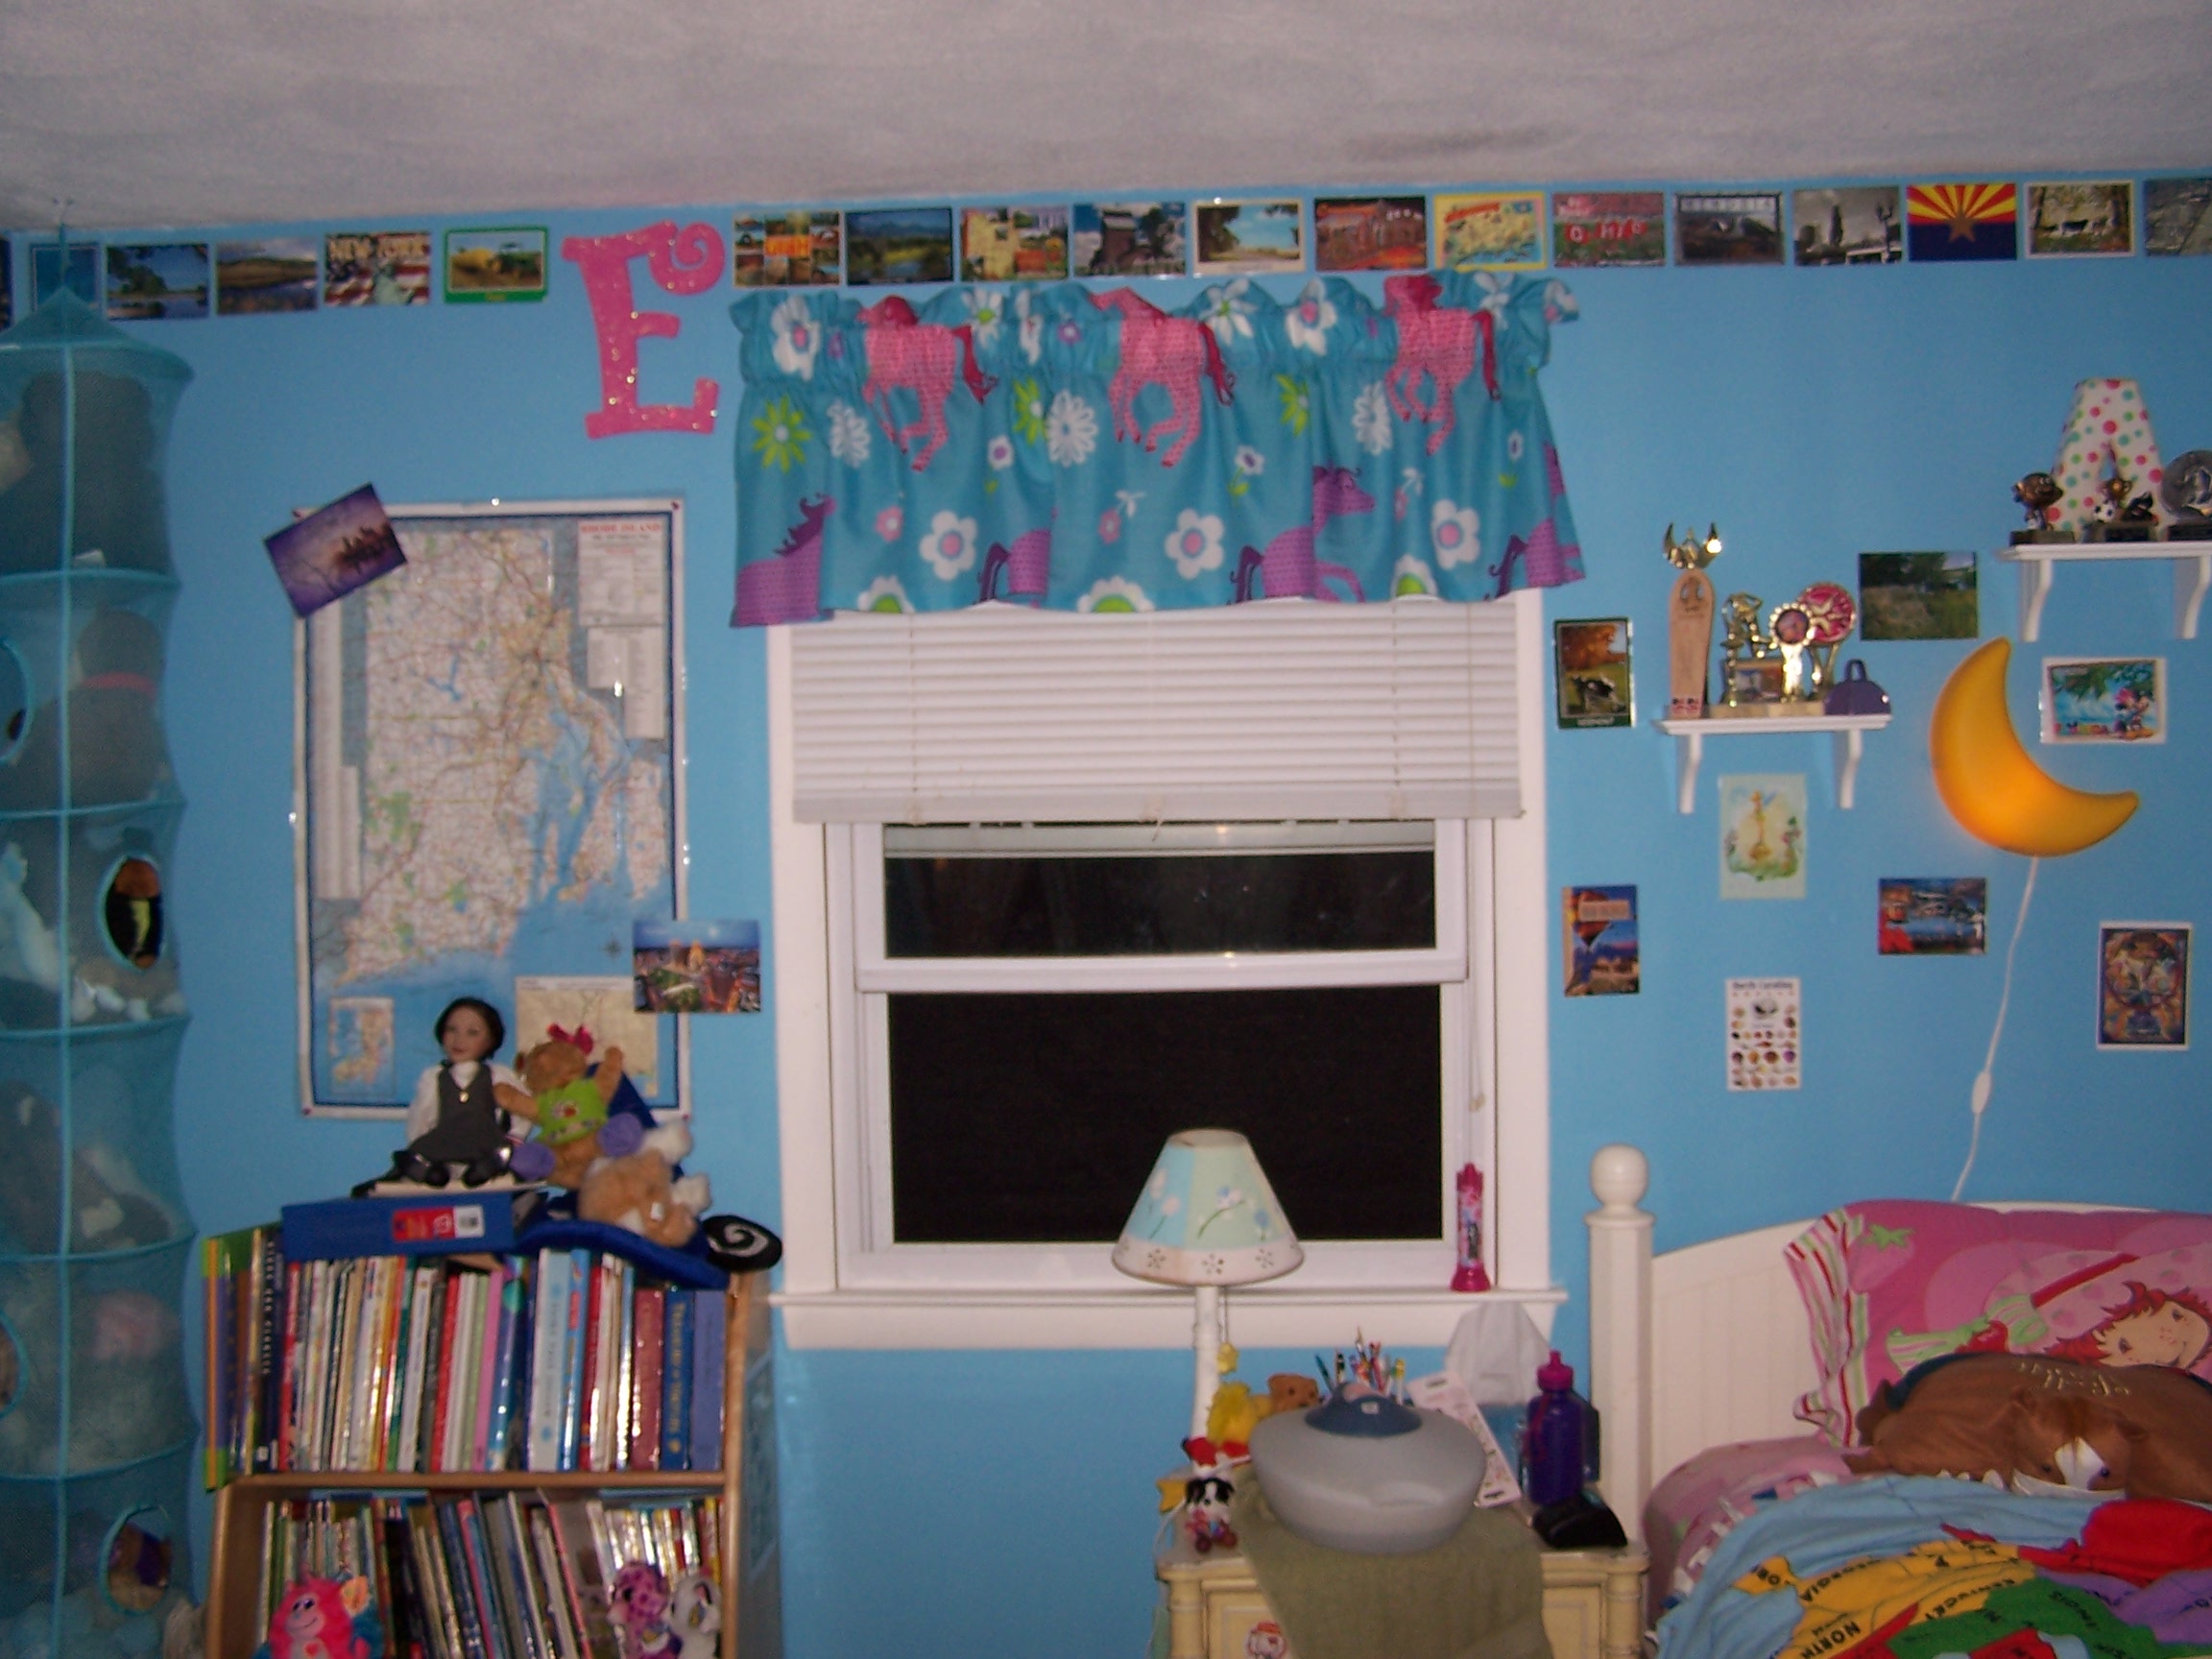
The East Wall houses her Rhode Island map and its coordinating RI postcards.
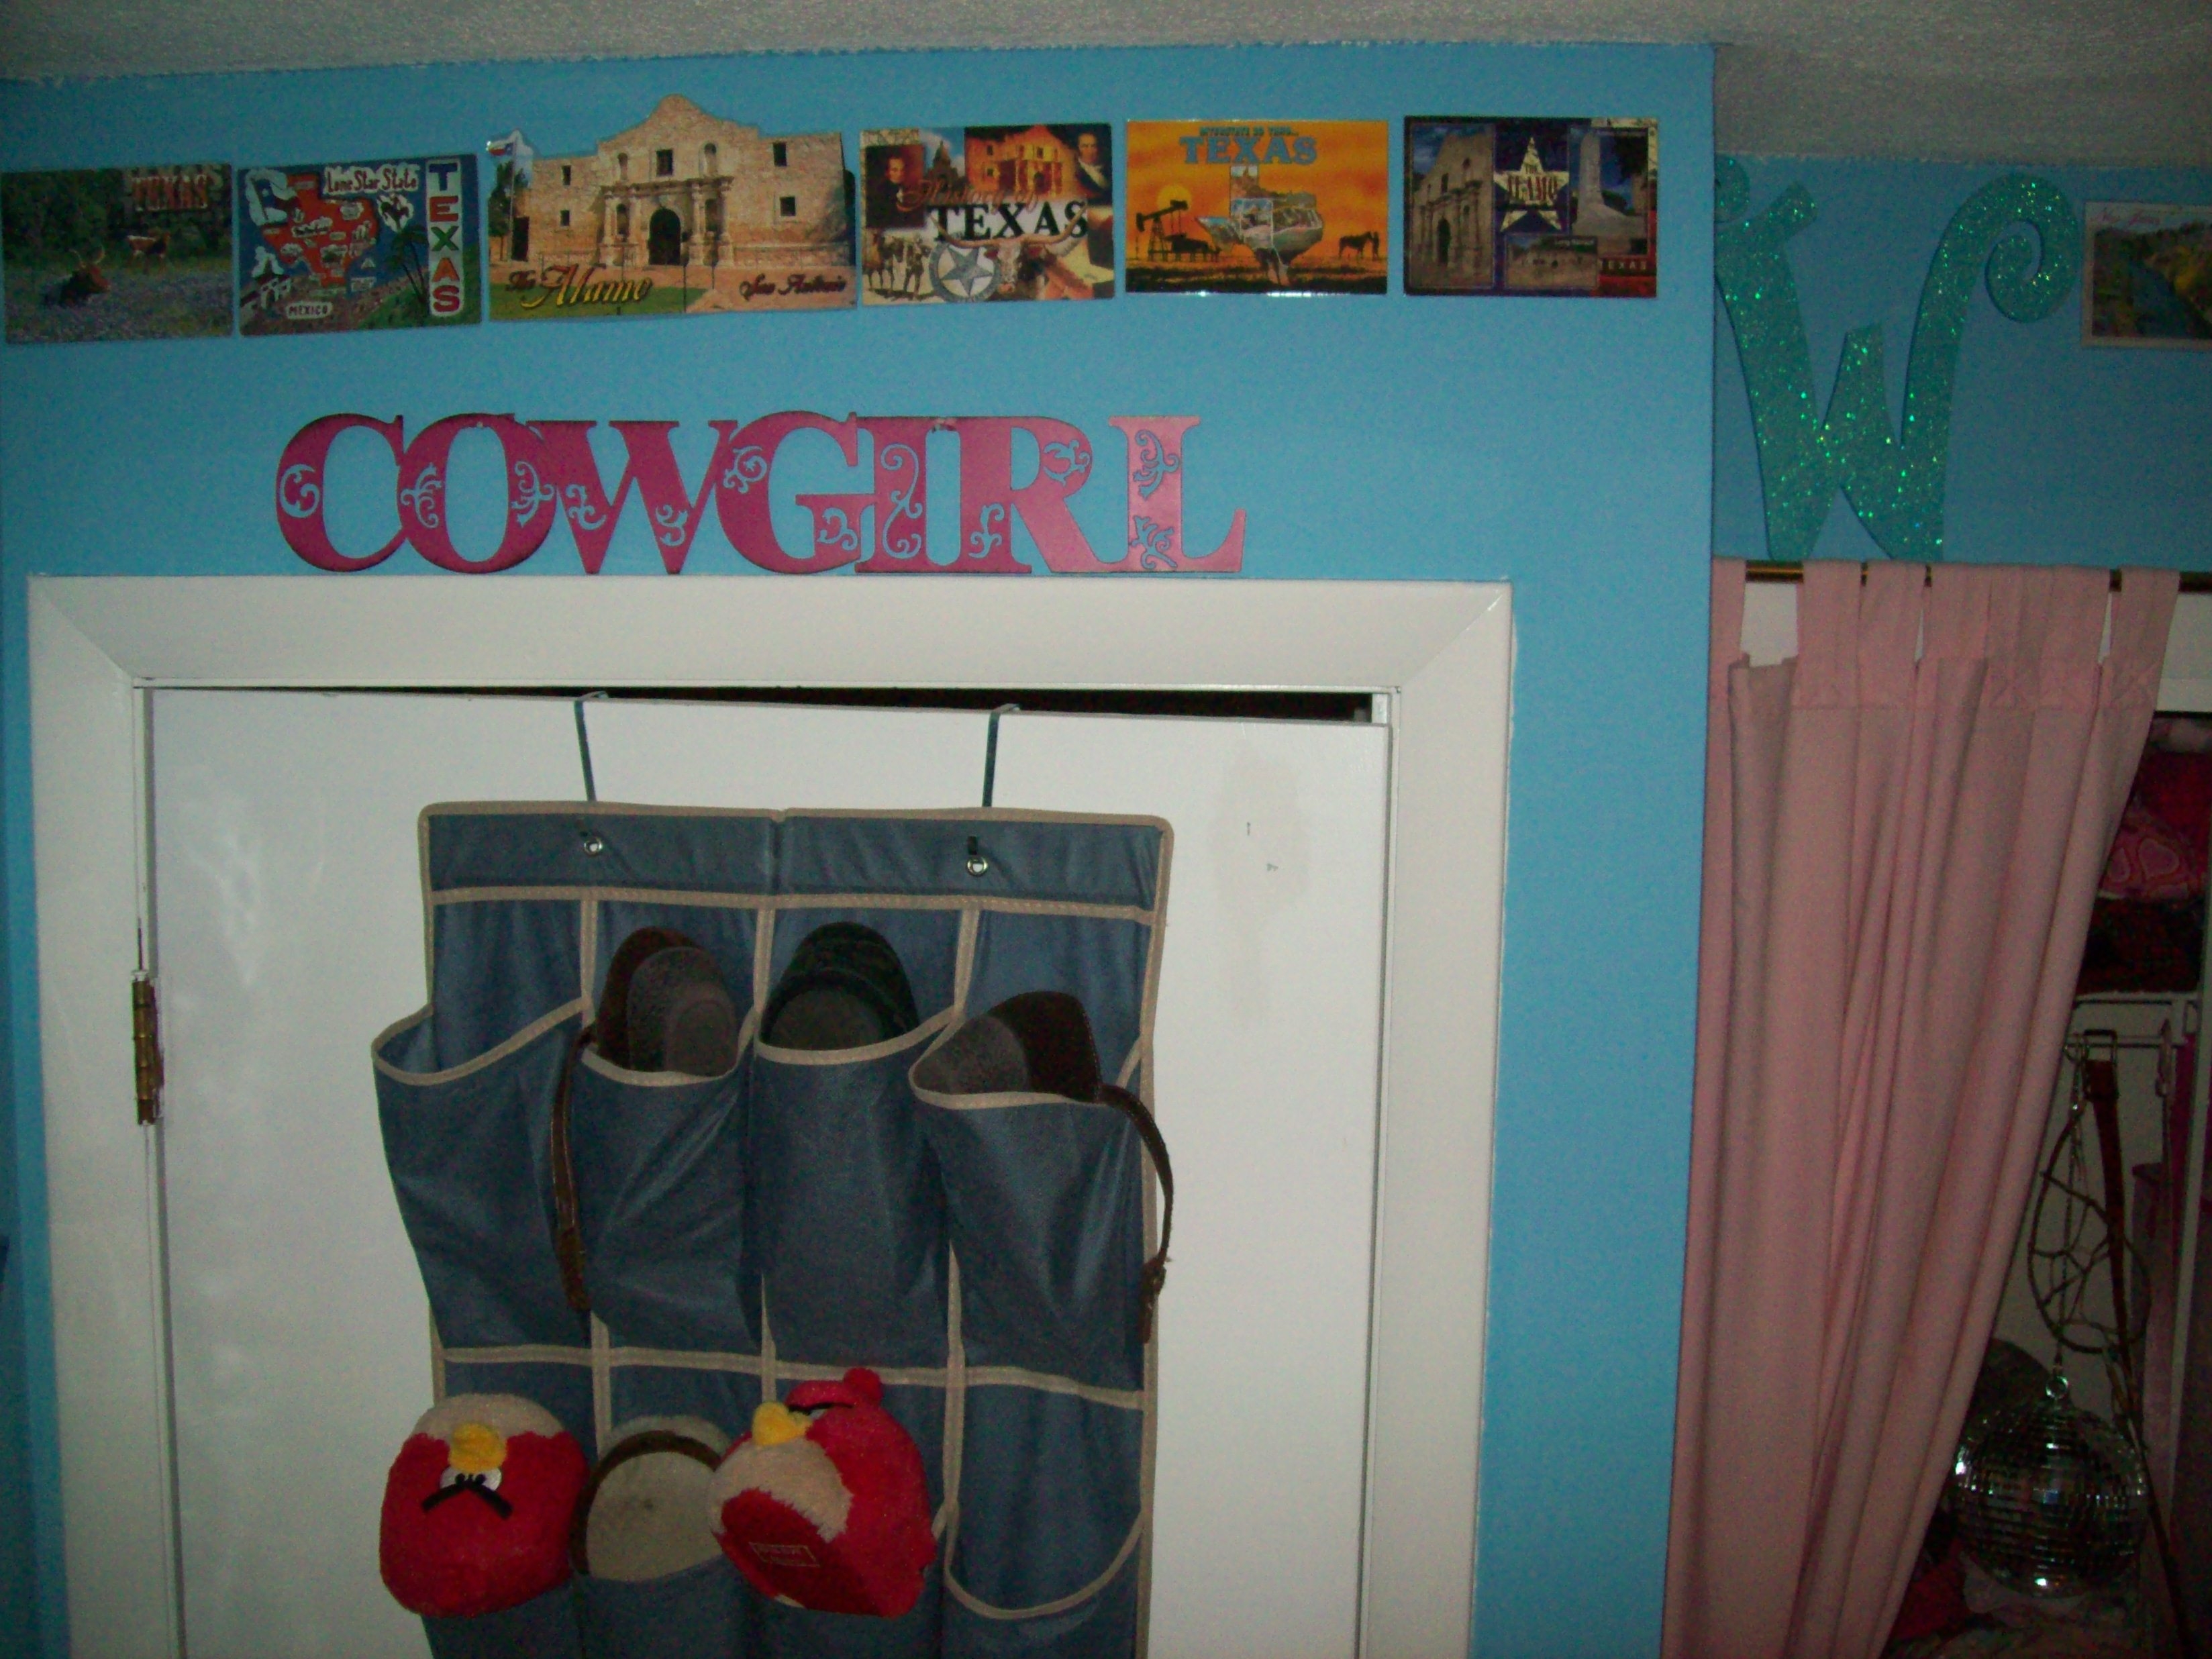
The West Wall is over the back of her door and over her closet. The wall over the door houses her Texas postcards and her Cowgirl sign.


