Archive | Eating on a budget RSS feed for this section

What’s For Dinner Wednesday: A Dish In Honor of the Chinese New Year

6 Feb
It's New Year's somewhere, so let's celebrate!

It’s New Year’s somewhere, so let’s celebrate!

February 10 is the start of the Chinese New Year! Since today’s recipe is an Asian inspired dish, I thought I’d share it with you this week in honor of the Chinese New Year. Also, as a bonus, I’ll be sharing an extra-special dish with you tomorrow as well, and then to continue the Chinese New Year celebration a bit longer, my dessert post on Friday will be a perfect Chinese New Year dessert too.

According to Wikapedia, the place everyone says not to rely on for information that I do always rely on for information, Chinese New Year is the most important of the traditional Chinese holidays. In China, it is also known as the ‘Spring Festival’, the literal translation of the modern Chinese name (see Names in Chinese below). Chinese New Year celebrations traditionally ran from Chinese New Year’s Day itself, the first day of the first month of the Chinese calendar, to the Lantern Festival on the 15th day of the first month. The evening preceding Chinese New Year’s Day is an occasion for Chinese families to gather for the annual reunion dinner.”

A couple of weeks ago I was trying to think of what to make for dinner. I wanted something different, not the same old thing, but I had all the same old ingredients to work with: chicken, shrimp and asparagus.  So, I decided to type those three ingredients into Google and see what came up.

To my delight I found this recipe from the blog So Tasty, So Yummy for Chicken and Shrimp with Asparagus. So perfect. The fact that it was Chinese in nature was even better. My family loves Chinese food but we very rarely get to eat it.

This meal was such a hit that there was not even a drop of the sauce leftover. Every single bit went and the kids were begging me to make it again. Five thumbs up for sure. Even Alex liked it, and that’s saying a lot.

I did need to adjust a few things, as I had not quite everything on the list, but enough of everything to make it work. Any adjustments I made I will make note of in the recipe.

So celebrate the Year of the Snake, and try out So Tasty, So Yummy’s awesome meal!

My ingredients, prepped and ready to go.

My ingredients, prepped and ready to go.

CHICKEN WITH SHRIMP AND ASPARAGUS
INGREDIENTS

1/2 pound chicken, cut into 3/4″ pieces  **I had several leftover cooked tenderloins so I sliced them up very small and used those instead.
1/2 pound shrimp, peeled and cleaned **I used a bag of frozen shrimp from Aldi’s, thawed.**
3/4 pound asparagus, trimmed and cut into 3/4″ pieces **I used a bag of frozen, again from Aldi’s.**
1/4 onion, minced
1 clove garlic, minced
1 teaspoon ginger, minced (or 1/8 tsp. ground ginger)
2 tablespoons oil (we use olive oil)

Seasoning sauce:
1 tablespoon soy sauce
1 tablespoon oyster sauce **I had none so I skipped it.**
1 tablespoon water
1 tablespoon sherry
1 tablespoon corn startch

Sauce:
1 tablespoon soy sauce
1 tablespoon sherry
2 tablespoons water
1 teaspoon corn starch

We don't have a wok, but this worked out great.

We don’t have a wok, but this worked out great.

DIRECTIONS

Whisk together the seasoning sauce ingredients until combined. Add the chicken, marinate for 15 minutes, set aside. Whisk the sauce ingredients until combined, set aside.

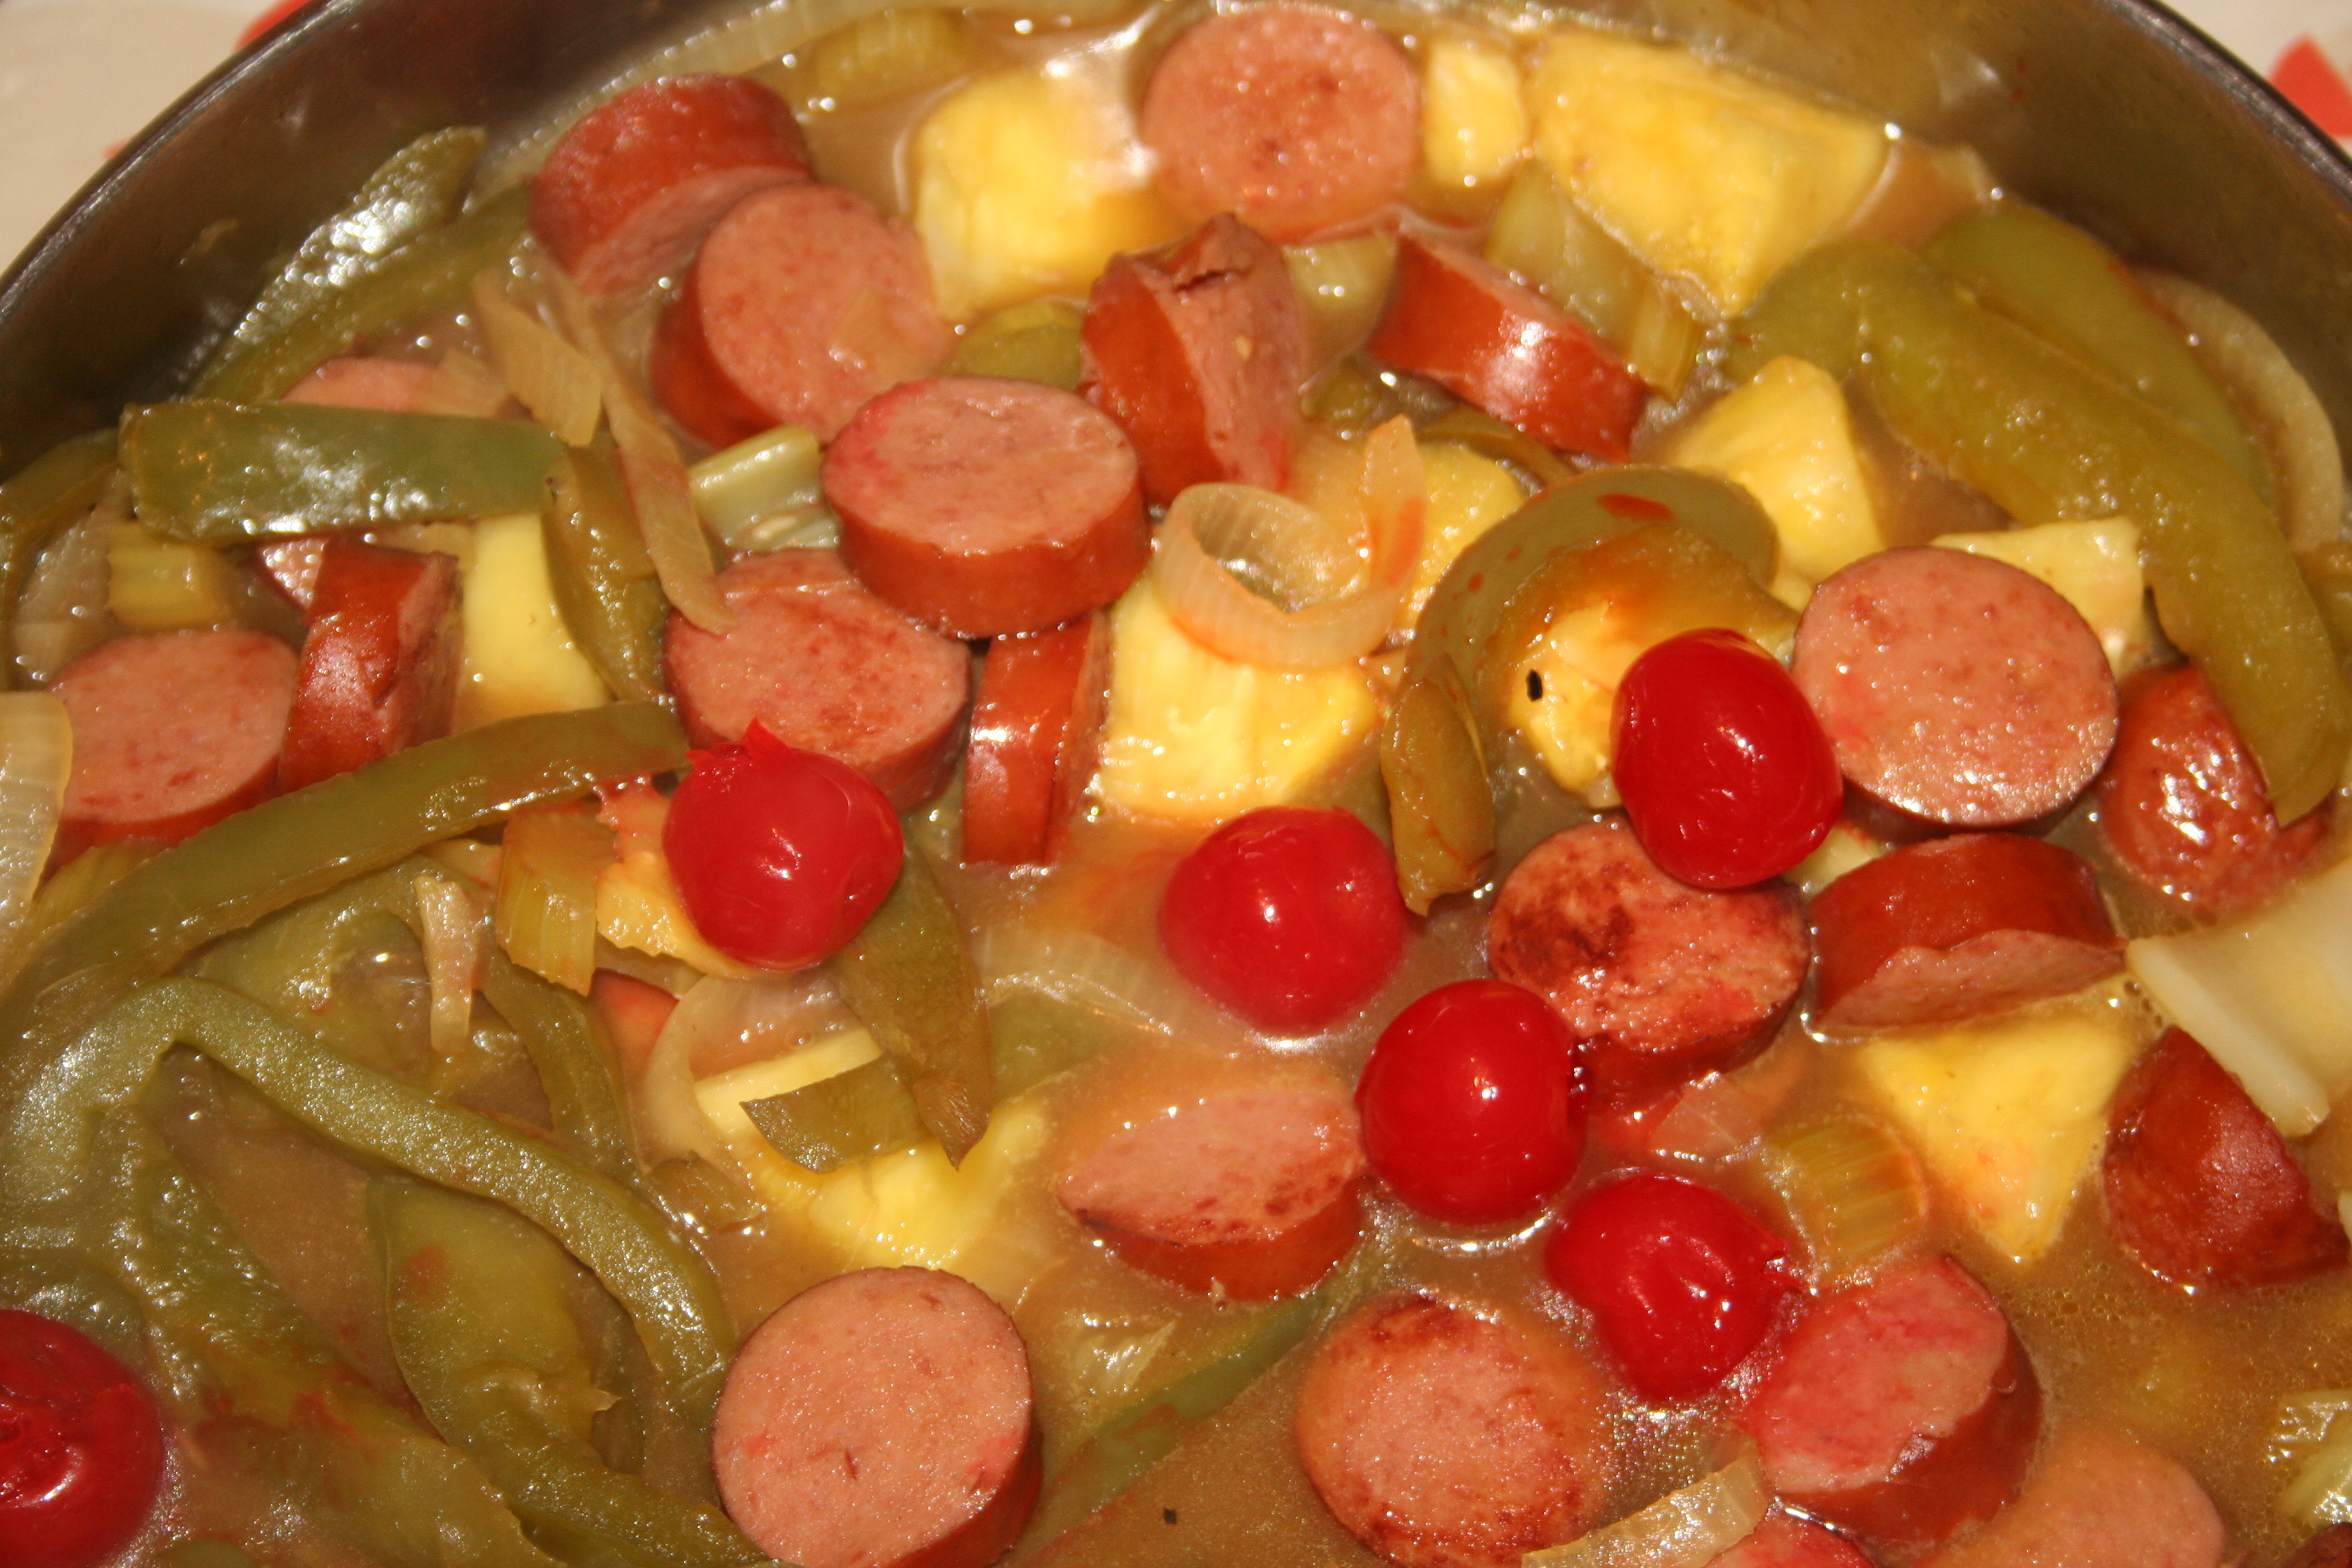
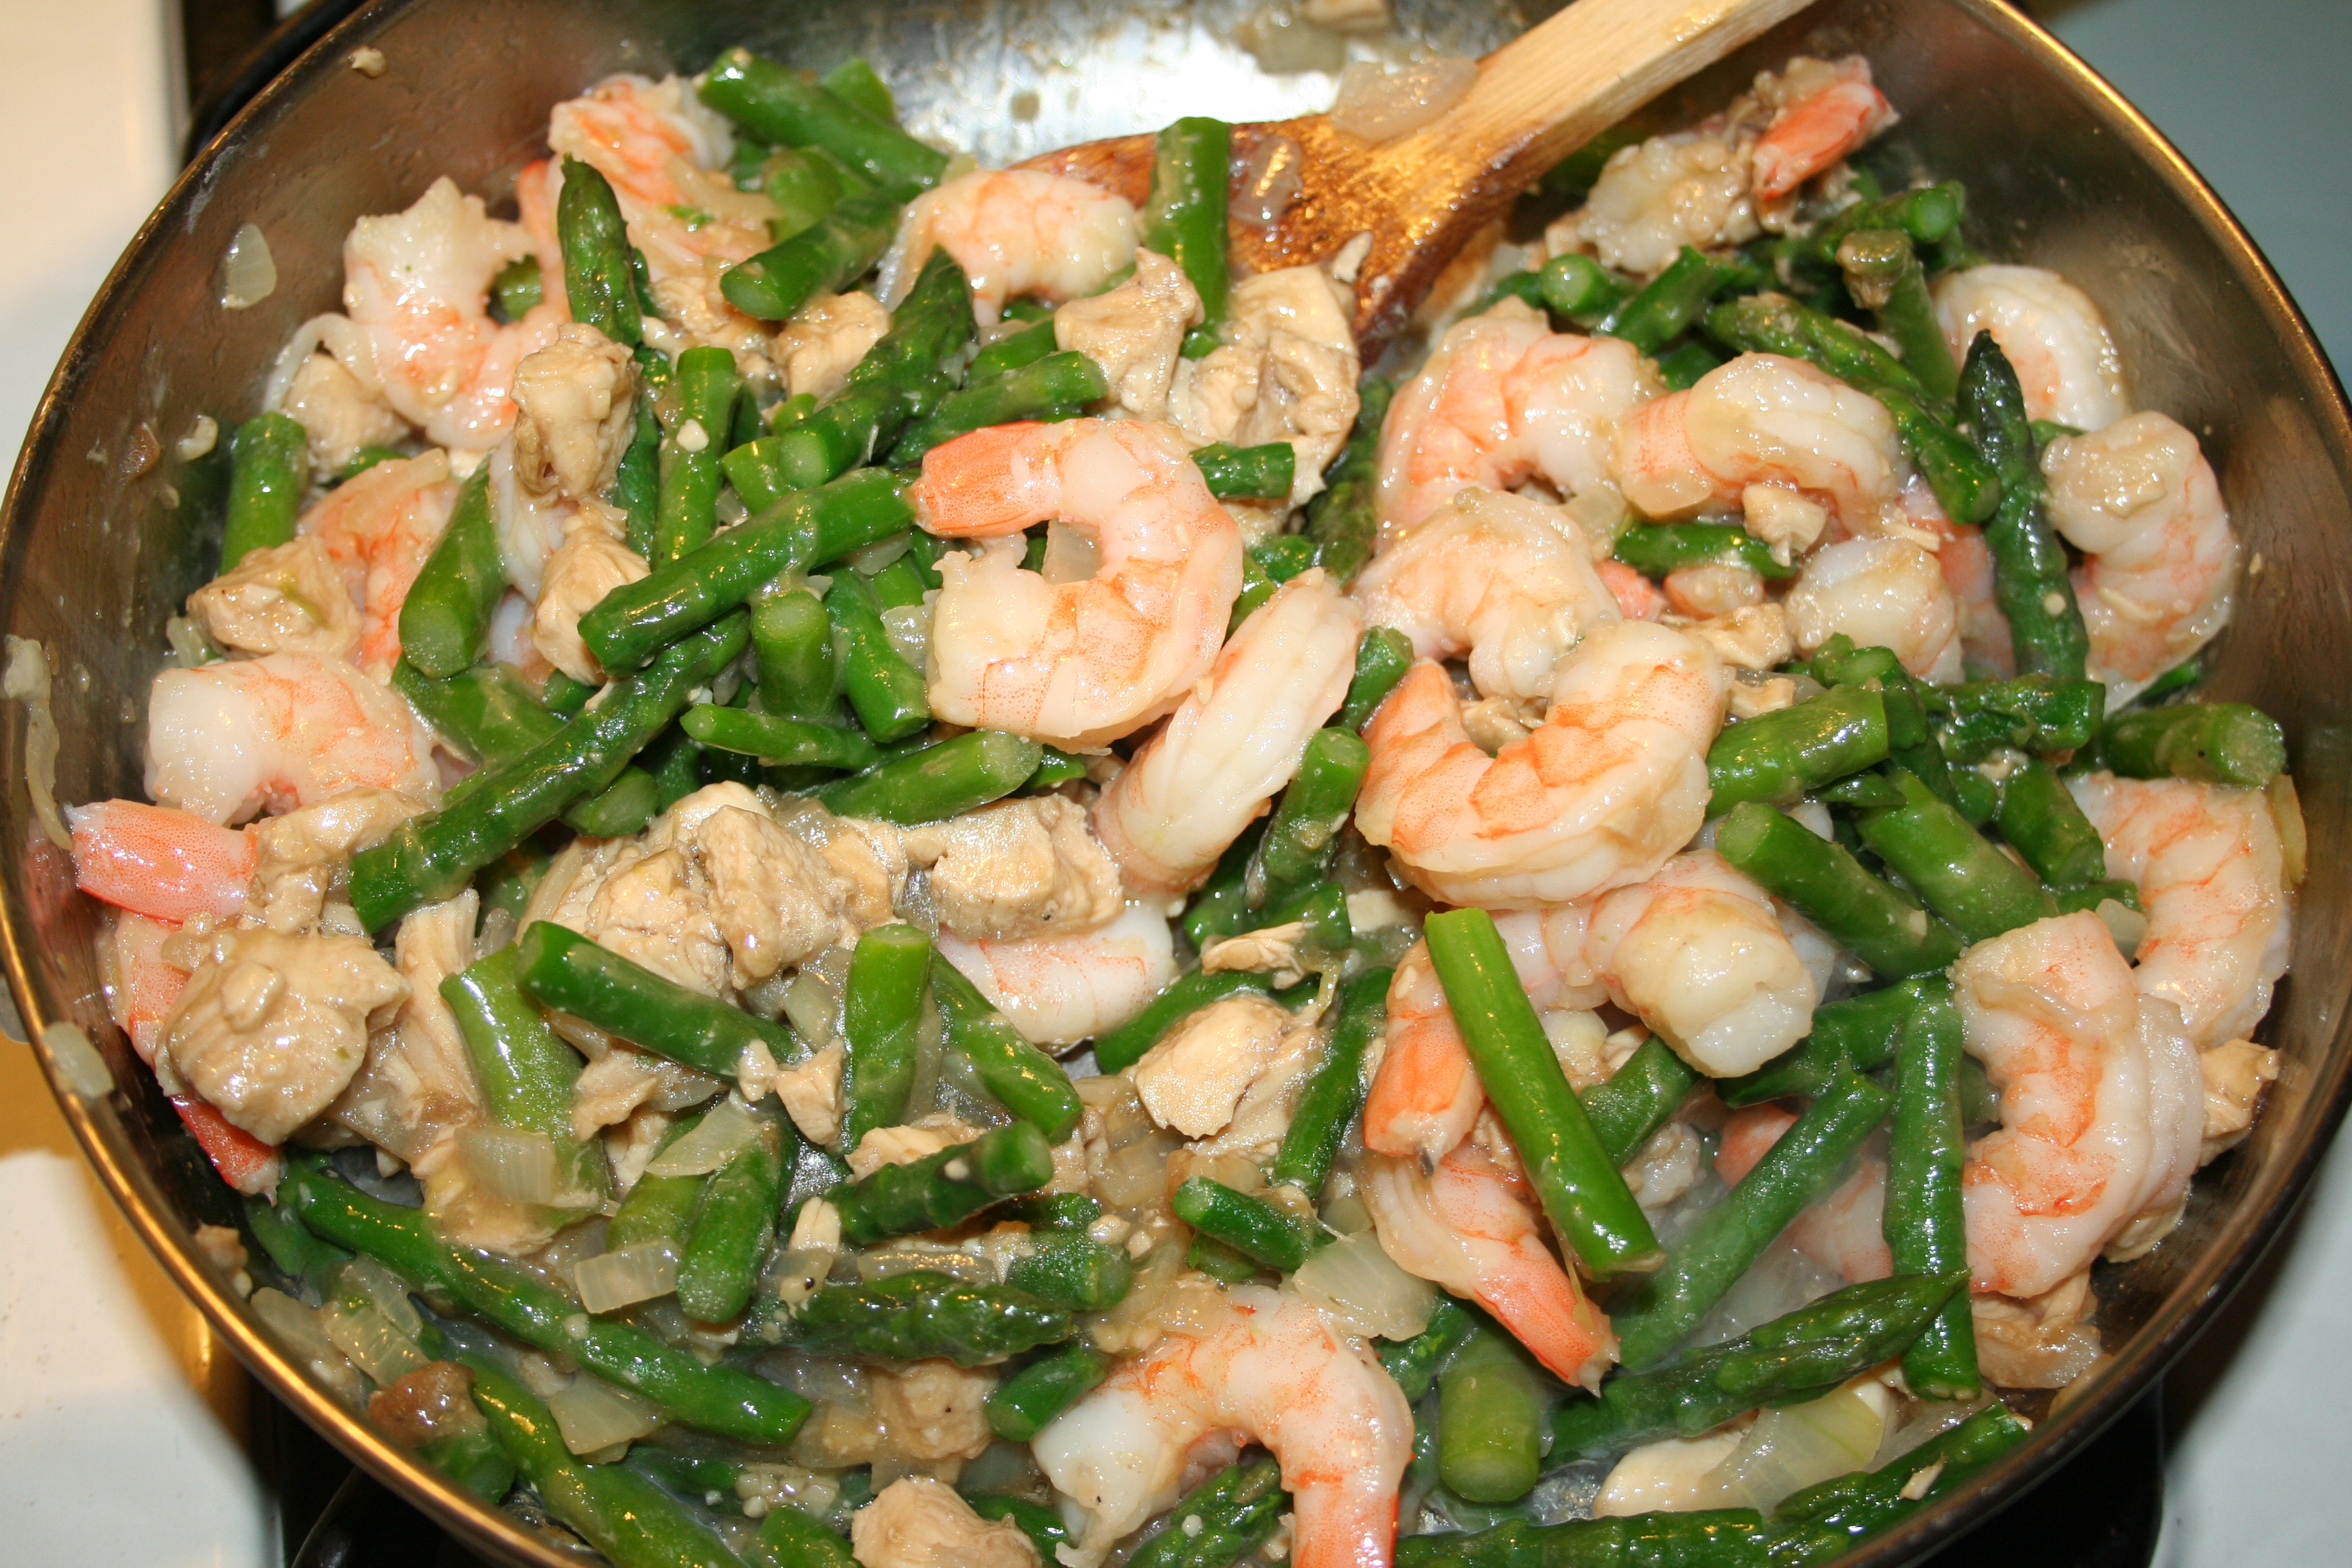
Heat oil in wok over high heat. Add onion, garlic and ginger to the wok. Saute until fragrant, about 30 seconds. Add the chicken and marinade, stir fry for 3 minutes. Add the asparagus and shrimp, stir fry for another 2 to 3 minutes, until shrimp are pink. Add the sauce and stir fry for about a minute to coat and thicken it. Serve over rice.

**I actually cooked up brown rice and quinoa and served both. The kids mixed them together and put the chicken, asparagus and shrimp on top; they said it was like fried rice.**

I would definitely, definitely cook this again. I would double the sauce recipe because it was “So Tasty, So Yummy,” and there just wasn’t enough of it to go around!
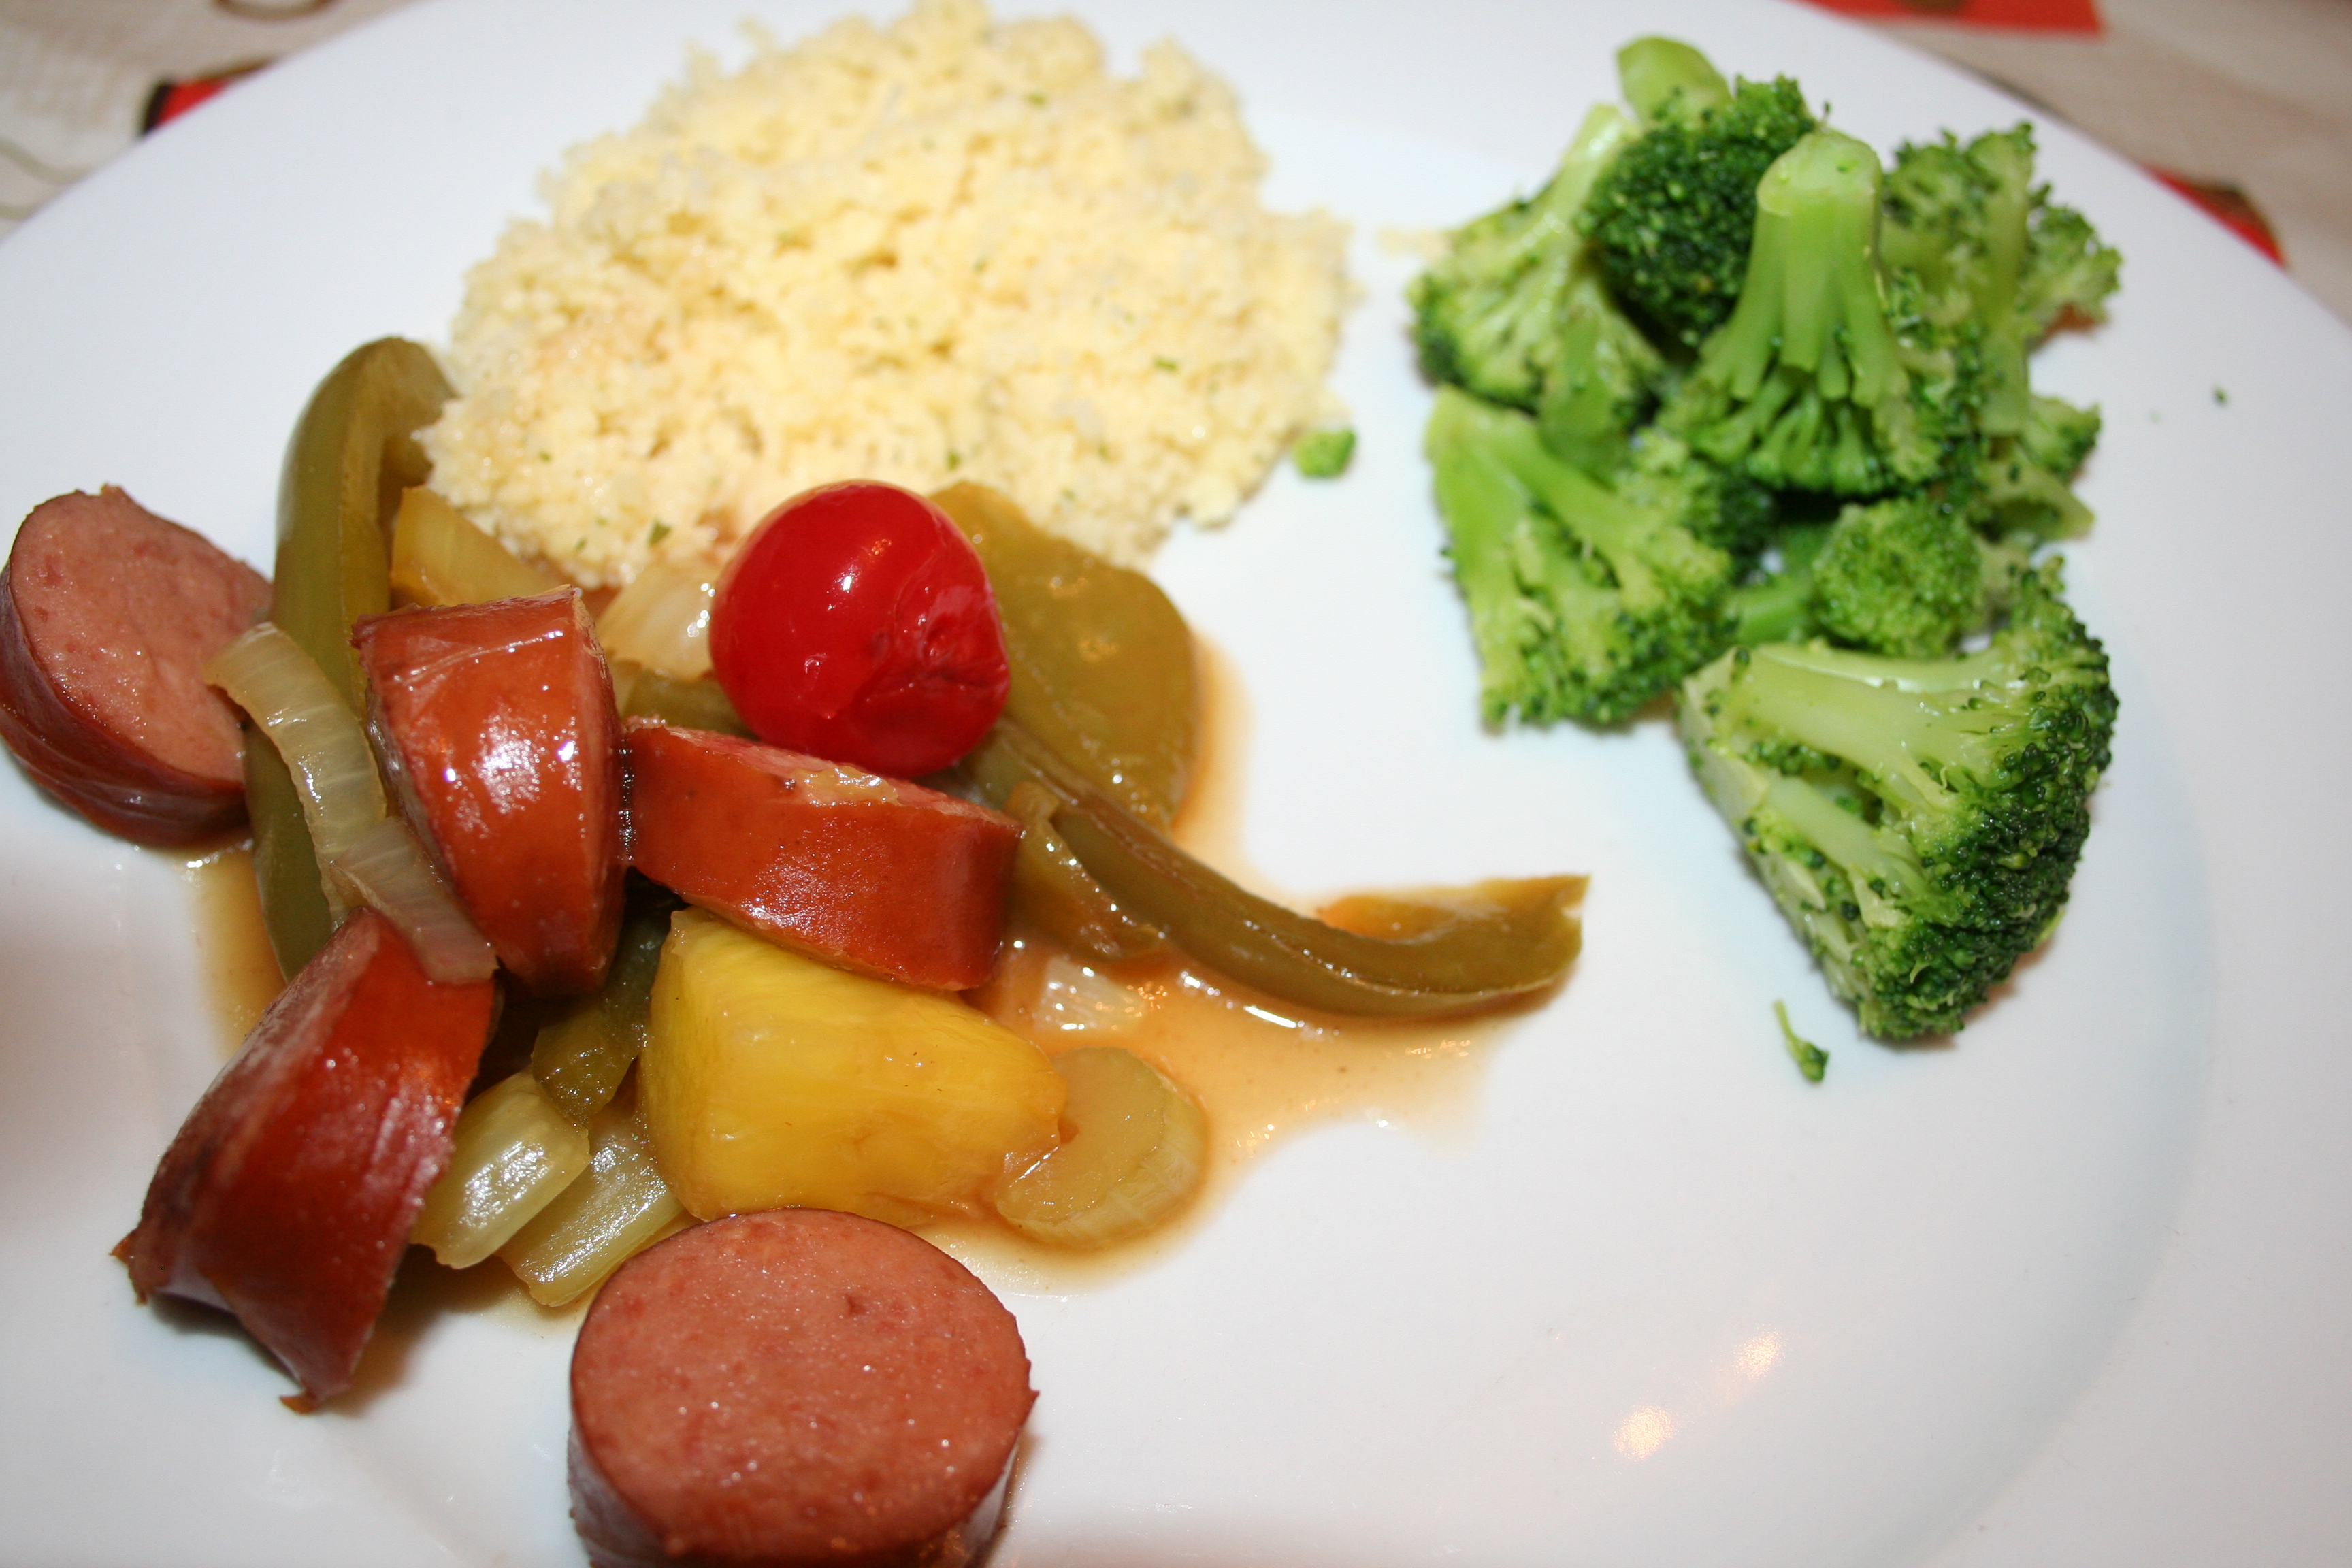
YUMMMM!!!!

YUMMMM!!!!

What’s For Dinner Wednesday: Fish Chowder

30 Jan
I absolutely loved this fish chowder last week!

I absolutely loved this fish chowder last week!

I’m not sure if I’ve ever mentioned this or not, but a few years back I developed an allergy to shellfish. Not all shellfish, but a lot of my faves are no longer on my menu.

To live in New England, a summer oasis of ocean and seafood, it’s terribly sad for me to have this allergy. I have always loved all seafood. Luckily there’s only a handful I can’t eat, and there are still some things I can eat.

Clam cakes and chowder after the beach were one thing that I’d been missing in particular, so my heart did a little leap this summer when I was walking through Washington DC on my way to the Smithsonian Museum of American History, with the winner of the Healthy Lunchtime Challenge from Virginia, Madeleine Steppel and her mom, Debra, while Caroline and I were there as the Rhode Island winners.

Madeleine's recipe was so easy to follow. Caroline made most of it by herself!

Madeleine’s recipe was so easy to follow. Caroline made most of it by herself!

The most common question we all asked each other on that first day of our trip was, “Where are you from and what was your recipe?”

When I asked that question to Madeleine and Deb, I was thrilled by their answer: Fish Chowder. Madeleine had chosen to make a chowder that I could actually eat! When I asked Debra what was in their chowder, she said that any white fish would do. I was so excited!

Unfortunately, it took me five months before I had a chance to try out this recipe, just last week. It was one that Caroline had been asking for also, and she was so excited when I said I had everything for it.

The recipe was super-easy and didn’t take long at all to make. We substituted a couple of items to suit our tastes and our diet, but overall we followed her recipe almost to a T.

And let me tell you….I was in chowder heaven. It has been several years since I’ve been able to have chowder. I savored every.single.bite.

I went to school to work the school book fair after dinner. Then I came back and had a second bowl. That second bowl was all I could think about when I was at the book fair.

I already have plans to bring this chowder with me this summer to our annual Labor Day Weekend cookout, the one that’s almost entirely seafood, so that I too, can partake in the summer yumminess that I’ve been missing terribly.

One of the best things about this recipe was that it was easy enough that Caroline could handle almost the entire thing by herself. I chopped the onions (we both cried), and she did just about all the rest.

Below are the ingredients and directions, along with any notes stating the changes I made for us. I would definitely make this again.

Soon.

And all summer long.

And on Labor Day weekend for our cookout.

And any time in between.

Fish Chowder

By Madeleine Steppel, age 9

Virginia

Madeleine’s page in the recipe book states, “‘Senator Mark Warner’s recipe for ‘creamless’ Asparagus Soup, which I found in the Celebrate Virginia Cookbook, inspired me to create a chowder recipe,” said Madeleine, who used milk in this recipe because it is the State Beverage of Virginia. She would serve this with a fruity salad of spring greens, cherry tomatoes, strawberries, dried cranberries, and a citrus vinaigrette, with whole-grain bread.”

Makes 4-6 servings

Caroline loved being able to make the majority of this herself.

Caroline loved being able to make the majority of this herself.

INGREDIENTS

3 white potatoes (about 12 ounces total) peeled and cut into 1/2″ cubes.

1 pound bag of frozen peas and carrots, thawed (We skip these.)

3 Tablespoons unsalted butter

1 small onion finely chopped

1/4 cup all-purpose flour (we use gluten free Bob’s Red Mill 1:1 flour as of 2015)

4 cups low fat milk (we used skim)

1 1/2 to 2 pounds skinless white fish fillet, such as bass, tilapia, or flounder cut into 2″ pieces (I used 2 one pound bags of frozen flounder from Aldi’s.)

Salt and white pepper

(I also sometimes add in 1/2 tsp dried dill weed for color and flavor, which is what my dad always does when he makes his chowder every summer.)

There's nothing like a pot of hot chowder on the stove!

There’s nothing like a pot of hot chowder on the stove!

DIRECTIONS

1. Place potatoes in large glass microwave safe bowl. Add enough cool water to just cover the potatoes, and microwave on high for 4 minutes. Add the peas and carrots and microwave on high until the vegetables are tender, about 3 minutes. Drain the vegetables and set aside (or boil the vegetables until soft, about 8 minutes).

2. In a large saucepan over moderate heat, melt the butter. Add the onion and the garlic, and saute, stirring occasionally, until golden, 4 to 5 minutes. Lower the heat to moderately low, add the flour, and whisk for 2 minutes to make a roux. Gradually whisk in one cup of milk and stir until hot and creamy, making sure to whisk out any lumps. Gradually whisk in the remaining three cups of milk and cook, whisking, until steaming hot, about 5 minutes.

3. Add the fish and the cooked vegetables, and cook over moderate heat, stirring often, until the fish is cooked through and flaky. Season to taste with salt and white pepper.

And last but not least, my gift: Smart Mug for my lunch

28 Jan
One mug has my morning coffee and one mug has my soup for lunch!

One mug has my morning coffee and one mug has my soup for lunch!

I got the coolest gift this year for Christmas!

I wanted a mug that I could plug into my car AC adapter in order to reheat my coffee during the day. Oftentimes, I’ll leave the house for work with a mug of hot coffee, get to my destination in just a couple of minutes, and then when I come out an hour or so later, my coffee is now ice cold. Then I drive around all day, wishing I had that hot coffee.

This year, this was one gift I really wanted, a mug that would warm up my coffee. There are lots of them out there, but this one says “Tech Tools” on it and its official name is the Princess International PI-4121 Red Retro Smart Mug. You can get it here on Amazon.com.

I totally love my mug. This weekend I used it after church. Similar to a work day, I often leave the house to go to church, bringing my coffee in the car with me. Ten minutes later we get there and I sadly say goodbye to my coffee because I know that later when I come out, it’s going to be cold while we run our errands during the hour the kids are at CCD.

Not anymore. This Sunday, my coffee was still semi-warm when I got out to my car, but all I had to do was plug in my mug, flip the little switch on the cup and wait for it to hit about 100 degrees. I was golden. I enjoyed every sip of my coffee during our hour.

With every sip, I thought, “This is the coolest thing.”

But actually, it’s not even the coolest thing of all.

My friend Paula, of the blog My Soup For You, enlightened me to the fact that rather than keeping cookies in my purse and in my car for when I’ve missed lunch and am totally starving after being on the road all day, I could plan ahead just a little bit and make a soup that I could drink, such as her Creamy Lentil Soup, which I’ve linked over to just above. (If you remember, I don’t really love traditional lunches, such as sandwiches, so I never pack one. Plus, I’d rather eat cookies anyway.)

Paula said that now that I had this nifty mug, I could then put my soup into my mug, and flip the switch when I’m ready to eat.

Amazing!

And guess what: She was right!

A couple of weeks ago I did not have enough time to go home in between stories for lunch, so I packed our chicken and veggie chowder for the road. I had time to sit in my car and eat it though, so I took a spoon with me when I left the house.

I left one story and turned on my mug to heat up my soup, so that before I had to go into the next story I had time to eat my soup.  It made my day so much more enjoyable because I was not starving. I don’t like to go and buy food for lunch when I’m working unless I absolutely have to, so I was happy to have avoided that. I went from my second story to my third one with a full belly.

And then, I had my cookies for dessert.

This mug has gotten great reviews from others, and I hope that my experience continues to be as great as it already has been so far, because I really love being able to take soup on the road.

Quinoa Muffins

25 Jan
These muffins are hearty, healthy and taste great!

These muffins are hearty, healthy and taste great!

I’ve mentioned previously that I really love getting ideas from Pinterest. I first had quinoa at the White House when I had lunch there for the first Kids’ State Dinner. After that I was hooked on quinoa and I searched for lots of different ways of cooking it.

Today’s recipe was originally a Pinterest recipe for Martha Stewart Quinoa Muffins.

We had to healthify it a little bit. I’ve put the link to the original recipe above, and I’ll make notes to tell you how we changed the recipe to suit our needs.

Everyone in our house likes these muffins. I’ve made them twice now, once following the original recipe back in the fall, and once a few weeks ago with our modifications. If you haven’t cooked with quinoa, I encourage you to try it. I like having another ingredient option for my cooking and baking. The last time I used it, I cooked up a big batch and used some for the muffins, some for a side dish with dinner another night, and some I ate like oatmeal in the mornings for my breakfast. It’s quite the versatile ingredient.

QUINOA MUFFINS
INGREDIENTS

  • 1 cup quinoa, rinsed
  • 1/4 cup vegetable oil, such as safflower, plus more for pan (We used 1/4 cup plain, nonfat yogurt.)
  • 2 cups all-purpose flour, plus more for pan (We used 1 cup wheat flour, 1 cup white flour.)
  • 3/4 cup packed dark-brown sugar
  • 1 1/2 teaspoons baking powder
  • 1 teaspoon salt
  • 1/2 cup raisins (We used craisins for half the batch and chocolate chips for the other half the batch.)
  • 3/4 cup whole milk (We used skim milk.)
  • 1 large egg (We used egg substitute.)
  • 1 teaspoon pure vanilla extract
Splitting the batch in half allowed for using both craisins and chocolate chips as filling options.

Splitting the batch in half allowed for using both craisins and chocolate chips as filling options.

DIRECTIONS

  1. Preheat oven to 350 degrees. In a medium saucepan, bring quinoa and 1 cup water to a boil. Reduce to a simmer; cover, and cook until water has been absorbed and quinoa is tender, 11 to 13 minutes.
  2. Meanwhile, brush a standard 12-cup muffin pan with oil; (we used fat free nonstick spray) dust with flour, tapping out excess. In a medium bowl, whisk together flour, sugar, baking powder, salt, raisins, and 2 cups cooked quinoa; reserve any leftover quinoa for another use.
  3. In a small bowl, whisk together oil, milk, egg, and vanilla. Add milk mixture to flour mixture, and stir just until combined; divide batter among prepared muffin cups.
  4. Bake until toothpick inserted into the center of a muffin comes out clean, 25 to 30 minutes. Cool muffins in pan, 5 minutes; transfer to a wire rack to cool completely.

What’s For Dinner Wednesday: Sweet and Sour Turkey Kielbasa

23 Jan
We've been on quite the kielbasa kick lately!

We’ve been on quite the kielbasa kick lately!

Our family has always loved kielbasa. I can remember being in high school and buying “hot lunch” on the days that kielbasa was on the lunch menu.

Lately we’ve been buying it to use every once in a while for our meals, just to break things up, as long as it’s a lowfat turkey kielbasa, not the regular kind. All of our kids like it and it’s affordable. We find ours at Aldi’s.

Recently Don found a recipe for a lowfat sweet and sour sauce for chicken, on food.com, and he used it to make the kielbasa. It was delicious. We served it with a lowfat couscous and a side of broccoli. Everyone loved it, we’d make it again, and I’d make it for chicken too!

Today I share that recipe with you for my What’s for Dinner Wednesday post. It might make a healthier option for a Superbowl Sunday game dish in a couple of weeks, if you’d like to give it a try.

INGREDIENTS

1/4 cup chicken stock
2 stalks celery, diagonally sliced
1 onion, thinly sliced lengthwise
1 small red bell pepper, cut in strips
1 small green bell pepper, cut in strips
1/3 cup pineapple juice or 1/3 cup orange juice
2 tablespoons packed brown sugar (can use more)
2 tablespoons white vinegar
3 tablespoons soy sauce (or to taste)
1 tablespoon cornstarch
1 cup mangoes or 1 cup pineapple chunk
1 pinch salt and pepper

I love how pretty this dish looks. Don threw in the cherries as a treat for the kids, but I loved what it did for the colors in the dish too!

I love how pretty this dish looks. Don threw in the cherries as a treat for the kids, but I loved what it did for the colors in the dish too!

DIRECTIONS:
1
In a large skillet, bring chicken and stock to a simmer over med-high heat.
2
Add celery, onion and sweet peppers; cook, stirring often, for about 5 minutes, or until chicken is no longer pink inside, and veggies are almost tender-crisp.
3
Mix together the juice, brown sugar, vinegar and soy sauce until blended.
4
Stir into skillet; bring to a boil.
5
Cook, stirring for about 2 minutes, or until glossy and thickened.
6
Mix the cornstarch with a small amount of cold water and add to the simmering sauce to thicken.
7
Add mango or pineapple chunks (if using), salt and pepper; simmer for 2 minutes, or until heated through.

Read more at: http://www.food.com/recipe/extreme-low-fat-sweet-and-sour-skillet-chicken-78288?oc=linkback

Liz’s Chocolate Chip Cookies

18 Jan

One of the things I love about recipes is the fact that they often remind me of people, places, of times in my life. Today’s recipe reminds me of all of those things.

When we eat our cookies, I'll be thinking of Liz!

When we eat our cookies, I’ll be thinking of Liz!

A while back we lived out of state for a few years and conveniently enough, we were in the neighboring state to where my brother and his roommates were living at the time. We were less than an hour away from them, which was fun.  Liz was one of the roommates, a friend of his from college, and a wonderful person. In fact, all of his roommates and friends were wonderful, but today’s recipe is from Liz, so today we focus on her.

Technology being what it is, we’ve been able to stay in touch with Liz and share the events of our lives with each other, which is so great. She is still living nearby, just a few hours from here, and now she has two children of her own.  She’s a fan of The Whole Bag of Chips, and recently she sent me today’s recipe. She knows how much I love cookies and she also knows that I love cookie batter. She specifically sent me this recipe because there were no eggs in the batter, so it makes it safe to taste.

I love that this recipe replaces some of the sugar with honey. It also lent itself well to being a low-fat recipe between the lack of eggs (great for people with egg allergies) and the fact that I could replace the butter with my new go-to, I Can’t Believe It’s Not Butter. It may just be my new favorite chocolate chip cookie recipe for all of those reasons. This time around, I even replaced half of the white flour with wheat flour, just to healthify it even more. Every little bit helps!

Each Friday we spend a chunk of our afternoon with my Grandma Rose, the girls’ great-grandmother. I’ve begun bringing along a low-fat or non-fat snack for our dessert, to make things easier for her and for us. At 91 years old, she puts out quite a spread, and I’m glad I can help out a little bit. Today we’ll be bringing along a batch of Liz’s chocolate chip cookies for everyone to enjoy.

These make a great long-weekend baking project too, so give them a try this Martin Luther King Weekend!

LIZ’S CHOCOLATE CHIP COOKIES
INGREDIENTS

1 1/4 cups flour (I did 3/4  cup white flour and 1/2 cup wheat flour)

1 tsp. baking soda

1/8 tsp. salt

1/2 cup butter (I used I Can’t Believe It’s Not Butter)

1/4 cup sugar

1/2 cup honey

1 cup chocolate chips

1 teaspoon vanilla
IMG_9153DIRECTIONS

Combine all ingredients and mix well.

I used my small Pampered Chef scoop to put them onto my ungreased trays.

Bake at 300 degrees for 18-20 minutes (18 was perfect for my oven.)

ENJOY!

Grandma Rose

We enjoy being able to spend some time with Great Grandma Rose! This photo was taken a year or so ago, at her house on her 90th birthday.

What’s For Dinner Wednesday: Eggplant Rollatini

16 Jan
Five thumbs up! Definitely a keeper for our family!

Five thumbs up! Definitely a keeper for our family!

It’s funny how things happen.

A couple of months ago Don mentioned to me that he’d seen a cooking show that featured a dish we never have had before but that he thought we’d like: Eggplant Rollatini.
I had never heard of it but from the way he described it, it certainly sounded good.

And then literally within the next day or so I received my next issue of All You magazine. I love that magazine because of all the recipes and all of the coupons.

Wouldn’t you know it, one of the featured recipes was for Eggplant Rollatini?! Crazy, right?

I ripped it out and placed it on our kitchen cabinet, the catch-all place for me to stick recipes. Well, one of many catch-all places I stick recipes.

Jump ahead through December and all of our fat-free recipe research, past the holidays and I’d totally forgotten about Eggplant Rollatini.

Last week I took a closer look at the recipe and realized that it would fit in perfectly with our newly overhauled menu plan. Turns out, Eggplant Rollatini is super healthy and very easy to make nonfat.

This past weekend we tried it out. Now when I say “we” I really mean Don.  He cooked it.

His first impression was that the recipe was very labor-intensive, which is not really tops on my list for a keeper recipe. His words were something to the effect of,  “This better be good, it was a lot of work.”

It was DELICIOUS.  If you like Eggplant Parmesan and you like Lasagna, this was a combination of the two. It was wonderful and Don declared that it was well-worth all of the work that went into it. He said he’d definitely make it again. All five of us gave this a thumbs up.

Therefore, I thought I’d share the recipe from All You with you today. It makes a good Sunday afternoon meal (which is when we had it) when you have the time to make something more labor intensive, definitely not a 30 minutes to the table type of dinner for a week night though.

The recipe lists the prep time as 45 minutes, standing time 15 minutes and cooking time as 45 minutes, so you can see what he meant when he said it was a lot of work.

Well worth it though, I promise.

The finished product!

The finished product!

EGGPLANT ROLLATINI
INGREDIENTS

4 medium eggplants

salt and pepper

1/4 cup olive oil

one 10 ounce box frozen chopped spinach, thawed and squeezed dry

3 cups part skim ricotta (ours is non-fat)

3 cloves garlic, minced

2 large eggs beaten (Don only used one, but they were extra large eggs)

1 1/2 cups shredded part skim mozzarella (we used non- fat)

3/4 cup grated Parmesan

one 24 ounce jar of marinara sauce (also fat free)
DIRECTIONS

1 Slice ends off eggplants (Don peeled ours also). Cut eggplants lengthwise into 1/4 inch thick slices, discarding the ends. You should get roughly 16 slices, total. Lay slices on a rimmed baking sheet and sprinkle both sides liberally with salt. Let stand for 15 minutes, then rinse salt off under cold running water and pat slices dry.

2 Preheat oven to 400 degrees. Brush both side of eggplant slices with olive oil and place in single layers on two baking sheets. Roast for 15 minutes until tender, turning eggplant slices over halfway through. Let cool on sheets on wire racks until cool enough to handle.

3 In large bowl, combine spinach, ricotta, garlic, eggs, 1/2 cup mozzarella and 1/2 cup Parmesan. Season with 1 tsp. salt and 1/2 tsp. pepper. Mist a 9×13 baking dish with cooking spray. Spread 1/2 cup of sauce over the bottom of dish. Divide ricotta mixture among eggplant slices, using about 1/3 cup for each, spreading it down the center. Roll up slices and place seam-side down in baking dish. Top with remaining sauce and sprinkle with remaining mozzarella and Parmesan.

4 Cover baking dish with foil and bake for 30 minutes. Remove foil and bake until browned and bubbling, about 15 minutes longer. Let cool for 10 minutes until serving.

Whole Wheat Snickerdoodles

11 Jan
I love making and eating Snickerdoodles and I was glad we didn't need to give them up this Christmas!

I love making and eating Snickerdoodles and I was glad we didn’t need to give them up this Christmas!

You all I know how much I love a good cookie.

A few years back I discovered a recipe for Snickerdoodles and ever since, I have used them on my trays for Christmas.

This year, before Christmas even came, way back in October, I found a recipe on one of my favorite blogs, Budget Gourmet Mom, for Whole Wheat Snickerdoodles.

I knew even back then, that I’d be trying out this recipe for my cookie trays this year.

Little did I know then, that I’d be overhauling our entire cookie tray plan as well. Thankfully, these cookies were easy to adapt to the lowfat diet we needed to incorporate.

Here is the recipe from the Budget Gourmet Blog, along with any notes or changes I might’ve made along the way to fit our needs. Snickerdoodles are great any time of year, and they’re a great recipe for involving your kids in the kitchen, so give this new recipe a try!

At Christmas time I need as much help as I can get so it's all hands on deck for cookie baking!

At Christmas time I need as much help as I can get so it’s all hands on deck for cookie baking!

BUDGET GOURMET MOM
WHOLE WHEAT SNICKERDOODLES
INGREDIENTS

  • 1/2 cup butter, softened (I used I Can’t Believe It’s Not Butter sticks for my baking this year.)
  • 3/4 cup packed brown sugar
  • 1 large egg
  • 1 teaspoon vanilla
  • 1 1/2 cups whole wheat flour
  • 1/2 teaspoon baking soda
  • 1/2 teaspoon cream of tartar
  • 1/4 teaspoon salt
  • 2 tablespoons granulated sugar
  • 1/2 teaspoon ground cinnamon

DIRECTIONS

Preheat oven to 375°.

In a medium bowl cream the butter and brown sugar.

Add the egg and vanilla and mix until combined.

In a separate bowl sift together the flour, baking soda, cream of tarter and salt.

Add to the creamed mixture and stir until it forms a dough. It helps to work it with a rubber spatula until it comes together.

In a small bowl mix the additional sugar and cinnamon.

Form tablespoon sized balls, roll in the cinnamon and sugar,  and place on a baking sheet 2″ apart.

Press slightly with the bottom of a cup (we used our fingers) and bake 8-10 minutes.

Rolled cookies are particularly great for kids who want to help out.

Rolled cookies are particularly great for kids who want to help out.

Not just rolling, but tasting is another favorite job for my little helpers.

After rolling and placing on the trays, pat them down slightly.

What’s for Dinner Wednesday: Oven Fried Chicken

9 Jan
This new chicken recipe got five thumbs up!

This new chicken recipe got five thumbs up!

As we’ve gone along in our search for delicious low-fat meals, we have been pretty happy with many of the ones we’ve found. Today’s is again from the South Beach Diet Cookbook, a cookbook that I’ve tabbed over and over again, since checking it out of the library last month.

This is listed as a Phase II meal, but we’re just eating from all over the book. We also tried a Phase I side dish, mashed cauliflower. I liked it, but it did not get the overwhelming thumbs ups that the chicken got. I liked the cauliflower so much that I made it again this week but I did not get any additional thumbs this time. I might be making it just for me.

Even Alex, who has chicken on her Do Not Like list, loved this chicken and asked when I would make it again. Most likely that’s because I let her have her favorite dipping sauces to go with it: ketchup and honey. It’s her own version of bbq sauce. Either way I was thrilled that she liked it, and even had two pieces.

Here is the recipe, I hope you enjoy it as much as we did!

OVEN FRIED CHICKEN WITH ALMONDS
INGREDIENTS

1 cup whole wheat bread crumbs

1/4 cup (one ounce) grated Parmesan cheese

1/4 cup finely chopped almonds (You could probably leave this out if you don’t have them but I liked it in. I used a Pampered Chef food chopper to chop my slivered almonds from Aldis.)

2 tablespoons chopped parsley

1 clove garlic, crushed

1 teaspoon salt

1/4 teaspoon dried thyme

Pinch of ground black pepper

1/4 cup extra virgin olive oil

2 pounds boneless, skinless chicken breasts, pounded to 1/2″ (I used chicken tenderloins.)

Sprig Italian parsley, for garnish

DIRECTIONS

Preheat oven to 400 degrees.

In medium bowl, combine the bread crumbs, cheese, almonds, parsley, garlic, salt, thyme, and pepper. Mix thoroughly.

Place the oil in a shallow dish. Dip the chicken first in the oil then dredge in the crumb mixture.

Place the chicken in a shallow baking pan.

Bake for 25 minutes or until a thermometer inserted in the center of a piece registers 170 degrees F and the juices run clear.  (Do not turn the chicken during cooking.) Garnish with parsley.

A new dessert recipe for you, and it’s healthy, to boot!

4 Jan
These yummy mini cheesecakes used fat free fillo dough, fat free, sugar free pudding and fat free whipped cream on top!

These yummy mini cheesecakes used fat free fillo dough, fat free, sugar free pudding and fat free whipped cream on top!

Oftentimes when you have an allergy or a dietary issue, eating out or eating some place that is not the comfort of your own home is tough. We’ve always had those issues, but never knew exactly what was causing them.

Now that our family knows that staying away from fats is the key to avoiding a severe stomachache for one of our family members, we worked very hard during the holidays to provide options for eating as close to fat free whenever we could, including when we went to someone else’s house. We also worked hard not to have completely separate choices for our family, but rather to make things everyone could enjoy.

This New Year’s Eve in preparing to go to our friends’ house for the festivities, Caroline and I came up with a great dessert recipe that was extremely healthy, meeting our fat free requirements, and delicious. It was an instant hit that night and I’d definitely make these again.

I had seen the little fillo dough tart shells on different websites, always filled with something cute, and one day they were on sale, 3 boxes for $5 at the store, so I grabbed them and put them in my freezer, knowing I could somehow make use of them.

Earlier this fall, on one of my favorite blogs, Budget  Gourmet Mom, I’d seen a recipe for a low fat pumpkin cheesecake parfait that I’d never gotten the chance to make, but the recipe had alerted me to the fact that Jello makes a fat free, sugar free cheesecake pudding mix. At the time I didn’t need to know that, but now, that information has come in pretty handy.

I picked up a few of these for my pantry, and they've come in handy this past month!

I picked up a few of these for my pantry, and they’ve come in handy this past month!

On one of my trips to the store, I was intent on finding various fat free dessert and snack options and I saw the pudding there, so I grabbed a few boxes to have on hand.

The side of the box has traditional pudding directions and then directions for making a cheesecake with the pudding, using a graham cracker crust.

So here is what I decided to do to create my delicious New Years Eve desserts:

I made one box of the Jello Cheesecake pudding mix using 1 3/4 cups of 1% milk. That is the amount of milk needed for a cheesecake, NOT for the regular pudding. I let that set a few minutes (it sets fast, in less then ten minutes) and then I used my Pampered Chef small scoop to scoop a little bit into the little fillo shells. One box of pudding filled 15 fillo tarts. I did not want to bring more than that so I used the leftover pudding, putting it into cups for future snacks in the days that followed. I was able to get two small cups of extra pudding in addition to the shells.

I left those in the fridge until we were ready to leave that night.

Getting the hang of shaving the chocolate and having it land on top was tricky but eventually we got it!

Getting the hang of shaving the chocolate and having it land on top was tricky but eventually we got it!

I took with me an Extra Dark Chocolate bar by Lindt that had very conveniently showed up in my stocking for Christmas, a grater like I’d use for cheese, and a can of Reddi Whip fat free whipped cream. We were also bringing a fruit tray (with a great dip which I’ll share the recipe for on another day) that had strawberries on the tray.

When it was time for dessert, people had the option to add whatever they wanted to their little tarts of cheesecake. Some added the berry and cream with the chocolate shavings (I was one of those people) and some did not.

Shaving the chocolate over the individual shells was tricky, as you had to figure out where the shavings were going to land. Initially they were landing everywhere til I got the hang of it. Had I shaved it all over the entire set of shells first, making them all exactly the same, that would have worked out perfectly, but I wanted to give everyone their options so I did them individually.

The great things about this recipe were:

It was inexpensive, fast and easy.

It was delicious.

It was versatile so people could take or leave whatever part of it they wanted to or leave it in tact.

It was healthy.

Even without the shells, you could do something similar with it in the future; a parfait or just a bowl of pudding with berries, with or without cream and chocolate.

And, it looked festive for the holidays.

This recipe gets huge thumbs up and I’d definitely make it again! I am especially proud because in general I am not an experimenter. I am a recipe follower to the T. So the fact that I sort of created a dessert is thrilling to me. The fact that everyone liked it…even more thrilling.

Give it a try for your next gathering and see what you think!