Archive | dessert RSS feed for this section

Fun Friday: Hot Fudge Sundae Cake

31 Jan
My mom used to make this all the time when we were growing up, but I'd forgotten all about it!

My mom used to make this all the time when we were growing up, but I’d forgotten all about it!

Today’s recipe for Fun Friday truly is a fun recipe! It’s fun to make and fun to eat. Like many recipes, it’s got a touch of science to it, and I always love recipes that show the kids something very cool. This one definitely does that as it creates a soupy, fudgy sauce underneath a crisp yet cake-like top.

The funny thing about this recipe is it’s one I grew up eating all the time. It was a go-to recipe in our house growing up. However, it’s been so long since I’ve made it myself, that none of my kids (the oldest being 14) even remembered ever having it.

I was recently reminded of it when a friend sent me a link to a similar recipe; she thought it was something I’d like. She was right, I love it! Seeing the link jogged my memory and I went to my oldest cookbook, a Campbell’s Soup photo album type of recipe binder and I pulled out my mom’s recipe for Hot Fudge Sundae Cake.

Elizabeth came into the kitchen, as she often does, and asked if she could help me. And, as she often does, she made almost the entire thing herself, with just some direction from me. It’s a great recipe for kids to learn to make themselves.

First group of dry ingredients get mixed right in the baking dish!

First group of dry ingredients get mixed right in the baking dish!

This recipe is a favorite because it’s a one-dish recipe. You make the entire thing in an 8×8 or 9×9 square baking dish. I used a glass Pyrex dish. You can mix the ingredients in four steps: dry, wet, dry, wet, and then you’re done!

Below is my mom’s recipe for Hot Fudge Sundae Cake, just as I copied it off her recipe card and put it into my first cookbook all those years ago. I hope you’ll give it a try this weekend and you too, will see what a fun, easy recipe it is!

INGREDIENTS and DIRECTIONS

                Step 1:  Preheat oven to 350 degrees.

 In an ungreased 9×9 square baking dish mix together the following ingredients with a fork:

1 cup flour

¾ cup sugar

2 TBL. Baking cocoa

2 tsp. Baking Powder

¼ tsp. salt

Spread evenly in baking dish.

                Step 2: In a two-cup measuring cup mix together the following ingredients and pour over first five ingreidents.

½ cup milk

2 TBL canola oil

1 tsp. vanilla

Spread batter evenly in baking dish.

Before the water goes on top, this is what your baking dish looks like.

Before the water goes on top, this is what your baking dish looks like.

  Step 3: Sprinkle the following two ingredients over batter:

1 cup brown sugar packed

¼ cup baking cocoa

                Step 4: Pour the following over all:

1 ¾ cup Hot Water

Bake 40 minutes at 350 degrees. Let stand15 minutes and serve.

Spoon sauce over ice cream if desired.

The secret is in the sauce. Underneath the crispy chocolate cake is a fudgy sauce to top your ice cream and cake!

The secret is in the sauce. Underneath the crispy chocolate cake is a fudgy sauce to top your ice cream and cake!

Fun Friday: Paula’s Whole Bag of Chips Bars

24 Jan
These were delicious, especially when topped with ice cream!

These were delicious, especially when topped with ice cream!

If you’re a longtime reader, you know that I often reference my friend Paula’s blog, My Soup for You. It’s a great blog and it’s so much more than soup!

Most recently I was honored when I saw that Paula had posted a new dessert recipe on her blog, and lo and behold, she named it after my blog! When I saw the post for The Whole Bag of Chips Bars, I was so flattered, and of course I had to make Paula’s recipe right away!

The recipe is a healthier dessert treat, but it includes of course, The Whole Bag of Chips! It also uses I Can’t Believe It’s Not Butter, an ingredient I now use instead of butter in all of my baking, and white wheat flour, another staple in our pantry here at home.

I hope you’ll head on over to My Soup for You and take a look at all of Paula’s recipes, but most especially The Whole Bag of Chips Bars! She wrote up the nicest post, you’ll want to read it!

Here is her recipe, just as she has it on her blog.

Enjoy!

Whole Bag of Chips Bars
1 cup I Can’t Believe It’s Not Butter
2 eggs
1 cup sugar
1 1/2 tsp vanilla
2 1/2 cups white wheat flour
1 tsp baking soda
1/2 tsp salt
splash of milk
A twelve ounce bag of baking chips of your choice – I used semi-sweet chocolate

1. Combine butter, sugar, eggs, and vanilla and mix until nice and velvety and smooth
2. Add the salt and baking soda to the flour, and add that to the sugar etc a little bit at a time because you probably will still have the mixer on and you don’t want to make a mess.
3. Add in a splash of milk and mix thoroughly.
4. Stir in the WHOLE BAG OF CHIPS!
5. Transfer batter to a 9×13 baking pan sprayed well with cooking spray.
6. Bake at 350 for at least 40 minutes. These are very thick bars and take a long time to bake.

Fun Friday: Chocolate Chip Zucchini Cake

10 Jan
I was actually shocked at how much everyone liked this cake!

I was actually shocked at how much everyone liked this cake!

Last week we had some very cold weather here; colder than our normal winter weather tends to be. When the weather gets cold, the first thing I think of doing is baking. I like the warmth of the kitchen when the oven is on, and the warmth of the atmosphere in the house when something delicious is baking as everyone is coming home.

On this particular day, I wasn’t sure what I wanted to make for an after school snack but I happened to be thumbing through an old issue of “Food Network Magazine” from July/August 2013. Being a summertime issue of the magazine, it was featuring recipes with zucchini; a garden staple for many.

It just so happened that I had two zucchinis that I’d bought to use for Christmas dinner and hadn’t used. This recipe would be perfect for making use of at least one of my zucchinis. Even better, it wasn’t just any zucchini cake, it was a *chocolate* zucchini cake! When I looked at the ingredients I actually had them all and it looked rather healthy, considering that it was a cake. I knew I could healthify it even more by making the flour a mix of white and wheat.

I decided to try it.

Well, it was d.e.l.i.c.i.o.u.s!!!!!!  Everyone loved it! They enjoyed it with a nice, cold glass of milk, which made me even happier. I’d definitely make it again, and I think I was a little bit shocked at just how rave the reviews actually were.

The only thing that I didn’t love about the recipe was that it used a lot of bowls. Not having a ton of work space, I prefer recipes that don’t need a ton of space. With so many bowls, this one took up some space. However, it was so delicious, it was well worth the extra bowls!

I am posting the recipe below, just as it appears in their magazine and on their website.

Besides changing the flour to include both wheat and white, I used a bigger baking dish and therefore doubled the ingredients for the frosting so that it would frost the whole cake.

Next time you’re looking for a healthier cake recipe, I recommend this one!

Thanks to “Food Network Magazine” for sharing such a great recipe!!

Look at that healthy, secret ingredient in the chocolate cake batter!

Look at that healthy, secret ingredient in the chocolate cake batter!

FOOD NETWORK MAGAZINE’S CHOCOLATE ZUCCHINI CAKE

IngredientsUnsalted butter, for the pan (*I used a fat free cooking spray instead*)
1 1/2 cups all-purpose flour, plus more for the pan (*I used a mix of 1/2 cup wheat, 1 cup white flour*)
1/2 cup plus 1/3 cup semisweet chocolate chips
1/4 cup unsweetened cocoa powder (not Dutch process)
1/2 teaspoon kosher salt
1/2 teaspoon baking soda
1/4 teaspoon ground nutmeg or allspice (*I went with nutmeg*)
1 1/4 cups sugar
1/2 cup plus 1 teaspoon extra-virgin olive oil (separated)
2 large eggs
1/2 teaspoon vanilla extract
1 medium zucchini, grated and squeezed dry
1 teaspoon honeyDirectionsPreheat the oven to 350 degrees F. Butter the bottom and sides of a 9-inch-square cake pan (I used 11×7). Dust the pan with flour, tapping out the excess.Toss 1/2 cup chocolate chips with 1 tablespoon flour in a small bowl. Whisk the remaining flour, the cocoa powder, salt, baking soda and nutmeg in a medium bowl; set aside.Beat the sugar, 1/2 cup olive oil, the eggs and vanilla in a large bowl with a mixer on medium speed until smooth and pale, about 3 minutes. Add the flour-cocoa mixture; beat on low speed until combined, about 2 minutes (the batter will be thick). Add the zucchini and beat until combined, about 2 more minutes. Fold in the flour-coated chocolate chips with a wooden spoon.Transfer the batter to the prepared pan and bake until a toothpick inserted into the center comes out clean, 30 to 35 minutes. Transfer to a rack and let cool completely.

Make the glaze: Combine the remaining 1/3 cup chocolate chips, 1 teaspoon olive oil and the honey in a microwave-safe bowl. Microwave on medium-high power in 30-second intervals, stirring, until the chocolate is melted. Spread over the cake, then cut into pieces. (*I doubled this glaze recipe*)

German Apple Cake

18 Nov
German Apple Cake is a recipe I loved, growing up.

German Apple Cake is a recipe I loved, growing up.

ORIGINALLY POSTED OCTOBER 17, 2011

**I decided to re-post this today, November 18, 2013 because I made it this weekend for our friends who came for dinner. Making it reminded me of this post, so I thought I’d run it again for my newer followers who may have missed it.**

Growing up, this was one of my favorite recipes that my mom made. I have one specific memory also, of a time (the ONE time) when my mom was sick and my dad helped us make this recipe for her. I still think of that each time I see the recipe or eat this cake.

As with all of my recipes it’s super easy and of course, super delicious.

What’s your favorite apple recipe for fall?

Ingredients:

3 c. chopped or shredded apples

1 c. oil

2 c. flour

1/2 c. choc. chips (or a few more if you love ’em as much as I do!)

1 tsp. baking soda

1 tsp. cinnamon

pinch of salt

2 eggs

2 tsp. vanilla

Directions:

Mix all ingredients together by hand in large bowl.

Grease and flour bundt pan.

Pour batter into pan.

Bake 45 minutes at 350 degrees.

Cool 1/2 hr. before removing from the pan.


Monday Musing: Celebrating the difference a year can make

21 Oct
This cake signified more to me than just a birthday cake.

This cake signified more to me than just a birthday cake.

Caroline is about to be 14.

Her birthday is next weekend, but we celebrated with our family this past weekend.

As I was thinking about her upcoming birthday, planning out my menu and thinking about a birthday cake, I was struck by the difference a year can make.

One year ago, for her 13th birthday, we were in a very different place. She hadn’t been feeling well for months, and she was really quite sick most of the time, but we weren’t sure why.

That birthday was a rough one. She’d been to the hospital just a week or so before. She was seeing so many doctors, having lots of testing and trying to go to school each day even though she was really not herself.

She was such a trooper, and it was an intense time for us as a family; very stressful and scary for a while there.

Just before Christmas last year, it was finally determined that it was the fat in foods that was making her so sick, each and every day.

We went to town, immediately revamping our menus from top to bottom, changing our diets to make as much of what we ate low fat or non fat, as much as possible; working hard to make her well again, and it worked. It took many months, literally, for her to begin to feel well more times than she didn’t, and it’s been many weeks since she’s felt sick now that we’ve got our eating habits down pat.

One year later, here we were again, ready to celebrate another one of her birthdays.

As I Googled “Low Fat Nutella Cakes” trying to find a fun, but low fat birthday cake for her celebration, it hit me how far she’s come and how well she is, and how healthy she looks, compared to last year.

I found a great recipe, different than the birthday cakes we used to make, but good for her and with just enough sweetness to make it delightful, and I made it this weekend.

To me, this cake signified more than just a birthday. To me, it stood for how far we’ve come as a family over the past year, and specifically how well she is. In my mind, I was celebrating the difference that a year has made in her life, and in the life of our family. Last year we were in such a dark place at this time and this year, everyone is healthy and happy.

I take nothing for granted, and I celebrate every blessing. This weekend was a bigger celebration than just a 14th birthday, at least for me. So as I share this cake recipe with you, a healthy, low fat recipe from Turntablekitchen.com, know that it signifies so much more than just a cake recipe. I’m sharing with you a piece of our celebration of good health, happiness, and blessings.

Happy 14th Birthday Caroline! What a difference a year makes!

Happy 14th Birthday Caroline! What a difference a year makes!

Here is the recipe, just as it appears on Turntable Kitchen. Thanks to them for sharing a recipe that was healthy and delicious!

**Pay attention to the recipe, as the ingredients need to be mixed in a certain order, different than the way they are listed. For our own purposes, we used I Can’t Believe It’s Not Butter, and 1/3 less fat cream cheese. Using the low fat cream cheese meant we needed to add a bit more confectioner’s sugar to the top frosting, to make it sweet enough, and about a teaspoon of vanilla, to taste.

Banana Cake with Nutella and Cream Cheese Frosting

*serves 6-8

 For the cake:

 1 1/4 cup of all-purpose flour

1 1/4 cup of whole wheat flour

1 teaspoon of vanilla extract

1 tablespoon baking soda

1 pinch salt

1/2 cup unsalted butter

1 cup white sugar

3/4 cup light brown sugar

2 eggs

4 ripe bananas, mashed

2/3 cup buttermilk

For the Nutella frosting:

3 heaping tablespoons of Nutella

1/2 cup of powdered sugar

3 1/2 ounces of cream cheese, at room temperature

1/4 cup of butter

For the cream cheese frosting:

1/2 cup of powdered sugar

3 1/2 ounces of cream cheese, at room temperature

1/4 cup of butter

1. Preheat your oven to 350 degrees F. Butter two 8-inch round cake pans and dust them with flour.

2. Sift the flours, baking soda and salt into a small bowl and set aside.

3. Combine the butter and sugars in the bowl of a stand mixer and beat until light and fluffy. Beat in the eggs until incorporated. Next, add the mashed bananas, vanilla and buttermilk. Beat until incorporated. Add about half of the flour mixture and beat until combined. Add the rest of the flour mixture and beat until just incorporated.

4. Evenly divide the batter between the two cake pans and bake for about 30 minutes (until a toothpick inserted into the center comes out clean). Cool the cake layers to room temperature.

5. To prepare the Nutella frosting, combine all of the ingredients in the bowl of a stand mixer and beat until fluffy. Set aside.

6. Repeat step five (omitting the Nutella) to make the cream cheese frosting.

7. To assemble: place one cake layer flat side up on a serving platter. Frost evenly with the Nutella frosting. Top with the second cake layer. Spread the cream cheese frosting evenly over the top.

– See more at: http://www.turntablekitchen.com/2011/11/banana-cake-with-nutella-and-cream-cheese-frosting/#sthash.GLbbjQCw.dpuf

Banana Cake with Nutella and Cream Cheese Frosting
*serves 6-8

For the cake:

1 1/4 cup of all-purpose flour
1 1/4 cup of whole wheat flour
1 teaspoon of vanilla extract
1 tablespoon baking soda
1 pinch salt
1/2 cup unsalted butter
1 cup white sugar
3/4 cup light brown sugar
2 eggs
4 ripe bananas, mashed
2/3 cup buttermilk

For the Nutella frosting:

3 heaping tablespoons of Nutella
1/2 cup of powdered sugar
3 1/2 ounces of cream cheese, at room temperature
1/4 cup of butter

For the cream cheese frosting:

1/2 cup of powdered sugar
3 1/2 ounces of cream cheese, at room temperature
1/4 cup of butter

1. Preheat your oven to 350 degrees F. Butter two 8-inch round cake pans and dust them with flour.
2. Sift the flours, baking soda and salt into a small bowl and set aside.
3. Combine the butter and sugars in the bowl of a stand mixer and beat until light and fluffy. Beat in the eggs until incorporated. Next, add the mashed bananas, vanilla and buttermilk. Beat until incorporated. Add about half of the flour mixture and beat until combined. Add the rest of the flour mixture and beat until just incorporated.
4. Evenly divide the batter between the two cake pans and bake for about 30 minutes (until a toothpick inserted into the center comes out clean). Cool the cake layers to room temperature.
5. To prepare the Nutella frosting, combine all of the ingredients in the bowl of a stand mixer and beat until fluffy. Set aside.
6. Repeat step five (omitting the Nutella) to make the cream cheese frosting.
7. To assemble: place one cake layer flat side up on a serving platter. Frost evenly with the Nutella frosting. Top with the second cake layer. Spread the cream cheese frosting evenly over the top.

– See more at: http://www.turntablekitchen.com/2011/11/banana-cake-with-nutella-and-cream-cheese-frosting/#sthash.6Elj5jvc.dpuf

Monday Musings: Everything and the kitchen sink

14 Oct

MP910221049It’s October.

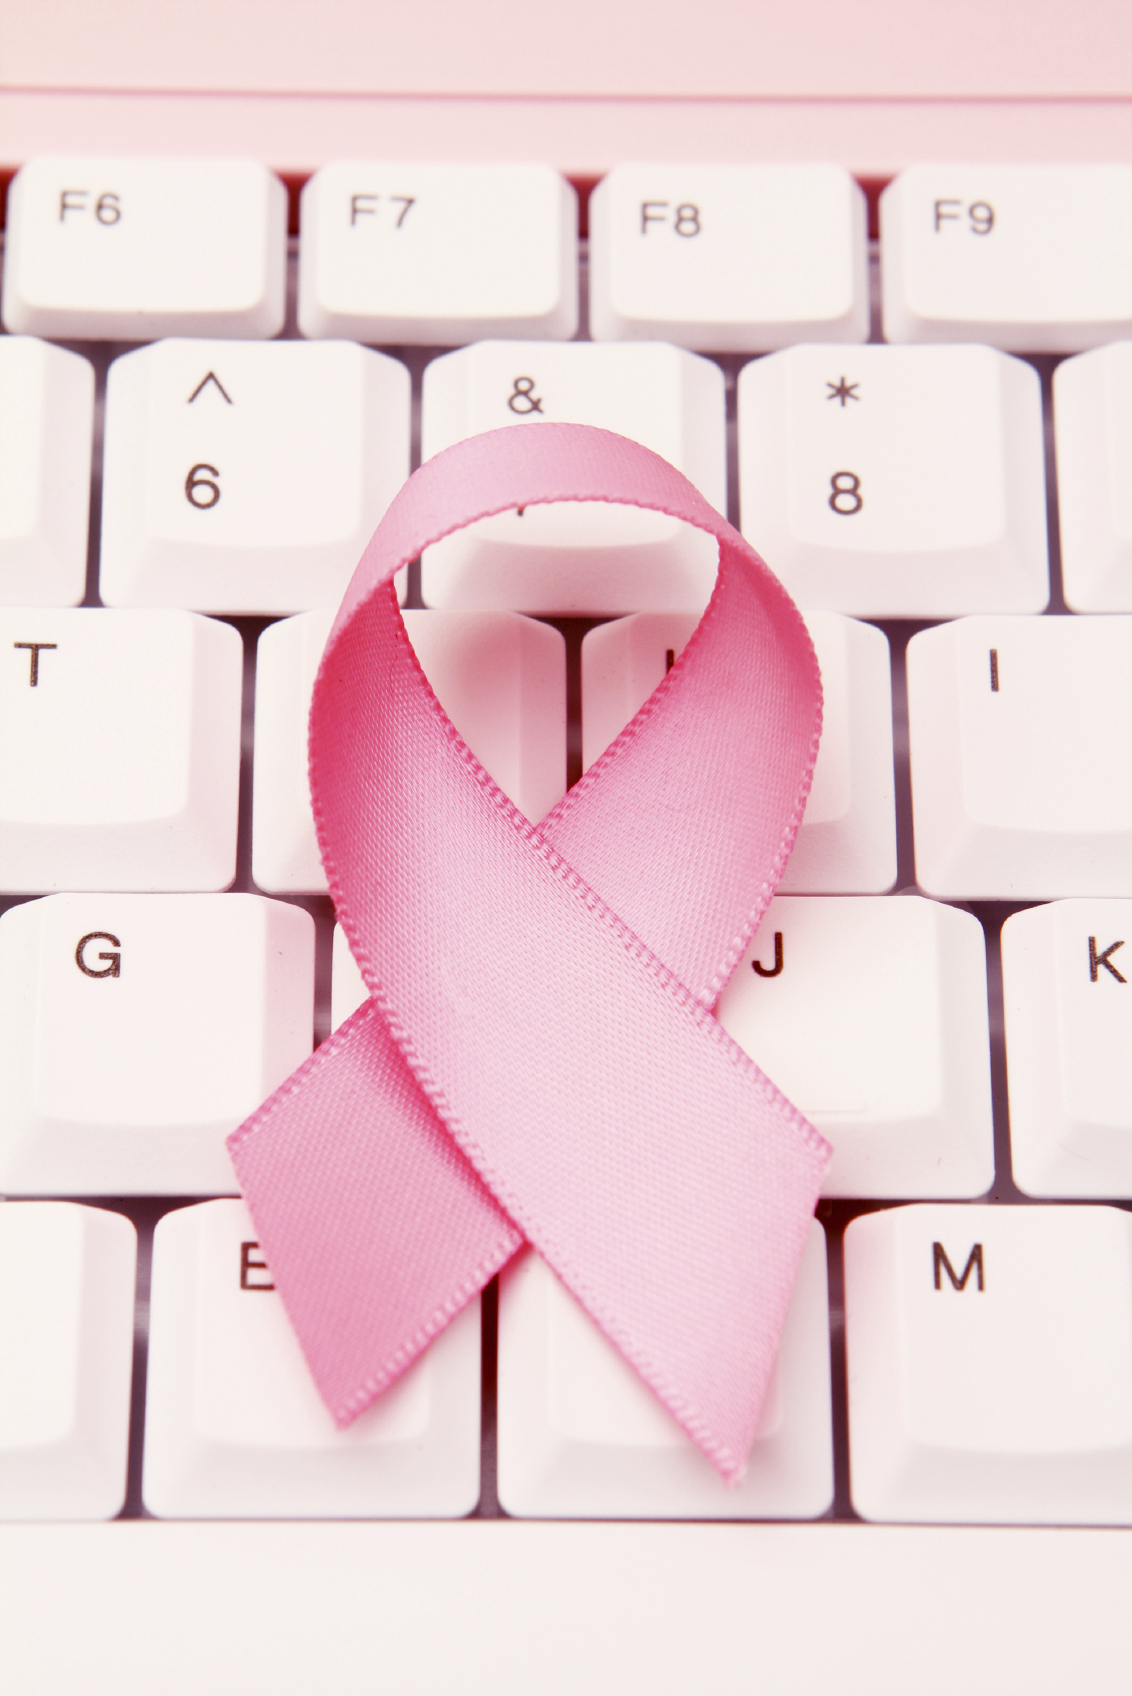
It’s Breast Cancer Awareness Month.

A friend was just diagnosed. It’s a scary time.

I have my mammogram next week. I don’t want to think about it.

I’ve actually been waiting for October to post a book review from a book I read this summer that I absolutely loved and goes well with this month’s honoring of those who have been affected by breast cancer. We read it for our book club book in July. I’ve waited a long time.

I had a great snack idea to share that went along with it too, which I wanted to write about and to tell you the story behind, as well.

But, I also struggled with this post because I believe in honesty and being forthcoming and because part of the story that goes along with the book and the snack isn’t pretty, but I can’t not add it in or I’d feel dishonest.

I never want people to think that it’s all rainbows and roses over here at our house all the time, with kids and parenting and all that goes along with it. I share lots of great ideas and lots of great and amazing happenings but I did want to share this too, because it’s part of daily life, it’s real.

So read on, for the review, the snack and the story. Today’s post will have everything and the kitchen sink for you.

******************************************************************************************************************

The Review:

This summer for our book club, we chose to read “All You Could Ask For” by Mike Greenberg. I’ve linked to his website here for the book rather than showing the cover of the book because I don’t want to use their image without permission.

It was one of the best books I’d read recently. I absolutely loved the story of the women characters in the book, joined together by the common thread of breast cancer. It featured a social media component, as the women first “meet up” online. You know how much I love social media, so I enjoyed that aspect of the book as well. I read the book every second I had the chance. I didn’t want to put it down, and when it ended, I was sad to see it go. I wanted to keep on reading, keep on following the story. I loved, loved, loved it.

I was amazed that the author, Mike Greenberg of the famed ESPN sports talk show had written the story. It had such a female perspective to it, such insight into the minds of how women, girls, think. Lots of girl-talk, chick-flick type of behavior. That part of reading the book, thinking of how he could’ve written it as a male author, was enough to keep me turning the pages alone!

The story behind the great snack idea:

So this summer, as we often do, we were taking a family walk after dinner one night. As we walked, I was slightly behind with my younger two daughters, while Don and Caroline were up ahead. We were walking and talking and I said to them, “Girls: I need to come up with an idea for what to bring to my book club this week. It’s a pot luck. I need either an appetizer or a dessert. Help me out.”

Total concentration.

Total concentration.

Elizabeth answered me, “Well Mommy, what was the book you read about?”

I gave her the cliff notes version, telling her the basic story line about the characters and breast cancer and social media.

“That’s easy,” she said. “Make cupcakes with white frosting and make pink ribbons on them!”

I was shocked. What a great idea! I loved it. I told her I loved it and promised that yes, I’d make the cupcakes and let them frost and decorate them since it was her idea. And I’d be sure to tell everyone in the book club that the amazing pink ribbon cupcakes were her idea.

Yes, yes, yes.

She was thrilled.

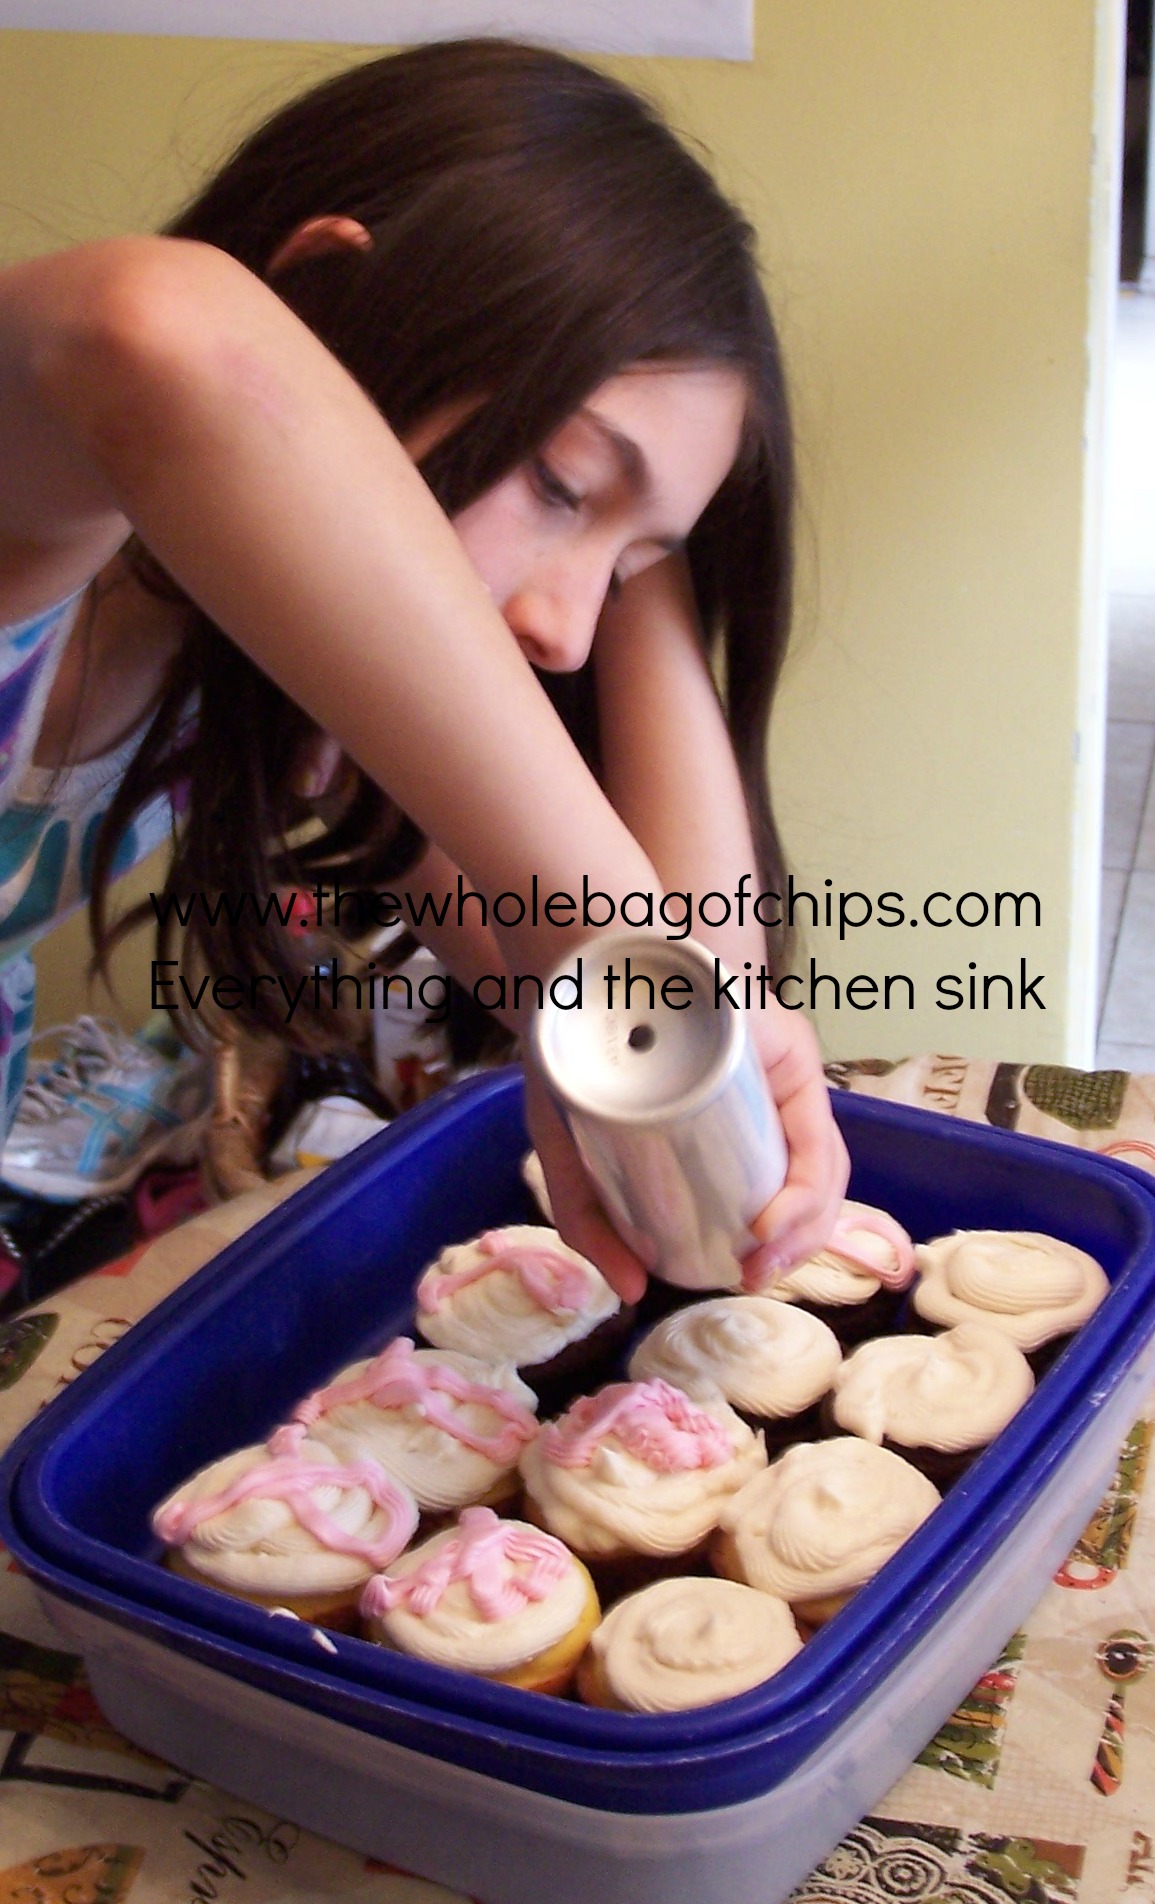
So we did. I baked, they frosted, she decorated. She was SO excited. Alex of course, wanted to decorate her own in her own design, so I gave her a plate with four on it while Caroline and Liz banged out the pink ribbon cupcakes.

It was great.

Til it wasn’t anymore.

And so it goes:

I was snapping pictures because Elizabeth had also made me promise to share her great idea on my blog when I talked about the book.

They were getting silly.

Fooling around.

Moments before it all got ugly

Moments before it all got ugly

“Don’t fool around,” I said.

“Let me take my pictures,” I said.

“Stop fooling around.” My stress level was intensifying. My head was about to spin around.

Are you getting it?

Seeing where this is heading?

Within minutes, it happened.

Someone bumped someone, someone knocked the container just so, and some of the cupcakes flipped over.

I lost it.

“You ruined them!” I yelled.

Elizabeth burst into tears and ran down the hall to her room.

They weren’t totally ruined. In fact, they were pretty salvageable. I righted them and packed them up and within a little while longer, I had to leave.

I went to book club with my cupcakes, but the pride and excitement I’d felt earlier was tainted now by my frustration and my bad mood.

We had a fun evening though, we discussed the book, who liked it, who didn’t, and why, outdoors over wine and dinner and then we all went inside for dessert.

I unveiled my cupcakes. They were stunned! What a great idea, how cute!!

I told my story. It didn’t seem as big a deal as it had been in the moment, of course, but a few said they’d have reacted the same way I would have.

I felt a little better. Validated, justified.

I got home in time to sneak into Elizabeth’s room to say good night and to tell her that her cupcakes had been a hit.

“But I ruined them,” she said, crying.
STILL crying.

I wanted to die. I felt so badly for her.

I felt bad knowing that she was still so sad and that this had in fact, ruined her night too.

I told her that they weren’t ruined and that although I still felt justified in reacting as I had, that was sorry.

I laid with her til she fell asleep that night, not something I often do, but I felt better when I left at least, than I had.

To this day, months later, I still have Mommy Guilt over the way the whole thing went down.

Lessons Learned:

But, I keep reminding myself that every day and every experience won’t be perfect. We aren’t perfect parents, they aren’t perfect kids.

Things happen. In the grand scheme of things, this wasn’t even a huge deal, but it weighed on me heavily and has for months and months.

During this month of October, during Breast Cancer Awareness Month, I will continue to make more of an effort to count my blessings, to remember and focus on the good and what’s gone well, and to remember that life can change on a dime. Overnight. In a split second.

If that were to happen, it’s the rainbows and roses I’ll want to remember, as well as the blessings I have and all the lessons I’ve learned.

Fun Friday: Bread and Jam

11 Oct
"Mom, you *have* to share these recipes on your blog!"

“Mom, you *have* to share these recipes on your blog!”

As a reporter and writer, I have a wacky work schedule, I’ll be the first to admit it.

Flexible, but wacky.

It’s different every single day, night and weekend, and I’m often working when a lot of people are off, but at the same time I also have a lot of flexibility to plan around the needs of my family, and that allows me to keep my focus of “family first” a top priority.

This week, after what seemed to be a crazier block of work days and nights than usual, I finally had a day off. I had a whole Wednesday day and night, where I didn’t have to work at all. I had nothing to cover, nothing to type for the newspaper, no place to be while my children were at school. Although my afternoon and evening would be busy bringing the kids to their Wednesday activities, my day was free.

Wide open.

You might think to yourself, “Oh…shopping, lunch, manis and pedis!!”  But no, I didn’t go that route. Instead, I decided that I’d use that day to the best of my ability, to cook ahead as much as I could, in order to be better prepared for the coming days when things were back to normal.

I’m so glad I did.

Focus, focus, focus! Once I got on a roll, I got a lot done!

Focus, focus, focus! Once I got on a roll, I got a lot done!

I got so much accomplished.

In one day, I cooked two banana breads, three batches of strawberry jam, 16 crustless baby quiches, six peanut butter and Nutella sandwiches to freeze ahead for lunches, and a dinner for that evening that was NOT cooked in the crock pot, of Shepherd’s Pie, which I made into seven individual pie tins just for the fun of it.

I rocked it.

I ate one of the sandwiches before it went into the freezer, but it’s okay. I earned it.

When my kids were eating their breakfast the next morning, enjoying their jam, Elizabeth said to me, “Mom you definitely have to share this recipe on your blog, it’s so good!”

And so I will share it with you today.

I can’t lie though: A big part of the secret to my success on Wednesday involved the crock pot…again!

Just when my kids thought I couldn't cook another new thing in the crock pot, I pull out the triple crock, and go to town!

Just when my kids thought I couldn’t cook another new thing in the crock pot, I pull out the triple crock, and go to town!

However, I used something different: our triple crock pot that we normally use for big gatherings–holidays, birthday parties, and big events like that. An anniversary gift from my mother-in-law years back, I never thought to use it “just” to cook in.

I don’t think I even realized that you could cook in it, since we’d always used it as a warmer to keep the food we’d pre-cooked for the parties, warm.

When a friend passed along two recipes to me, one for banana bread in the crock pot and one for strawberry jam in the crock pot, I decided to give it a try, and do it all at once in the triple crock. This would allow me to use my oven and stove top for other things at the same time so that I could get more than one thing going at a time.

I must say, I loved that option! I also have to say my house smelled AMAZING the entire day. I was hungry all day long!!

The recipes were both super-easy and super-fast to prep. My triple crock has two small wells on the sides and a larger well in the middle. For that reason, I opted to make two smaller breads using the sides and do the strawberries in the middle. I could’ve gone either way I suppose. I could also, in the future, make a double batch of breads: one larger one in the middle and two small ones on the sides.

Lots of options.

Using my crock pot freed up my oven and stove so I could cook a non-crock pot meal for dinner that night!

Using my crock pot freed up my oven and stove so I could cook a non-crock pot meal for dinner that night! Individual shepherd’s pies were fun to eat!

And, now that my bread and jam in the crock pot experiment was successful, I know that I could do this as an after school snack in the future, baking all day long while I’m gone, making the house smell warm and welcoming when we return.

The link to the bread recipe is here, from the Crockpot Ladies.com.

The link to the jam recipe is here, from The Lady Wolf.com.

I encourage you to try them both and see what you think!

Fun Friday: Our new after school snack obsession: Flatbread Pizzas

27 Sep
My impulse purchase earlier this week has led to some fun after school snacks this week!

My impulse purchase earlier this week has led to some fun after school snacks this week!

It all started earlier this week when I went grocery shopping on an empty stomach.

That’s the worst.

In this case though, it benefited us in that it led to the greatest after school snack experimentation!

While I was at Aldi’s, I found flatbread in their “Fit and Active” line of healthier foods. I was intrigued. One was “original” and one was multigrain and contained flaxseed. Both were reasonably priced and I was pretty hungry so even plain flatbread sounded delicious.

Well, as I walked through the store, I saw some good-looking plum tomatoes and I put them into my carriage also. Seeing them, alongside my flatbread, reminded me of an old Pampered Chef pizza recipe we used to make that had ricotta cheese mixed with Parmesan cheese, topped with sliced plum tomatoes and mozzarella cheese.

I decided that with my new flatbread and tomatoes, along with the nonfat ricotta and mozzarella cheeses I had at home, I would make a variation of that for my lunch. And I did. I cut up two plum tomatoes, spread a little tomato sauce on my flatbread, and layered on my toppings. About 10 minutes under the broiler on low, and I had my lunch.

This was my lunch that day, and the leftovers were just as good!

This was my lunch that day, and the leftovers were just as good!

When the girls arrived home later on, they asked me what was mysteriously wrapped up in foil in the fridge. When I showed them my leftovers, they wanted a flatbread pizza for their after school snack. So I sliced up some more tomatoes, some olives and used the rest of my sauce and mozzarella cheese to make one for them.  The entire snack took less than 15 minutes to prep and broil and even less than that to eat.

They loved it!

The following day, my wheels were turning. I remembered a dessert pizza that I had at a restaurant a while back and I decided to make a dessert pizza for the kids based on another recipe I’d seen floating around Facebook lately.

With Elizabeth helping me, I took a flatbread,we  spread some peanut butter on it, layered sliced green apples on top of that, and drizzled caramel over them. A sprinkle of cinnamon-sugar over the whole thing, and under the broiler it went.

Our first dessert pizza of the week.

Our first dessert pizza of the week.

DELICIOUS.

Our creative juices were flowing. The next day I made them a peanut butter and Nutella pizza with sliced bananas on top.

As they were eating that one, they came up with the next one: S’Mores flatbread pizzas: Nutella and marshmallows. When I told my friend Gina, she suggested crushing up graham crackers and sprinkling them on the top. What a great idea! For dinner that night, her family was having chicken and broccoli flatbread pizzas.

I was adding that one to my list.

Elizabeth has already requested flatbread pizzas to be added to our lunchbox rotations. As quick as they are to make, I could easily make them up ahead of time and send them in for lunch. Obviously the dessert pizzas would not be our lunchbox pizzas, but they do have their place!

I’m excited for this newest snack option. It gives us some fun and some variety in our choices, and that’s always a good thing! I encourage you to see how many different variations you could come up with!

Another keeper!

Another keeper!

Fun Friday: Is it a cupcake or a muffin? You decide!

20 Sep

Looks like a muffin, tastes like a cupcake. What was I serving my family for breakfast?

ORIGINALLY POSTED OCTOBER 26, 2012:

This summer, one thing I wanted to do was try out some of the recipes I’d pinned on Pinterest. Today’s recipe post is one of those. I figured that if it was good, I’d post it for one of my fall/pumpkin themed posts.

Which I am, today.

But I don’t know what it is.

A muffin maybe.

Or a cupcake possibly.

Pumpkin, for sure.

I’ve seen this recipe all over the internet and Pinterest, and it’s touted as being fast, easy, tasty and a good Weight Watchers snack even.

Two ingredients for today’s muffins. Cupcakes. Whatever they are.

This recipe has two ingredients:

Cake Mix
15 ounces of pumpkin

Mix, bake at 350 for 20-25 minutes.
Try them and let me know what you think! Are they a cupcake or a muffin? Are they truly healthy? No eggs, no oil or butter.

Do you sprinkle them with powdered sugar like a muffin or do you put frosting on them like a cupcake?

Muffin?

Cupcake?

Breakfast?

Or dessert?

You try them and let me know what you think!

A Once-a-Year Dessert: Plum Crunch

9 Sep

I try to convince myself that if I could have this dessert more than once a year, it would not be as special. I’m not quite convinced yet.

Originally Posted September 14, 2012.

Reposting this recipe today, September 9, 2013, in honor of my mom’s birthday!

Happy Birthday Mom!

You know how little kids say they wish it were Christmas every day, or their birthday every day? Isn’t our answer that if it were every day, then it wouldn’t be special when we had it, that it has to be once a year or it wouldn’t mean as much?

Right.

I wish I could have Plum Crunch every day.

Well, if not every day, then at least more than the once-a-year that I do have it.

I know, then it wouldn’t be special, yaddah, yaddah, yaddah…

I get it.

Sigh…..

Why, you ask, do we only have this once a year?

I’m sure you were asking. Somewhere, someone is asking right now.

It’s because it uses a particular kind of plum, not just any plum, an Italian Prune Plum, these little half-sized plums that are available in our stores just in the fall. Really, just in September.

As a kid, I remember having them for my school lunch snacks in the fall. They’re just so cute. Cuter than the plums you get all the rest of the time. And they make this recipe SO delicious. My mom made it every fall and she and I love it more than anyone in our family, hands down.

I actually had a little thrill when I gave my kids these plums for the first time, as it brought back memories of eating them myself as a kid. I love passing those types of memories and traditions down to my own kids as well.

Top it with ice cream….even more deliciousness…

Now I will say, I’ve never tried this Plum Crunch with any other kind of plum, but I just assume it won’t be the same because otherwise the recipe would say you could use any plums and eat it any time.

So before the window has shut for you to try this recipe I am sharing it with you today.

Quick, run out and get your plums so you can try it this weekend!

PLUM CRUNCH
INGREDIENTS

3 cups halved and pitted Italian Prune Plums (about 18 but I always buy extra in case one is bad or in case my kids want to eat some out of the dish.)

3 TBL brown sugar
3 TBL sugar
1/4 tsp. nutmeg

Topping:

1 egg well beaten
1 cup flour
1 cup sugar
1/2 to 3/4 cup oatmeal
1 tsp. baking powder
1/4 tsp. salt

1/2 cup melted margarine

This recipe is so simple, we always have everything in the house to make it, except for the plums.

DIRECTIONS

Spray 9×13 baking dish with no stick spray.

Put prepared plums cut side up on the bottom of the pan.

Mix the two sugars and the nutmeg together and sprinkle over fruit.

Beat the egg in a bowl, then add the dry ingredients together.

Mix til crumbly. Sprinkle over plums.

Pour melted butter over all.

Bake in 375 degree oven for 35 minutes.

Serve warm with ice cream.