Archive | Christmas Cookies RSS feed for this section

A Your Tray or Mine Recipe and an Online Cookie Swap: Chocolate Buttersweets

8 Dec
Chocolate Buttersweets

These are my other top favorite cookie from our trays!

ORIGINALLY POSTED DECEMBER 19, 2014

This week I was invited to participate in such a fun activity: a digital cookie exchange! Now, you know how much I love cookies, and what a fun idea to do an online recipe swap! I was invited by Patience Brewster, a company that offers a unique line of handmade, hand painted ornaments and gifts for holiday and every day decor.  Their products are so beautiful! Every piece in the collection is based on original artwork by artist/designer Patience Brewster and is filled with intricate details and fanciful designs. You can read more about the company here.

As I was going through my favorite cookie recipes, trying to decide which one to choose for today’s online cookie exchange with Patience Brewster, I had such a hard time deciding! Not just any cookie would do. Ultimately I decided to run the recipe for one of my top two favorite Christmas cookies, the Chocolate Buttersweets. These cookies were the ultimate equivalent of a beautiful Patience Brewster ornament, in a cookie. Hand-glazed, multi-step, multi-layer, delectable cookies, beautiful confections….it’s a perfect fit.

Below you’ll find the step-by-step instructions for this cookie. I hope you’ll give it a try, and I certainly hope that you’ll go on over to the Patience Brewster site and and take a look at their beautiful creations.

In the meantime, I’d like to tag my friend Paula over at My Soup for You and invite her to join in on our online cookie exchange! Paula is a wonderful cook and baker, and I know she’ll be doing some baking this weekend, too! In fact, I’d like to challenge all of my readers and fellow bloggers. Link up a great cookie recipe in the comments here, blog about a good cookie recipe on your own blog, or share a cookie recipe wherever you share, and tag us all!

*************************************************************************************************************

ORIGINALLY POSTED DECEMBER 19, 2011

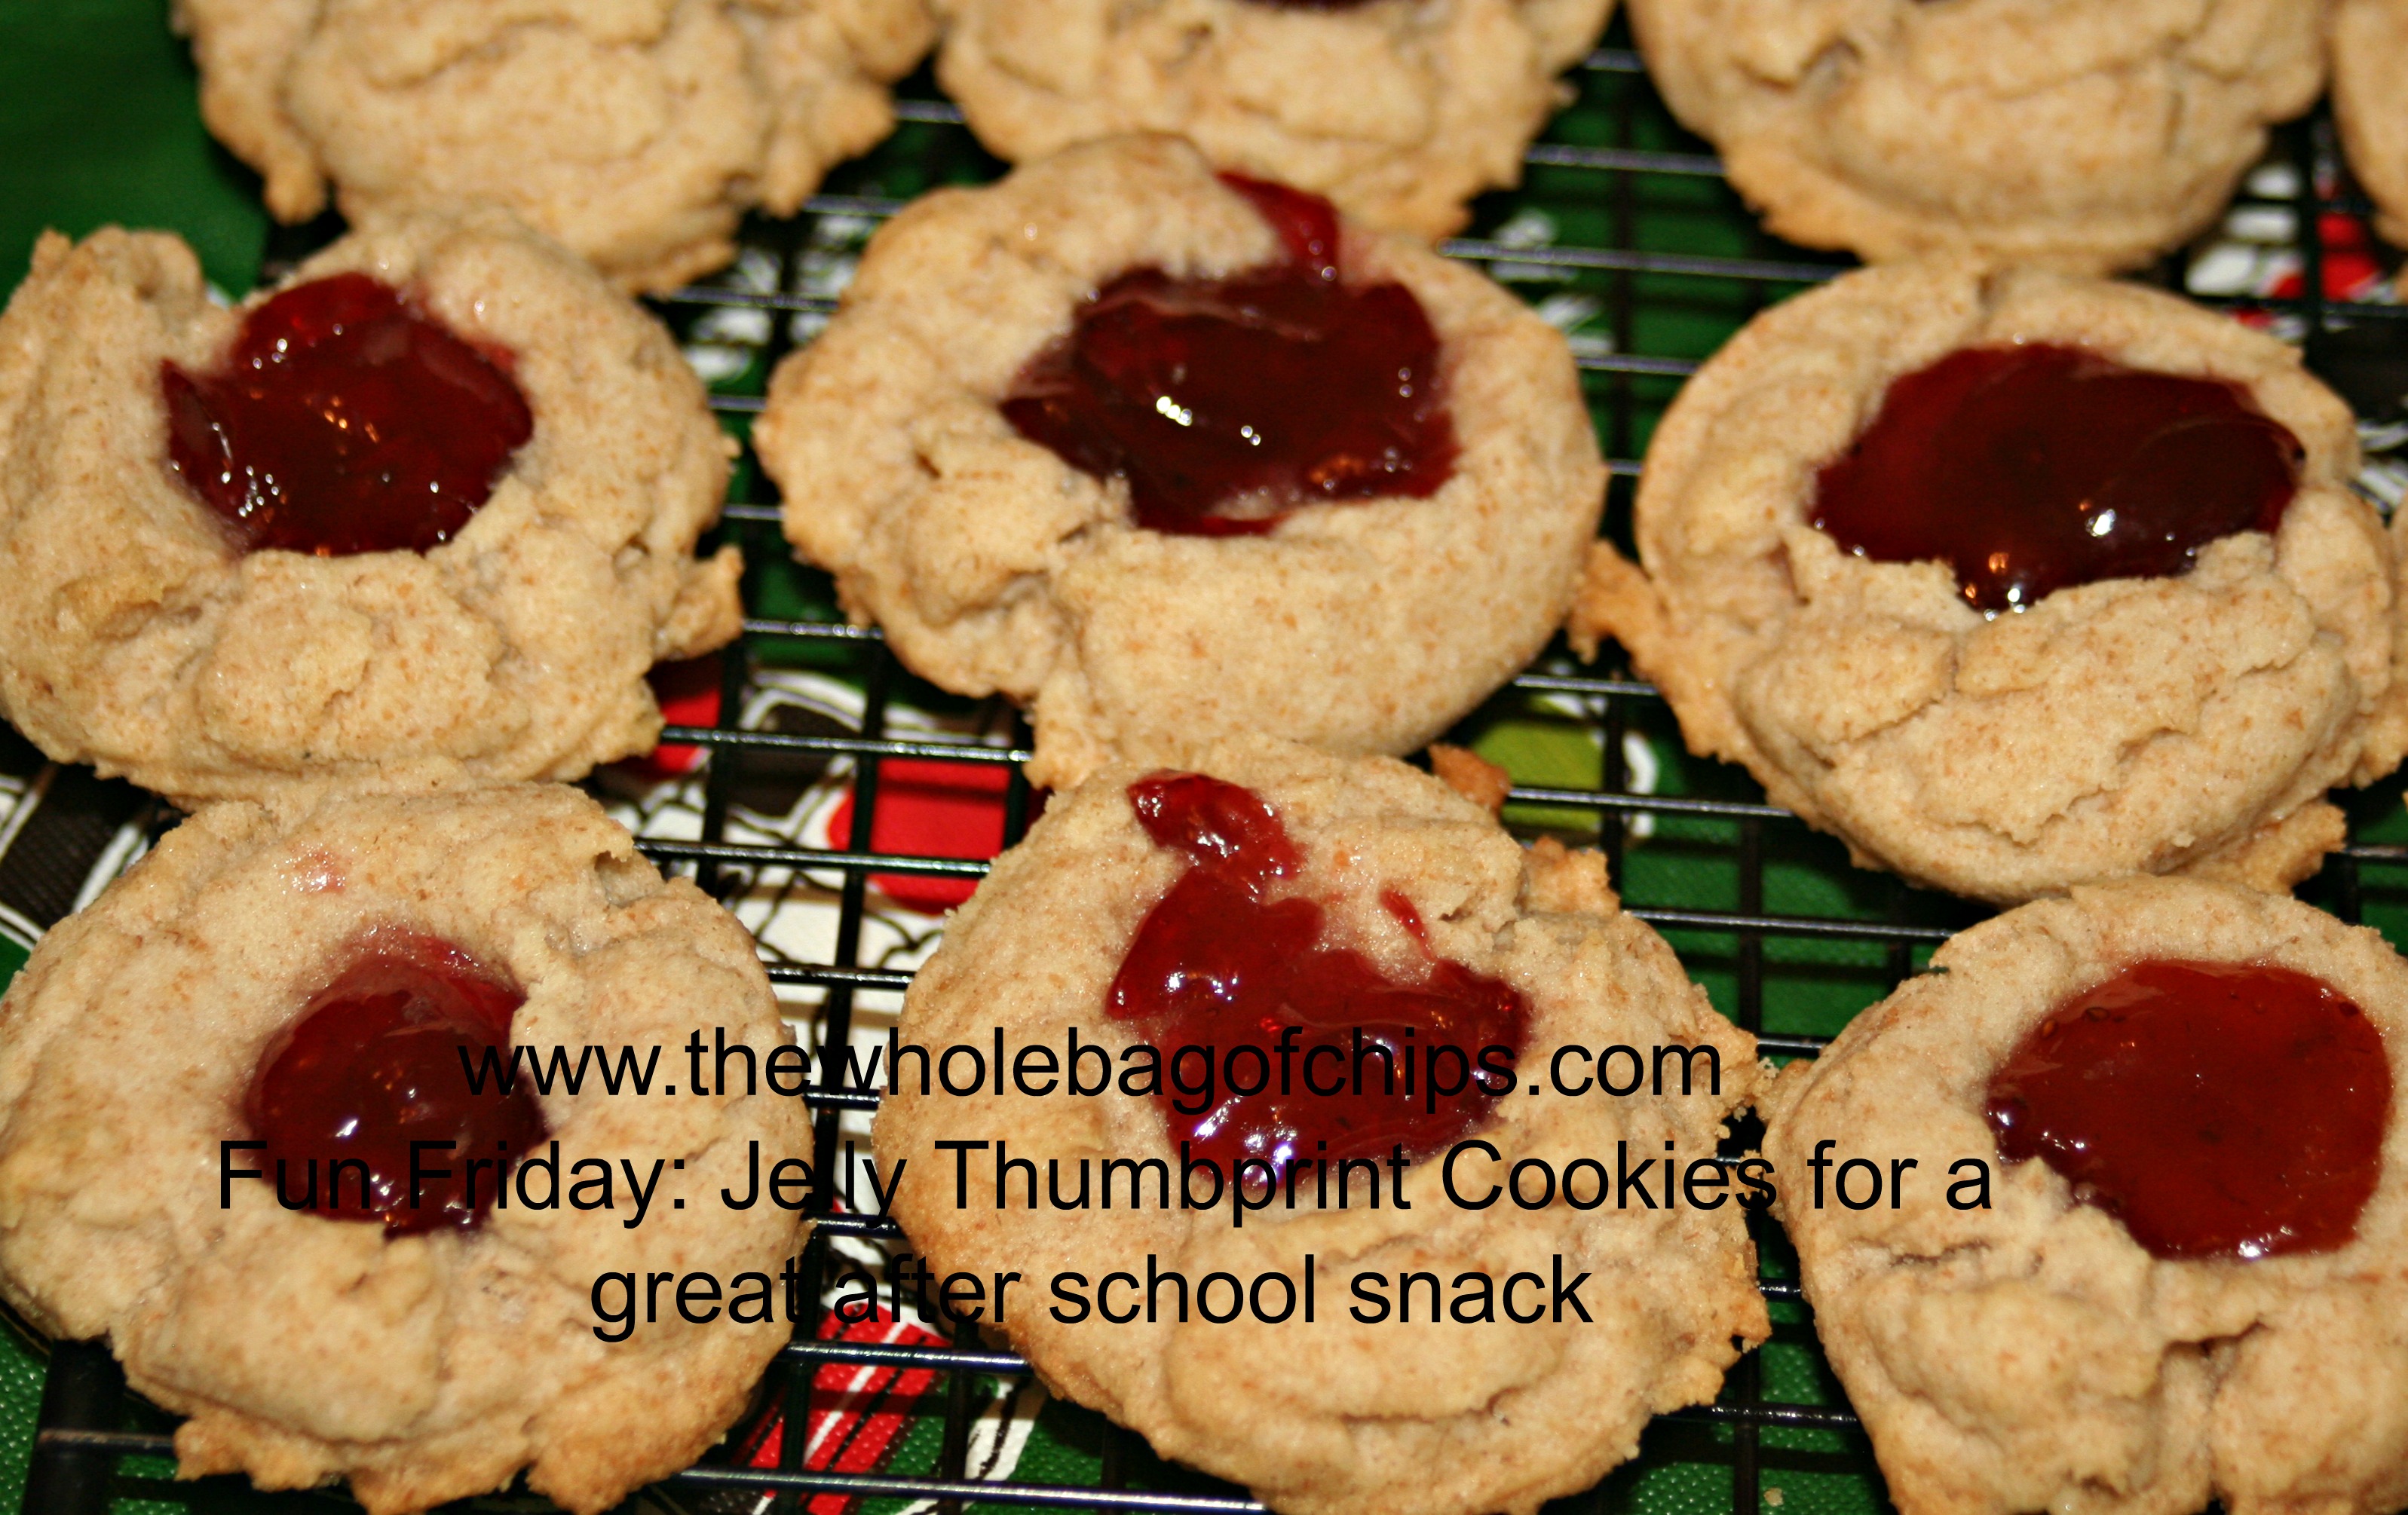
When I first began the Your Tray or Mine series of recipes earlier this month, I began with the Chocolate Thumbprints, which I said were one of my top two favorite cookie recipes from the trays my mom and I do. Today’s cookie, the Chocolate Buttersweets, are my other top favorite cookie on the tray.

This recipe is not complicated, although it does have three distinct steps: the cookie, the filling and the frosting. Because the cookie should be frosted when it’s warm (but not hot) I recommend prepping the filling first, so that it’s ready. Then make your cookies, and after they are filled, make your frosting and frost the filled cookies.

INGREDIENTS

Cookie base for chocolate buttersweets

If you have a wooden spoon with a round handle, you can use it to poke the holes in the tops of the cookies before baking.

Cookies:
1 cup margarine or butter
1 cup confectioners sugar
1/2 tsp salt
2 tsp vanilla
2 cups all purpose flour (we also make these gluten free, using Bob’s Red Mill 1 to 1 flour)

**Filling:
6 oz cream cheese, softened
2 cups confectioners sugar
4 TBL flour
2 tsp vanilla

Frosting:
1 cup semisweet chocolate chips
4 TBL butter or margarine
4 TBL water
1 cup confectioners sugar

DIRECTIONS:
**Prepare the filling first. The cookies, when done, need to be filled while warm. Have the filling ready to go.

Preheat oven to 350 degrees.

FOR COOKIES:
1) In large bowl cream together butter, confectioners sugar, salt and vanilla.
2) Gradually add flour to creamed mixture, mix well.
3) Roll dough into 1″ balls, placing them 2″ apart on ungreased cookie sheets.
4) Press hole in center of each cookie with finger or the handle end of wooden spoon (if handle is round, not flat.)
5) Bake at 350 for 12-15 minutes until edges are lightly brown.
6) Fill while warm
7) Frost

Filled Chocolate Buttersweets

Step two: fill the cookies while warm.

FOR FILLING:
Soften cream cheese. Blend in sugar, flour, vanilla. Cream well. Fill cookies.

FOR FROSTING:
In small saucepan melt chocolate chips, butter, and water over low heat. Stir constantly. Stir in confectioners sugar and mix well. Will be lumpy at first until the sugar melts. Spoon a little frosting onto each cookie.

Your Tray or Mine? Cookie Tray Recipe of the Day: Snickerdoodles

6 Dec
Snickerdoodle Cookies

These are fast and easy cookies to make and one of my kids’ favorites.

ORIGINALLY POSTED DECEMBER 12, 2011

Today’s recipe is a new addition to our cookie trays. It is not one that we did when I was growing up but it’s one I include every year now.

Several years ago when my kids were in preschool we attended a book fair there prior to Christmas. I got them a “Strawberry Shortcake Holiday Treats” cookbook and this recipe is from there! It had all “regular” ingredients (aka ingredients I had on hand) and that’s why I liked it.

I usually have them help me by dropping the cookie dough in the cinnamon and sugar and having them roll them. Rolled cookies are good for that!

I often double this one, it’s a fast tray filler.

Tomorrow be on the lookout for a fun craft for the kids to go along with this recipe!

Strawberry Shortcake Holiday Treats Cookbook

Here’s the girls’ cookbook that this recipe came from.

SNICKERDOODLES
Ingredients:
1 3/4 cups flour

1/2 tsp baking soda

1/4 tsp salt

1/2 cup butter, softened

1 cup white sugar

also 2 Tbl. white sugar

1 egg

2 Tbl milk or cream

2 tsp vanilla

1/2 tsp cinnamon

Directions:
Preheat oven to 375

In medium bowl, stir together the flour, baking soda, and salt. Set aside

Use the electric mixer to cream together the butter and 1 cup of sugar.

Beat in the egg. Add the milk and vanilla. Beat until all combined.

Add in dry ingredients and beat til well mixed.

In the small bowl, stir together the 2 TBL sugar and 1/2 tsp cinnamon.

Roll the dough into 1″ balls. Roll the balls in the cinnamon sugar mixture and place them about two inches apart on the baking tray.

Bake for 10-12 minutes or until cookies are done. Remove to wire rack and cool completely.

Your Tray or Mine? Cookie Tray Recipe of the Day: Chocolate Thumbprints

4 Dec

ORIGINALLY POSTED DECEMBER 1, 2011

I first posted this recipe on my FB page on December 5, 2008!! It’s a cookie recipe my mom and I make every year, and if I had to pick a top favorite, this would be in my top two. I LOVE these cookies. They’re easy to make and easy to just POP into your mouth!! And, they’re chocolate on chocolate. I mean really…how much better can you get than that?

This is a rolled cookie, so your kids can help you if you’d like them to. They can also use their thumbs to make the indentation in the cookies for the filling.

***As of 2013, I’ve added some modifications to the recipe to go with our dietary restrictions. You can either stick to the original recipe or try the healthified version.***

Chocolate Thumbprint Cookies
Makes six dozen
Preheat oven to 375 degrees

Thumbprints before baking

Almost ready to go in the oven!

Alex making thumbprint batter

Alex did almost all the measuring and mixing for the thumbprints herself, with very little help from me.

INGREDIENTS FOR COOKIES

1 cup margarine or butter, soft (We now use I Can’t Believe It’s Not Butter)
1 cup granulated sugar
1 tsp vanilla extract
2 oz (2 sq.) unsweetened chocolate, melted and cooled
1 egg
2 1/2 cups all purpose flour (you can sneak in some wheat flour, mixing half wheat and half white)

DIRECTIONS FOR COOKIES

In large bowl, cream margarine and sugar until light and fluffy.
Blend in vanilla, chocolate and egg.
Lightly spoon flour into measuring cup, level off. Gradually add flour to creamed mixture, mix well.
Chill dough 30 minutes for easier handling.

Shape dough into 1″ balls, place 2″ apart on ungreased cookie sheets or parchment lined sheets. With thumb, make imprint in center of each cookie.

Bake at 375 degrees 8-10 minutes. Let cool one minute before removing from cookie sheets. Fill with chocolate cream filling.

Thumbprints ready to fill

Thumbprints are ready to be filled!

INGREDIENTS FOR CHOCOLATE CREAM FILLING

6 oz. (1 cup) semisweet chocolate chips
2 Tablespoons corn syrup
1 Tablespoon water
1 Tablespoon margarine or butter
1 teaspoon vanilla extract

In small saucepan melt chocoalte chips with corn syup, water and margarine over low heat, stirring constantly. Stir in vanilla.
Spoon 1 tsp into each cookie.

Your Tray or Mine? Cookie Tray Recipe of the Day: Chocolate Chip Butterballs

2 Dec

These cookies could be made with nuts instead of chocolate chips if you prefer!

ORIGINALLY POSTED DECEMBER 5, 2011

Today’s recipe is another one of my favorite cookie recipes, one we’ve made for years and years. Way back when I was a Girl Scout, I used to participate in the Girl Scout Bake Off each year and one of the years I earned second place with these cookies! That’s how long my family has been making them.

We call them Chocolate Chip Butterballs, but they have many other names: Snowballs, Mexican Wedding Balls, Hazelnut Balls and probably other names I don’t even know about.

Traditionally they are made with nuts. I don’t like nuts, my family never baked with nuts growing up and I don’t either We all really love Chocolate Chips though, so my mom has always subbed in the chocolate chips for nuts. You can choose either mini chips or the regular sized chips. Personally, I prefer the big ones, but if you don’t, switch them for the minis instead. If you’re into tasting batter, this one is safe to eat, there are no eggs in this recipe. I’m always pretty sure I’d come out with about six more cookies in each batch if I ate less batter!

This recipe can be made fast and easy if you have extra set(s) of hands to help you roll the batter into balls! This is one I often let my kids help with. I don’t usually have them roll the hot ones in the sugar though, even though I use a spoon for that. Their “part” is the cold batter getting rolled into the balls for baking.

Be sure to check back tomorrow to see what the coordinating kids’ activities are for this recipe!

Enjoy!

Chocolate Chip Butterball Cookies

INGREDIENTS

2 cups flour **for a healthier version, I have used one cup of wheat flour mixed with one cup of white flour**
1 cup butter or margarine  **for a healthier version I have substituted “I Can’t Believe It’s Not Butter” for regular**
4 TBL granulated sugar
1/4 tsp salt
2 tsp vanilla

one 12 oz. package chocolate chips

Bowl of confectioner’s sugar

DIRECTIONS

Combine flour, butter, granulated sugar, salt, vanilla in bowl of electric mixer. Mix well.

Add in chocolate chips, mix them into the batter.

Refrigerate dough 30 minutes (or longer.)

Form into 1″ balls, place on cookie sheet. These don’t spread, so you can put a lot on a sheet, no need to spread them out a ton.

Bake at 375 for 15-20 minutes.

Cool only slightly, maybe a minute or so, and then roll each one in a bowl of confectioner’s sugar.

Roll a second time in confectioner’s sugar before serving.

Fun Friday: Dairy-free cream cheese filling for crepes

11 Jan

This was a great new option for our crepe fillings!

TGIF! It’s Friday and it was our first full week back to school. For me personally, it wasn’t a bad week, but for the kids, it was exhausting to be full-on, back at it again after the break.

For today’s Fun Friday post, I thought I’d share a cream cheese filling that I made for our New Year’s Day brunch here at home. We don’t entertain guests that morning, but we generally do a very special breakfast just for our own little family to celebrate the new year. This year we opted to do crepes. We usually put out a variety of fillings including eggs/ham/cheese, bacon, berries, Nutella, peanut butter, bananas, and sometimes we’ll make a hot compote of apples and raisins. This year we also made a chocolate fondue on New Year’s Eve night while we waited for the ball to drop, so we were strategic when shopping for our dipping items for that treat so we’d have some fruits leftover for the next morning’s fillings.

This was a brand I’d already come to trust with a few other products, so that’s how I chose the cream cheese for my recipes.

When I made our Christmas cookies this year, I had one cookie I was particularly nervous about because it had a cream cheese filling and I had yet to try out a dairy-free option for cream cheese. When I bought my cookie-baking ingredients I had yet to do a “trial run” of these cookies, so I just purchased a cream cheese substitute that came from a brand whose products I already liked, and I crossed my fingers, hoping the filling would come out well, and it did. Everyone raved about these cookies, and I was just thrilled. And, relieved.

The cream cheese filling came out so well in fact, that I thought that I would try making a new filling for our crepes, since Nutella is not dairy-free and therefore, it eliminated one of the filling options for some of us.

I went back to the store and I picked up another package of the Daiya cream cheese spread, and I looked up a recipe online for a cream cheese filling for crepes. I assumed it would be pretty similar to the cookie filling, and it was. I found the recipe here, which included the recipe for the crepes themselves as well, and I used just the filling ingredients as my guide, not including berries, although I did have them ready to go:

For the Filling:
  • 1/2 cup granulated sugar
  • 8 ounces cream cheese
  • 1/2 cup powdered sugar
  • 1/2 teaspoon vanilla extract

    When the time came, we had a lot of filling options for our crepes.

    That morning’s brunch was delicious, and I was so pleased with the filling. It worked out very well, and I’d definitely use it again. I am happy with the Daiya cream cheese substitute. They also have a flavored one that I would consider using in my recipes as well, which replaces a staple for one of our favorite chicken recipes over the years, and it’s a recipe I haven’t made in the past year or so.

    I hope you’ll give this cream cheese filling a try too. If you’re not in need of a cream cheese replacement, the recipe is one that ordinarily uses regular cream cheese, so you don’t need to do anything different.

    Have a wonderful weekend and I hope you too, have a Fun Friday!

    You can add a little whipped cream to the top of your crepes, dairy-free or not, and you’ll have quite the treat!

Fun Friday: Jelly Thumbprint Cookies for a great after school snack

10 Dec
Once I tried these cookies the first time, I knew the recipe was a keeper!

Once I tried these cookies the first time, I knew the recipe was a keeper!

ORIGINALLY PUBLISHED JANUARY 2, 2014

I tend to enjoy cookies of the chocolate variety.

I know, you’re completely shocked by this news.

However, last year when I made my cookie trays, I thought the chocolate was a little bit overwhelming to the non-chocolate choices on my trays.

What if someone doesn’t like chocolate?

Doubtful, but what if?

Then they’d only have two of my cookies to choose from: Snickerdoodles and Oatmeal Scotchies. I felt like I needed another option for this year’s trays. I wanted something easy, something without a ton of ingredients or steps.

Enter the Jelly Thumbprint cookie.

I had a Chocolate Thumbprint cookie, but these would be completely different, other than the thumbs.

I went to Allrecipes.com and found this recipe, and modified it to suit my own needs.

I made it a little bit healthier, with the addition of some wheat flour and by using I Can’t Believe It’s Not Butter.  I didn’t want the peanut butter glaze, so I just left them plain.

I first made them as an after school snack, making half with strawberry jelly and half with grape. The kids loved them so I decided they’d make it onto the trays. This year I’d been invited to participate in a cookie swap, so I made a double batch of these, using half for the swap, some for a Christmas party we were going to, and the rest for my trays.

They were a hit, all around!

This is a cookie that can be made for my family throughout the year, and I intend to make them a permanent addition to my trays in the future as well.

Below is the recipe from Allrecipes.com as it appears on their site, along with my modifications. If you’d like to make them with the peanut butter, you can try that as well!

Jelly Thumbprint Cookies

Ingredients:
1 cup butter, softened (I used I Can’t Believe It’s Not Butter)
2/3 cup white sugar
1/2 teaspoon vanilla extract
2 cups all-purpose flour (I used one cup of white, one cup of wheat flour)
1/2 cup grape jelly (I also used strawberry jelly)
1/2 cup creamy peanut butter (I skipped the peanut butter)
1 1/2 teaspoons vegetable oil (When skipping the peanut butter, no use for the oil either)
Directions:
1. Preheat an oven to 350 degrees F (175 degrees C); line a baking sheet with parchment paper.
2. Beat the butter and sugar with an electric mixer in a large bowl until smooth; add the vanilla and continue to beat. Mix in the flour mixture until just incorporated. Roll dough into 1 1/2-inch balls and arrange on prepared baking sheets. Make a small hole in the center of each ball, using your thumb and finger; fill the holes with grape jam.
3. Bake in the preheated oven until lightly browned, about 14 minutes; allow to cool on baking sheet for 1 minute.
4. Put the peanut butter in a microwave-safe bowl, and cook in a microwave oven until soft for 10 – 30 seconds, checking every 10 seconds. Be careful not to overheat the peanut butter; do not let it bubble. Stir the vegetable oil through the heated peanut butter; drizzle over the warm cookies.

Saving My Sanity Holiday Chex Mix

7 Dec
This Chex Mix recipe literally saved me this year.

This Chex Mix recipe literally saved me this year. I filled an entire laundry basket with gift bags, plus a Tupperware Cake Taker full of the mix itself.

ORIGINALLY POSTED DECEMBER 20, 2013:

I think we’d all agree that the holidays are much more enjoyable when you’re not totally and completely stressed out.

Agreed?

Agreed.

That being said, this school year, the holidays and the treat-giving season that goes along with them, had the potential to put me right over the edge. And really, as a working mom of three this time of year, that edge is awfully close most of the time anyway, so I really didn’t have far to be pushed.

Normally, I’m a cookie baker at Christmastime. Between my mom and I, we bake over a dozen different types of cookies, creating cookie trays for our family and friends.

As a mom of three, I have always given all of our kids’ teachers a cookie plate at Christmastime. I also have given one to the secretary, bus driver and bus monitor, teacher aides, principal and I make a tray for the faculty room. I also treat the staff at my husband’s school to a tray of cookies in the teachers’ room, and then I make them for our family as well.

It seemed doable when my oldest was first in school, and even when two were in school. It started to get a little tougher when all three were in school, as well as my husband at his own school, but I continued on.

Then last year came middle school.

SEVEN TEACHERS. A whole new set of office staff. A principal AND an assistant. TWO secretaries.

A lot of people will say, “Oh, in middle school that all ends. No gifts for those teachers anymore.”

I’m not sure where that theory came from, but I will say I used to BE a middle school teacher, and I love cookies, but more than that, I liked being thought of at this time of year just as much as when I was an elementary teacher.

My daughter didn’t want to stop our treat-giving tradition, and I couldn’t find a good reason why she had to. And she didn’t want to leave any of her teachers out. So we didn’t.

This year, my husband has a new job at a larger school.

With 90 staff members.

I knew something had to give. I was not going to be able to do it. There wasn’t any way that I could possibly make enough cookies for all of the teachers and staff in all three schools and my family, and keep my job. Or my sanity. I’d be baking all hours of the day and night for weeks to make that happen.

There had to be another answer.

Simple, affordable ingredients, few dishes to wash. A win-win!

Simple, affordable ingredients, few dishes to wash. A win-win!

Enter The Tailgateista and her Homemade Crock Pot Apple Cinnamon Chex Mix.

That’s right. I said CROCK POT.

That was the answer to my problem, thanks to my Crock Pot partner in crime, Gina, who was also searching for another solution to the gift-giving issue. She’s the one who found this recipe and sent it to me.

We both decided to go with Chex Mix gifts this year, although we each chose a different mix to make, and today, as I type this three days before the last day of school before the vacation, I can honestly say that this saved my sanity.

My gifts are done. Cooked, cooled, bagged, tagged and ready to be handed out on Friday, the day you’ll be reading this.

And I still have my job and my sanity, thanks to this recipe from The Tailgateista.

I doubled her original recipe and made a few modifications to it, to serve my purposes. I will put her recipe and my modifications below.

I doubled the recipe SIX TIMES.

That’s right, six times. 72 cups of cereal, and the equivalent of 48 two-cup gift bags of Chex Mix.

And the best part of all? Not only is it a very cost-effective gift, but it cooks while you accomplish other tasks!!

For me, a journalist who works from home a good part of the week, I could type all day and my gifts were cooking themselves over in the crock pot behind me as I worked. Or, if I was working away from the house all day, I could throw in a batch at night to cook itself while we worked on homework and showers and cleaned up from dinner. Some days, I did both: a batch in the daytime if I was here, and a batch again in the evening or after school.

Phenomenal.

And delicious.

I’ll still be making Christmas Cookies this weekend, all our favorites, and I’ll still share them amongst our family and some close friends, but I won’t be cooking over the mixer and oven,rolling and frosting, baking and cooling late at night for a week in between working and parenting obligations, and still not  having enough cookies to go around.

We’ve found a way to thank our teachers and staff members for their time, talent and hard work without pushing me over the proverbial edge the week before Christmas.

I even had enough gifts to give out extras to people I have always wanted to give cookies to, but didn't ever have enough!

I even had enough gifts to give out extras to people I have always wanted to give cookies to, but didn’t ever have enough!

Below is the Tailgateista’s recipe and my modifications follow below it.

Give it a try, it’s delicious! Maybe this Chex Mix will be the key to saving your sanity too!

Ingredients

6 Cups Chex Corn Cereal
1/4 Stick Butter
1/2 Cup Brown Sugar
1 Teaspoon Ground Cinnamon
1/4 Teaspoon Ground Nutmeg
1/4 Teaspoon Ground Ginger
1/2 Cup Chopped Dried Apples

***You can also add Pecans, M&M’s, any other candy,dried fruit or nuts!!

Instructions

* In a microwave combine all spices, sugar and butter until it is melted.
* Add the Dry ingredients (cereal, apples) into crock-pot
* Add all melted ingredients into the crock-pot and mix
* Cook in crock-pot on low for 3 hours
* Enjoy!

I used I Can't Believe It's Not Butter instead of real butter, which makes this a bit lower in fat.

I used I Can’t Believe It’s Not Butter instead of real butter, which makes this a bit lower in fat.

MY MODIFICATIONS

1) I doubled this recipe each time, since my crock pot is large enough to hold a double recipe.  ***2014: Another sanity-saving tip I have added in this year is using the plastic bag liners for the crock pot for every batch. The brand I used is an Aldi’s brand, Boulder, and they’ve been amazing. I would not make this again without using the bags.***

2) I substituted the Dulche le Leche flavored Cheerios for one cup of the Chex, (so two cups of Cheerios for a double recipe and ten cups of Chex.)  ***2014: Substituted Frosted Cheerios instead of Dulche le Leche.***

3) The butter should read 1/4 cup for a single recipe, in my opinion, not stick. I used 1 stick per double recipe.

4) I opted not to use the apples, because the first time I did a trial run, they burned.

5) I did not stir the Chex Mix in my trial run, which may be the reason why the apples burned. In every subsequent time however, I stirred the Chex Mix every 45-60 minutes while it cooked for the 3 hrs.

6) For my mix-ins, I used 1/2 bag of mini marshmallows, 1/2 bag of red and green mini M&Ms, and one full bag of white yogurt covered raisins, per double recipe.

7) Each double recipe with my mix-ins filled eight gift bags. For my husband’s school, I filled  a large Tupperware Cake Taker, normally used to carry layer cakes, with an entire double recipe, just for his faculty room. I sent in small plastic drinking cups for them to eat it out of.

Although cost is not always the deciding factor in gift-giving, it’s certainly taken into account. I think most everyone sticks to a budget when shopping for gifts. With each of the six double recipes yielding 8 two-cup bags of mix, and my ingredients costing a total of $40.68 for all six batches (I used coupons for the M&Ms and the cereals), these 48 gifts cost me $.85 per bag to make. I spent just under $2.00 on two packs of 20 gift baggies to put them in. Even still, that cost me less than $1 per gift.

Over 100 people will be enjoying my Sanity Saving Chex Mix this weekend, and I was able to accomplish it relatively stress-free and budget-consciously.

Have a great Christmas everyone!!

It’s that time of year again: a cookie recipe a day!

6 Dec

How is it already that time of year again?

I don’t know how it happened, but I blinked and now it’s December. It’s cookie-baking time again. Starting tomorrow, one cookie recipe or bar recipe will run every day until December 21, so be ready! You’ll have them all at your fingertips when you’re ready to start baking.

Have a wonderful holiday season!

Christmas Dessert: Mocha Roll and Christmas Cookies

29 Dec
Christmas cookie tray

All together now: all of the cookies made by my mom, me and both grandmas, all on one tray.

ORIGINALLY POSTED DECEMBER 29, 2011

This week I’ve been posting in retrospect about our Christmas Dinner. To me, the best part of any dinner is always the dessert. And like our Christmas Dinner, which is much the same every year, our dessert selection is as well.

First off, there’s the tray of Christmas Cookies. Together with my mom and two grandmothers, we put together a tray of cookies that has about 13 different varieties to choose from. We all have our favorites.

But…we’ve been eating cookies on and off now for two weeks. Well, at least I have. So we have to have another choice also. Enter…the Mocha Roll.

My mom makes the most fabulous frozen dessert called a Mocha Roll.

The Mocha Roll, before the first piece has been cut.

The Mocha Roll before the first piece has been cut.

This picture looks nice enough, but you truly can’t get a good enough idea of what this dessert really is unless you see it cut into a serving, which you will in a minute, when I post the recipe. However, I first must give tons of thanks to my mom here, because I decided to ask her for the recipe *just* as she was getting ready to leave for a cross-country, day-after-Christmas trip and I’m sure she had better things to be doing than emailing me recipes, but sure enough, there it was in my inbox this afternoon. So 1) She made it for yesterday’s dessert, 2) she typed up the recipe for me already so I don’t have to do it and 3) she took the time to send it to me. Thank you Mom!!

Single serving mocha roll

Here’s my dish, whipped cream on the side because I don’t actually like whipped cream. I did that just for you!

Here’s the recipe for her Mocha Roll for you!

FROZEN MOCHA ROLL

(Good Housekeeping Magazine – 1974 or earlier)

Note:  Can be made and frozen one month ahead.

INGREDIENTS

5 eggs, separated, at room temperature

1 cup confectioner’s sugar, divided

Cocoa

Dash salt

Mocha cream (recipe follows)

DIRECTIONS

Day before or early in day:

Preheat oven to 400º.  Grease 15½ X 10½ jelly roll pan with shortening.  Line plan with waxed paper, then grease again and flour.

Separate eggs while they are cold, taking care not to get any yolk mixed in with the whites because if any egg yolk is present in whites, the whites will not beat to their highest volume.  Also, for greatest volume, cover bowl and let egg whites warm to room temperature before beating.

In large bowl, with mixer at high speed, beat egg whites until soft peaks form.  Beating at high sped, sprinkle in 1/2 cup confectioner’s sugar.  Beat until sugar is completely dissolved.  Do not scrape sides of bowl.  (Egg whites should be stiff with glossy peaks.)  Set aside.

In small bowl, with mixer at high speed, beat egg yolks until thick and lemon-colored.  At low speed, beat in 1/2 cup confectioner’s sugar, 3 Tablespoons cocoa, and dash of salt, occasionally scraping bowl with rubber spatula.  Gently fold yolk mixture into whites until blended.  (To do this, with a gentle downward motion and using a spatula, cut through the center of the whites, across the bottom and up the side of the bowl.  Then, give the bowl a quarter turn and repeat the cutting motion until egg-white mixture is broken to the size of small peas.  Fold just until all ingredients are combined, using spatula or whisk.  Over-folding breaks air bubbles, causing a flat jelly roll.)

Spread batter evenly in pan and bake 12-13 minutes.  Cake is done when top springs back when lightly touched with finger.  Do not overbake.

Meanwhile, sprinkle a clean cloth towel with cocoa.  (A flat weave towel, rather than a terry towel, works best.)

When cake is done, use a small spatula to immediately loosen edges from sides of pan.  Invert cake onto prepared towel.  Gently peel waxed paper from cake.  Roll towel together with cake from one of the narrow edges (jelly-roll fashion).  Roll as tightly as possible, but do not press down on cake.   Cool completely, seam-side down, on a wire rack.  Meanwhile, prepare mocha cream.

When cake is cool, unroll from towel.  Evenly spread Mocha Cream on cake almost to edges.  Starting at same narrow end, roll up cake without towel.  Place cake seam-side down on top of plastic wrap.  Wrap cake and then place on heavy duty foil; wrap and freeze cake for several hours or overnight.

About 15 minutes before serving, remove cake from freezer; unwrap; let stand for easier slicing.

MOCHA CREAM:

In medium bowl, whip together, until soft peaks form:

1 cup heavy cream

1/4 cup light brown sugar

3 teaspoons instant coffee (prefer decaf, but not required)

(You can buy 16 oz. container and use remaining 1 cup to whip and serve with cake; add a little confectioner’s sugar to cream before whipping.)

Serves 8 to 10. This can be refrozen if there are leftovers!

Fun Friday: Book Review and Giveaway!

5 Dec
I was so excited to go and get my copy of Anika and Chris's new book! You're going to want your own copy too!

I was so excited to go and get my copy of Anika and Chris’s new book! You’re going to want your own copy too!

What’s more fun on a Friday than a giveaway?!

You might be thinking, maybe a giveaway that includes something yummy to eat?

You’ve got it!!

I do lots of book reviews and lots of giveaways, but it’s always more special to me when I know the author of the book personally.

Therefore, today’s review and giveaway is an extra-special one.

Last spring, I participated in the 2014 Providence Listen To Your Mother show, and I had the honor and privilege of sharing the stage with so many wonderful, talented women.

Anika Denise was one of those women. Anika told a wonderful, funny and yet emotional story about her children and their experience with their pet fish. You can hear her story here.

Today’s book review is another story by Anika Denise, a children’s book author, and it holds special meaning for me personally as well. The story behind this sweet children’s book, “Baking Day at Grandma’s” is from Anika’s own childhood as she grew up spending time with her Grandma Rose. Her story reminds me of my own two grandmothers and my mother, and the rich tradition of baking together that has been instilled in me as well as the rich tradition of giving. It’s a tradition I’ve written about each December on my blog as I share my own Grandma Rose’s recipe for her Italian Wine Biscuits and as I’ve shared my Grandma Grello’s recipe for her Christmas Prune Cookies. I’ve written about the years I spent growing up, baking with my mom so that my brother and I could go off delivering trays of cookies each Christmas Eve day. It’s a memory that I hold dear to me, and I’ll continue to share them again this holiday season, beginning next week.

In the book trailer (link below), Anika talks about the fact that growing up she spent a great many summers and winter vacations with her Grandma Rose. I too, spent summers and school vacations with my grandparents, making special memories with them and learning their cooking skills. My kids now spend time baking with my mother as well and carrying on that special bond and tradition.

As I flipped through my book, I found each illustration to be more beautiful than the last.

As I flipped through my book, I found each illustration to be more beautiful than the last.

Christopher Denise is the amazingly talented illustrator of “Baking Day at Grandma’s” and in the trailer below he explains where much of his stunning scenery is derived. Each illustration in the book is more beautiful than the last, and the Denise team does a wonderful job of both showing and telling such a sweet story, one can’t help but love it.

One of the best parts of the book, is the recipe Anika shares in the back of the book. It’s her Grandma Rose’s recipe for chocolate cake, and it provides a perfect opportunity for families to bake together, to spend special time together and even (here goes the teacher in me again) to throw in a little hands-on kitchen math and science. I won’t share the recipe here, of course, but when you get your own copy of the book, you’re going to love that extra-special touch.

Given that the holidays are coming up, I think that “Baking Day at Grandma’s” makes a perfect gift! Being a person who loves themed gifts, I can just imagine a kid-sized apron, maybe a matching adult-sized apron, and some cute baking supplies added in. It’d be a wonderful treat for anyone–child or adult, and a great tradition starter or an add-on to an already existing tradition of baking and sharing!

Listen in this trailer for the book, as Anika and her husband Chris, speak about how this story came to be, and then enter my giveaway for your own copy of the book!

HERE’S HOW YOU WIN:

Leave me a comment below telling me who you’d like to have this book for, and why!

Entries will be accepted until Sunday, December 14, and one lucky winner of their very own copy of “Baking Day at Grandma’s” by Anika Denise and Christopher Denise will be announced on Monday December 15.

**This contest is open only to those in the continental United States!**