Archive | Jennifer L. Cowart RSS feed for this section

Summer Couponing Update

14 Jul
Last week's CVS haul was amazing!

Last week’s CVS haul was amazing! I spent $6 on all of this, which is equivalent to paying for just one purple bottle of the shampoo shown here. I had $25 in Extra Care Bucks and a variety of manufacturer’s coupons to combine with the CVS weekly promotions and sales.

It’s been such a long time since I did a couponing post. The springtime is so busy at work and at home that I don’t have as much time to devote to couponing as I’d like, so I didn’t have a lot of really great hauls to write about. I got lots of little deals here and there, but nothing really blog-worthy.

However, this summer in just one week’s time or so, I had two huge hauls and when I posted the photo shown here on the left on Facebook last week, I had a lot of “Please tell me how!” type of requests, so I decided that I’d do a post about couponing soon.

On the night that I came home with all of the items shown here, I said to my husband, “And I bet when I go back, I’ll have earned $5 from the Beauty Club too!” At CVS, for every $50 you spend on beauty products you get $5 back. Shampoo, conditioner, hair color, hair supplies, body wash, and all makeup products count as beauty supplies. With three girls and myself living here, we go through a whole lot of all those things. At CVS there’s always great sales and great CVS coupons to stack along with the  manufacturer’s coupons for all these types of items, you can’t go wrong.

Sure enough, when I went to CVS tonight (I realized we were completely out of extra toothbrushes and I’d just tossed mine in the trash) my $5 Beauty Club reward popped out, but so did a $5 Prescription program reward! I walked into the store with $10 to spend for free! (At CVS, for every 10 prescriptions you fill, you earn $5. You can sign up three customers per loyalty card.)

My coupons and Extra Care Bucks rewards in hand, I headed straight to the toothbrush section. After comparing prices and sales, I opted to just go with a basic set of two CVS brand toothbrushes. From there I moved on to the makeup section because when I’d scanned my card at the CVS machine, a coupon for $4 off $12 of makeup popped out. I try to keep things like foundation, mascara, and concealer, on hand because again…a house full of women, two of whom use makeup, we go through quite a bit.

This week's haul was just as good, if not better, than last week's! I had $22 in Extra Care Bucks and several manufacturers coupons to combine with the new week's sales and promotions at CVS!

This week’s haul was just as good, if not better, than last week’s! I had $22 in Extra Care Bucks and several manufacturer’s coupons to combine with the new week’s sales and promotions at CVS!

Imagine my surprise when I came upon the Physicians Formula makeup section and saw those bright yellow CVS signs that said, “Buy any 2 Physicians Formula items and receive $10 in Extra Care Bucks!” I couldn’t believe my luck! I had $4 off already! I grabbed two of the concealers that we use, which are $6.99 each, which gave me the $12 I needed to spend to use the CVS $4 coupon, knowing I’d earned my $10 back.

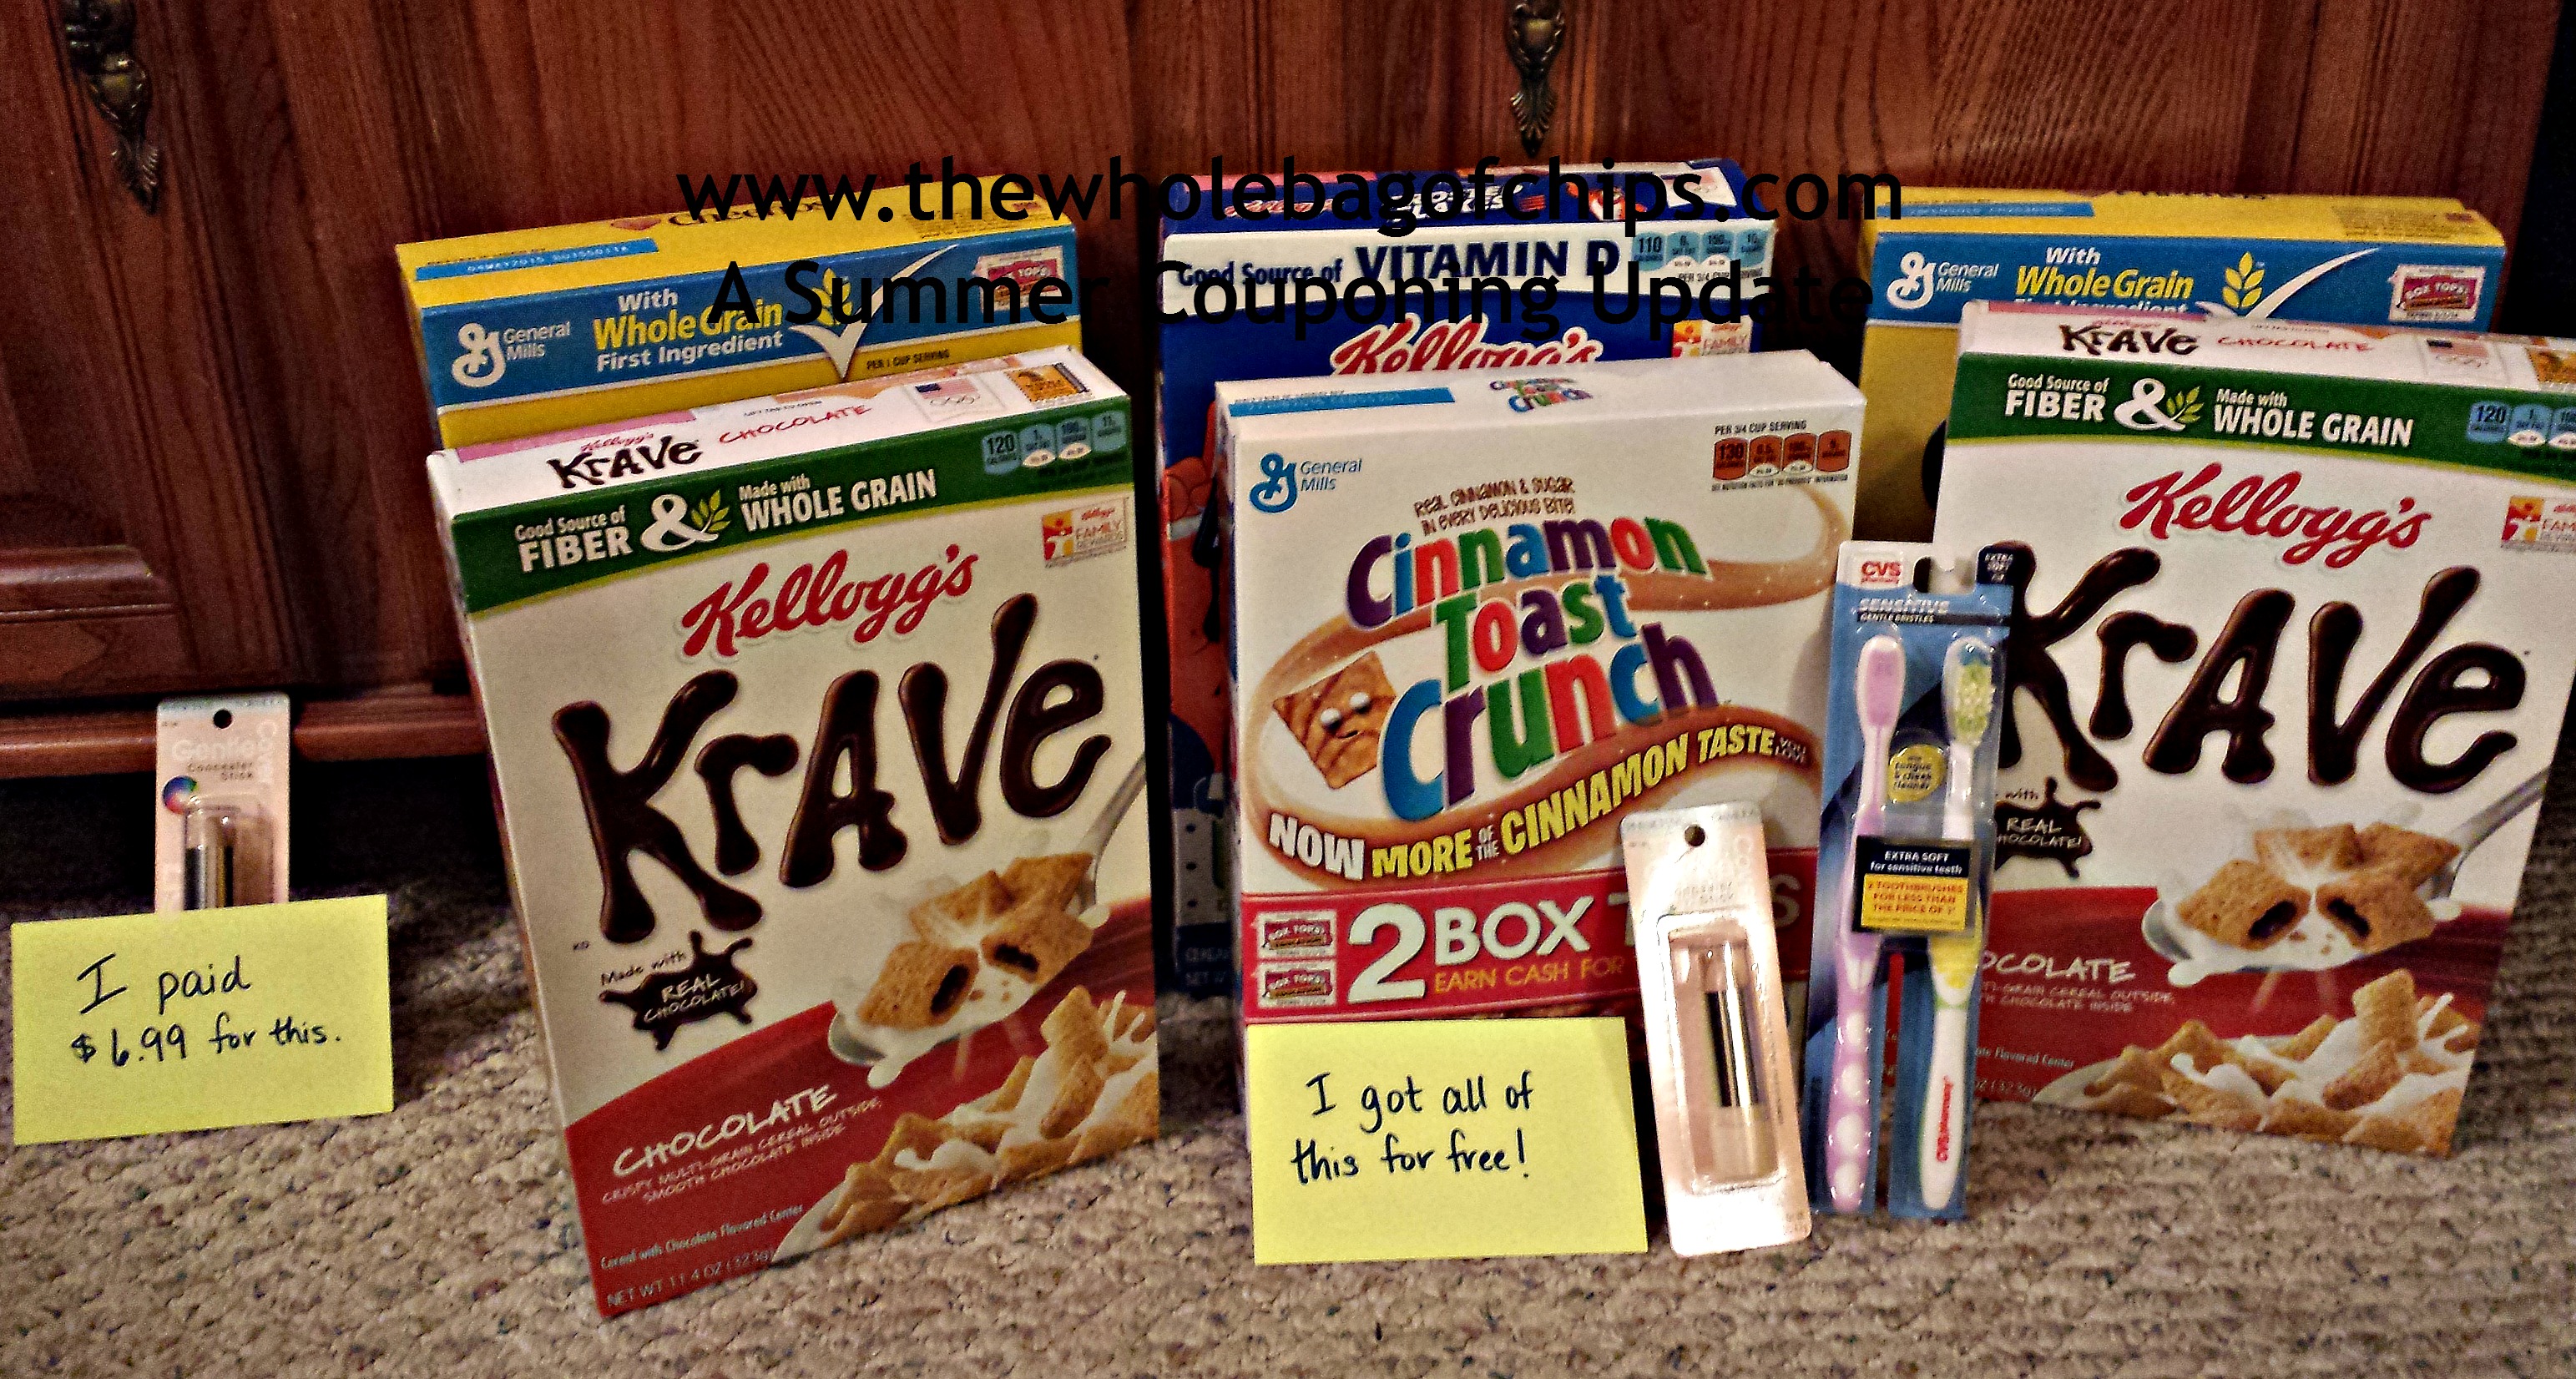
I moved on to the cereal section. We go through tons of cereal for breakfast and snacks, especially in the summer. I buy a huge variety usually, and we range from the healthier types to the sweeter types, depending on what coupons I have, what’s on sale and what’s left on the pantry shelves.

I had a $1 off 3 Kellogg’s cereals coupon as well as a $1 coupon off two boxes of the Cheerios in the yellow box, which also had a “get $2 Extra Care Bucks Back” sign on display.

In the end I had a total of $22 Extra Care Bucks and spent only $7 out of pocket for my entire haul shown here. That’s equivalent to paying for just one of the concealer sticks!!

I can’t emphasize enough that it’s so important to utilize all aspects of any store’s promotions in addition to manufacturer’s coupons when you shop, no matter what store you’re at. If the store utilizes a customer loyalty program, sign up for it. If they accept their own store coupons, internet coupons, manufacturer’s coupons or any combination of those things, use them to your benefit. Try to shop the sales and promotions even if you don’t currently need a particular item. If it’s something you use, it’s better to get it for free or almost free, ahead of time than to pay full price for it the day you need it. My toothbrushes are a perfect example. I’m usually very good about keeping them on hand from sales and promotions as well as from the dentist and I have enough toothpaste to sink a small ship, but somehow I’d forgotten to keep up with the toothbrushes, so some of my first $5 of Extra Care Bucks went right to a 2-pack of toothbrushes. That’s kind of a waste of Extra Care Bucks, but at least I had them to use and I didn’t have to pay for them anywhere out of pocket.

In my first week’s haul shown above, the majority of my coupons were CVS store coupons coupled with their own store promotions. At CVS you can stack their own store coupons with each other, so for example, if you have a CVS coupon off of Almay makeup for $2 off $10, and you have a CVS coupon for $5 off $15 of makeup, you can use both. If you have manufacturer’s coupons off of Almay you can use those as well. And if you’re lucky there may be a promotion going on such as a Buy One Get One 50% off, or an Extra Care Bucks promotion where you earn back some of what you’ve spent. If you have two manufacturer’s coupons for the same item and you buy two of that item you can use both coupons in addition to your CVS coupons. You can use manufacturer’s coupons off of the half-priced items and even off the free items for a Buy One Get One Free promotion.

No matter what store you go to, be sure to know their coupon policies before you go in. Not all stores are the same. I do the best with my coupons at CVS and Target in my area because they have their own store coupons and promotions to couple with the manufacturer’s coupons.

If you’re new to couponing, or want to be, I’d say start small. Pick just a couple of stores that you frequent most and try it out there before going all over the place trying to hit up every store in your town with your coupons. And remember, anything you save is better than not saving at all, and you’ll get out of it what you put in to it. If you have lots of time to devote, you’ll save more money. If you have a little bit of time to devote to it, you’ll save a little less money, but every penny saved is money in your pocket rather than someone else’s pocket!

Good luck and happy saving!!

What’s for Dinner Wednesday: Frogmore Stew

9 Jul
Frogmore Stew: I couldn't get enough of it!

Frogmore Stew: I couldn’t get enough of it!

I’d like to start this post with, “Well, at least I loved it.”

And now I’ll continue from there, with my disclaimer out there.

I’ve mentioned it before, but I’ll mention it again: I have a seafood allergy. It’s not all seafood, but it’s a lot of seafood: clams, oysters, scallops, calamari, mussels. It’s class two of shellfish, the mollusks. It’s also a relatively new allergy. I grew up eating all of the above, but only began reacting to the seafood in the past five or so years.

It really, really stinks. It stinks even more, I think, because I know what I’m missing. I can taste those foods in my mind. I crave them.

As a native New Englander, it’s an awful allergy to have, and in the summertime it’s particularly really awful. Seafood is everywhere and it’s particularly prominent in the summertime. It’s the thing to do, the post-event treat, or the event itself, as in a good, old-fashioned clam boil.

A clam boil traditionally is where you cook the clams, the corn, the potatoes, the onions, the white fish, saugy hot dogs, everything all together and then you eat it. The smell is to die for if you love seafood the way I do. The taste is even better. You often pair it with some white clam chowder, and some golden fried clam cakes. Clams, clams, clams.

I miss clam boils.

That’s why, when I saw this recipe come across my Facebook timeline for something called Frogmore Stew, I had to have it. I tagged my husband: “I can eat this,” I said. It didn’t have clams. It had shrimp, which I can have, and kielbasa, which we like and then the usual corn, potatoes, onions etc. I wanted it instantly. **The recipe that I have linked here may not be the exact one that came across my page because the one I saw go by had kielbasa as the ingredient, whereas this one has sausage but you could substitute kielbasa. I couldn’t find the original post on my page that I’d shared when I looked back to type this post. Everything else is the same, however.**

And, the good husband that he is, I had it for dinner that same night. He made the whole thing, just for me.

I was in heaven.

I will say, as I alluded in the beginning of this post: I was the only one.

According to my husband, a true clam boil is better.

Well, of course.

My kids had a variety of reactions from “Can I just make myself a bagel?” to “Where’s the cocktail sauce?” to “I’ll have just corn and kielbasa please.”

But, I honestly didn’t care. I was so happy to have a version of a clam boil type of dinner that had almost all the ingredients, the same aroma, and wouldn’t put me down for the count, that I really didn’t care who else loved it as much as I did.

So, my recommendation? I’d totally make it and eat it again. I have friends who also said they made it and loved it in and around the same time that I did, so it wasn’t just me!

If you like all the ingredients in the recipe and you’re looking for a new and different twist on a traditional New England clam boil as I was, I highly recommend you try this one!


Fun Friday: So Many Strawberries!

4 Jul
What to do with more than ten pounds of strawberries?

What to do with more than ten pounds of strawberries?

We went strawberry picking!!

I had not been strawberry picking since I was a child. Each year it seems, we’d miss the season between the end of school and the start of summer. This year, when a friend posted her picture of her strawberries on Facebook, I decided that I was going to go that same week. I knew my kids would love it and I knew there was lots that I could do with fresh-picked strawberries.

We went on a beautiful, picture-perfect day. There were just a few clouds in the sky, the sun was bright and the temperature was an even 75 degrees; not too hot, not too cold. We couldn’t have asked for a better day.

Within an hour we had picked a basket full of strawberries. I was beyond excited!

As we drove home, I began to consider that full basket of berries that was sitting in the back of my car. I could smell them.

I started to think of all the things I wanted to do with all those berries. I knew that although it seemed like there would be a never-ending supply, I’d have to be strategic and prioritize because eventually they’d run out. I also knew that the berries were fresh and “ready,” which meant they’d turn quickly. I only had a day, two at most, to make use of them.

Right off the bat when I got home, I sliced the berries and put sugar and orange juice on them for strawberry shortcake. I used this recipe from Taste of Home for my biscuits and my berries, but I did add more sugar to my biscuits after taking a quick taste of the batter. I like mine sweet! That would be our dessert for that very night.

This recipe from Caramel Potatoes was so delicious!

This recipe from Caramel Potatoes was so delicious!

Next, I started prepping a dessert recipe I’d seen just days before, on the Caramel Potatoes blog for Strawberry Crumble Pie. I get their email every day and the recipe for the pie looked right up my alley. I happened to have a pie crust in the freezer and I now had plenty of berries.

The pie chilled overnight and we cut into it the next night for dessert. It was amazing!

From there, I needed to think ahead. I knew that part of my goal was to have plenty of berries on hand frozen for smoothies, since that’s something we use a lot of all year long. I had no idea the best way to freeze them, so I Googled how to freeze fresh-picked strawberries and found simple instructions for freezing both whole and sliced from Taste of Home, once again. I decided to do both. The whole would be for smoothies, and the sliced would be for a future strawberry compote, maybe even on July 4th for our breakfast!

The following day I picked one more recipe that I wanted to make as I tried to stretch my berries just a little further: my mother in law’s recipe for Strawberry Bread, one which has always been a favorite of mine. I love that it makes two breads, and we usually freeze one and eat one. This time I put chocolate chips in the one we ate that day and left them out of the one we froze.

There are so many things you can do with strawberries, and the summertime is the very best time to do them. Although picking season is just about done for strawberries, eating season can be all year long between using frozen and fresh, if you can find them. Now that we’ve frozen some, we’ll have the taste of summer once again in the fall or winter, if we can hold off that long!

If you’re looking for additional strawberry recipes, you can find several more here on my blog, just by searching Strawberries in the search bar. There are recipes for desserts, breakfasts, shakes and even a strawberry salad!

And then, before we know it, it’ll be blueberry picking season!

What We’re Doing for Fun This Summer: Letterboxing

30 Jun

Look, we found a letterbox!

ORIGINALLY POSTED JULY 30, 2012

Have you ever heard of letterboxing?

It’s so much fun, it’s free, and it’s great for a family activity during any season that’s not freezing cold. For us, that’s 3/4 of the year, but we really only get to do it in the summer for the most part because that’s when we have time to do things.

Things that aren’t school and work things.

Fun things.

Like letterboxing.

I first heard of letterboxing so long ago, I don’t even know if we had all three kids yet. I read about it in Family Fun Magazine. I don’t get that magazine any longer and I can only imagine all the amazing ideas I’ve missed, but I used to love it. I credit all our letterboxing fun to the article I read in Family Fun.

I remember reading the article and saying to Don, “When our kids are bigger, I want to do this,” and I never forgot it. In 2008 we began our letterboxing adventures. Alexandra, our youngest, was three.

You’re probably saying, “Get to the point! What IS letterboxing???” I take the long way around sometimes, when I tell a story.

Okay. Here’s what it is and here’s how you do it:

All around the world people are hiding, and finding letterboxes!

All around the world, literally, people are hiding these little boxes in secret places and uploading the clues to help you find them, online.

I kid you not.

It’s like a giant treasure hunt, really.

Here’s what you need to get started:

*A notebook of some kind (Mine is super fancy because I’m crafty and I actually have notebooks like this just hanging around in my office. However, it can be a simple composition book.)

*A pen

*A rubber stamp (some people make their own. I used a Stampin’ Up! stamp of a globe. I thought it appropriate.)

*An ink pad

*Something in which to store all those things. I used to use a gallon ziploc bag. Then I used a big manilla folder. Now they’re in an expandable file I found in my office. That’s the most durable thing I’ve used so far.

Now here’s what you have to do:

1) Visit this website for Letterboxing North America (assuming that’s where you live).

2) Click on the state you want to explore. Click on the area of the state. Ours is set up by counties.

3) Check out the list of letterboxes in that area and pick some to print out. I read the clues first to see if it says the last time the box was found or if it’s missing, or if the terrain is notable in any way, such as rough or rocky or easy.

4) Print out the clues for the boxes you want to look for. We started with boxes right in our own city to get the hang of it, and then expanded to nearby cities and now we do them even if we’re traveling on vacation and think we’ll have a chance to look for a letterbox.

Now you take your clues and go.

1) You park your car where they tell you to, and start following the clues until you reach the hiding spot where they say the box is. We told our kids right off the bat that sometimes the boxes are missing or we won’t find them, just so they wouldn’t be so disappointed if that happened, but it’s not been the norm for us.. Usually we find them.

2) When you get to the hiding place you find the box. It’s usually a tupperware type of plastic box. Open the box. Find their stamp, ink and notebook.

3) You stamp your stamp into their notebook and we like to leave a little note with the date and our last name, so they know at least when the most recent one was found. We sometimes will look back to see how long the boxes have been hidden in that spot.

4) Then you take their stamp and their ink (or use your ink if needbe) and stamp their stamp into your notebook. Put the date and where you are so that you too, can look back in the future and see all the places you’ve explored and found letterboxes, and how long you’ve been doing it.

5) Put all their stuff back in their box and REHIDE the box. Don’t just leave it out there in the open. Put it back where you found it and cover it back up as it was so that the next person can find it.

That’s it! Done! Fun times!!

We never even knew this spot existed until we followed the letterboxing clues. The box ended up not being there, but the stunning location we found instead made up for it.

We have not only found some neat letterboxes, but we’ve found some incredible spots, gorgeous places that we never knew existed in our own state. We’ve also explored some neat historic places both in our state and in other states, where we’ve found letterboxes.

Letterboxing makes a day trip double the fun.

Some state parks have a series of letterboxes in them, sometimes three or four of them. You can spend the day hiking through the park and finding them.

A few things to keep in mind:

Dress appropriately. Sneakers work better than flip flops, for example.

Sunscreen, snacks, water, tissues and band-aids are all good things to bring with you. You never know what you’ll need but those basics have served us well.

Next time you’re looking for a fun, active way to spend the day together with your family, give letterboxing a try!

What’s for Dinner Wednesday: Tortellini, Shrimp and Tomato Soup

25 Jun
Sometimes impulse shopping can be good!

Sometimes impulse shopping can be good!

Grocery shopping on an empty stomach…never a good thing. Grocery shopping with a bunch of kids who all have empty stomachs, also not a good thing.

At least, not usually.

At the end of the school year, the kids and I were power walking through Aldi’s, trying to pick up a few things to get us through the next bunch of days, but we were all hungry. There was lots of, “Can we get this? Oh…we haven’t had this in a while, can we get it….Oh Mommy I LOVE these, can we get them,” I’m sure you know how it goes.

I mostly said no to many of the requests unless it was something I knew we actually needed. I try to keep my big grocery trip to a paycheck week only, and I knew that this could quickly get out of hand if I didn’t keep my kids’ requests to a minimum.

However, one of the requests I said yes to was my daughter’s plea for Tortellini. We hadn’t had it in a while, I did need some meal fillers, and it looked good just in the packaging because it was tri-colored pasta.

We threw not one, but two bags in the carriage and moved on. We passed the frozen shrimp section next. I love putting shrimp and pasta together so I threw one bag of that in the carriage also.

I wasn’t sure what I would be doing with the items I was purchasing, but I couldn’t wait to get home and do Google search and see what came up. I didn’t just want to do plain old pasta and sauce. I’d done that in a pinch too many times this school year.

Sure enough, my Google search led me to a great recipe for Tortellini Tomato Soup. I knew I could add shrimp to that without a problem. Funny enough, one of my other daughters had been begging me to find a recipe for Tomato Soup that could equal the sample we’d had earlier this winter at Whole Foods. At $4.99 for a small jar it was a once-only treat for us, and I’d promised to find her a recipe to equal it or surpass it.

The recipe I found, from Two Peas and Their Pod.com, was great. It didn’t take long to prepare and it had easy ingredients. I knew that I could throw the shrimp into the mix without a problem.

The soup looked amazing as it cooked. Cooking time didn't take very long at all and the ingredients were simple.

The soup looked amazing as it cooked. Cooking time didn’t take very long at all and the ingredients were simple.

In my house there are such a wide variety of tastes that it’s hard to please everyone. I knew that this recipe had the potential to work for everyone. I could separate some of the soup before throwing in the pasta and shrimp, for those who wanted just plain tomato soup. Then, anyone who wanted tortellini and shrimp in theirs could have it (me) and anyone who wanted one or the other could do that too. There was definitely something for everyone with this recipe.

I also threw the ingredients into my bread machine, a newly rediscovered toy this year, to make a French Bread to go along with our soup. The recipe on Two Peas and Their Pod showed the soup with a nice crusty bread, and I couldn’t get that image out of my mind when I was prepping my meal.

It turned out to be a fabulously delicious dinner, and everyone was happy. I had enough leftovers of both the plain soup and the loaded soup to have lunch for a couple of days, and the bread was the perfect accompaniment to the meal. The use of Greek nonfat yogurt in the recipe made it ideal for our family’s dietary needs, as we have to stick to a pretty lowfat diet as much as possible. The soup was still just as creamy as it would have been had we used a heavier cream.

I definitely would make this soup again, and I did indeed keep my promise of finding my daughter a soup that’d match the one she’d sampled in Whole Foods, and for a fraction of the cost of one small jar in their store.

I have copied the recipe from Two Peas and Their Pod below, just as they have it on their site. I encourage you to pop on over to their site as well, they have lots of great recipes on there. This is not the first time I’ve visited it myself!

I was essentially able to make two soups with one recipe: one loaded with tortellini and shrimp, and one creamy tomato soup.

I was essentially able to make two soups with one recipe: one loaded with tortellini and shrimp, and one creamy tomato soup.

TWO PEAS AND THEIR POD CREAMY TOMATO TORTELLINI SOUP

Ingredients:

1 tablespoon olive oil
1/2 cup chopped onion
3 cloves garlic, minced
2 bay leaves
Dash of crushed red pepper flakes
2 (28 oz) cans diced tomatoes
1 (32 oz) container vegetable broth
1/4 cup chopped fresh basil
Salt and freshly ground black pepper, to taste
1/2 cup plain Greek yogurt
2 (9 oz) packages fresh or frozen cheese tortellini (we use Buitoni)
Grated Parmesan cheese and fresh basil, for garnish, optional

Directions:

1. In a large pot, heat the olive oil over medium heat. Add the onion and garlic and cook until tender, about 5 minutes. Stir in the bay leaves and crushed red pepper flakes.

2. Add the diced tomatoes and vegetable broth. Stir in fresh basil and season with salt and black pepper, to taste. Simmer on low for 15 minutes.

3. Remove the bay leaves from the pot. Use a hand immersion blender to blend the soup (or carefully transfer soup to a blender to blend and return to the pot). Stir in the Greek yogurt until well combined. Stir in the cheese tortellini and cook on medium-low until tortellini is cooked, about 7-8 minutes. Serve warm.

Fun Friday: Peach Cobbler from GirlsGoGames.com

20 Jun
After a long, hard day, this was a great dessert to come home to, thanks to Liz.

After a long, hard day, this was a great dessert to come home to!

This was a long, tough school year. Lots of hard work, lots of time and schedule commitments. Oftentimes our kids, just like lots of other people’s kids, could be found on some device or other during their downtime, if they happened to have any. They’d make Video Star videos to their favorite songs, play a game or chat with friends.

I was surprised however, when one day my daughter approached me asking if she could make a recipe from GirlsGoGames.com. I didn’t even realize Girls Go Games had recipes. I wasn’t even sure if they were real, doable recipes or not, but when I took a look, they were. The site listed tons and tons of recipe ideas, complete with ingredients and directions.

I immediately said yes, we definitely could do that. We chose a peach cobbler, an easy recipe which used canned peaches, even though I’m sure you could substitute fresh if you had them. It wasn’t quite peach season here yet, so we were going with the canned option.

Having the ingredients here at the house, now that was another story. It turned out that we were low on lots of stuff and and there wasn’t one recipe on that particular day, that we had everything for. We had to put our baking plans on hold temporarily until I picked up a few things we needed.

Sunday turned into Monday, and Tuesday and Wednesday, and you know how the days fly by.

“Mom, WHEN can we make my recipe from Girls Go Games????” she asked.

I didn’t really have an answer. There wasn’t time to do it when I was home, at least not for a few more nights until the next weekend arrived.

However, one night while I was out, I got a text from home. The text contained a photo of a bubbling peach cobbler coming right out of the oven at that very moment, courtesy of my daughter and my husband, who helped her make it that night.

“I’m on my way home!” I wrote back, as I thanked him profusely for taking over the cooking project for me.

SUCH a good dad.

I arrived home, just in time to be handed a pretty plate of cobbler with vanilla ice cream on top.

It was amazing. So delicious, I was shocked. I couldn’t believe such a great recipe that was kid-friendly could come from an online kids’ game site. It was definitely a keeper.

My kids work hard and they play hard, and I don’t mind giving them down time ever. I think they need it as much as I do. They read a lot but they’re also on their devices a lot too. It was nice to know, at least this time around, that it wasn’t just mindless time spent staring at a screen. Although I don’t mind them having that kind of down time on occasion too, it was great to see that their screen time turned into a delicious treat for all of us.

I’ve linked over to the recipe twice in this post. If you have a daughter who likes games and likes to cook, you can have them check out the site, and maybe one day you’ll come home to a yummy dessert at your house too!

Hot and bubbly, this recipe was definitely a keeper!

Hot and bubbly, this recipe was definitely a keeper!


Fun Friday: New blender review and recipe

13 Jun
A new blender for all our delicious smoothies!

A new blender for all our delicious smoothies!

You know you’ve been married a long time when a new blender in the house is super-exciting news.

We used to have a blender that we’d had for years and years. It did a decent job and it got quite a bit of use in our kitchen. However, it couldn’t really handle ice, especially when we wanted smoothies, and it was extremely loud when we used it with ice. It didn’t matter though, we kept on using it. If it’s not broken, as they say, don’t fix it.

Well, that philosophy worked until the day smoke came out of the old blender during a smoothie-making session. My husband was making the smoothies and he called out to me from the kitchen.

“I think the blender’s dead,” he said.

“If it’s that black stuff that shows up after you use it, it always does that, it’s fine,” I said.

“And does it always have smoke coming out of it?” he asked.

“The blender’s dead,” I said.

What a bummer: Time to buy a new blender, just a few weeks after our toaster-oven had also passed on into the world of over-used appliances.

But, on the bright side: Yay!!! I get to go blender shopping!!!

I decided that this time, I would shop with purpose. I wanted an affordable blender that could handle the blending of ice and frozen fruits which are so often the ingredients in our cool, refreshing smoothies.

As I wandered through Target one day, the Ninja blender caught my eye. It caught my eye because it had one of those great little red Target signs that alerts you to the fact that not only is something on sale, but you also got a gift card with its purchase.

In this particular case the blender I was looking at was on sale for $139 and you received a $25 Target gift card back with the purchase. Additionally, I am a Red Card carrier, which means I get an additional 5% off of my purchases all the time. The Red Card can be a debit card or a credit card, and ours is a debit card so our purchases still come out of our checking account.

I examined the blender box. It was an 1100 watt blender. It came with not one, but TWO travel-sized cups that fit right on top of the blender so that you blend right into them, cover and you’re good to go. The blender had three speeds as well as a Pulse button, which I never truly understand the purpose of, but it must be important so it’s good that it was there. It had a pour spout on the big blender pitcher, which I loved and it was easy to take apart and clean.

Best of all: it was advertised as being powerful enough to take on ice.

Frozen strawberries gave this smoothie a nice frozen consistency and the blender had no trouble with the frozen fruit.

Frozen strawberries gave this smoothie a nice frozen consistency and the blender had no trouble with the frozen fruit.

That’s really all I needed to see. That and the gift card special and I was sold.

On my way out of the appliance section I swung by the frozen fruit case and grabbed a bag of frozen strawberries. I could already envision a delicious smoothing coming together in our new blender that very afternoon.

Once we got the blender open and out of the box, I was really able to see some neat features on the new blender, things that I loved that I didn’t even knew were priorities.

I loved that the cover of the blender locks on and needs to be released to come off. I loved that the cover has a pour spout that opens and closes.
I loved the single-serve shake options. I loved that the measuring markings on the blender were in dark print. My last blender had a glass pitcher and the markings were raised glass so they were hard to see.

Best of all, our smoothies have been delicious.

The smoothie above has the following ingredients in it:

Two bananas

1/3 cup Nutella

1 pkg. frozen strawberries (I used 16 oz.)

about 4 cups of skim milk

This smoothie was delicious and had a decent amount of fruit in it for an after school snack!

We’ve also done chocolate/peanut butter/banana/vanilla low-fat yogurt smoothies and even a couple of “adult beverage” “smoothies” for a Memorial Day cookout we hosted. The blender has been great. It’s quieter than our old blender when we use ice and so far, no smoke, no black “stuff.” My husband has utilized the single-sized option several times and takes his smoothie to work with him in the car.

This is definitely a product I’d recommend to others. The price-point was good for our budget and the gift card helped us out too. If you’re in the market for a new blender I encourage you to consider the Ninja blender as an option! Although I have not been compensated by Target or Ninja for this review, I am so pleased with the product, I thought I’d share my opinions and experiences with you.

From after school snacks, morning breakfast to go, and adult beverages, this blender has been a great addition to our appliance family!

From after school snacks, morning breakfast to go, and adult beverages, this blender has been a great addition to our appliance family!


Fun Friday: Baked Oatmeal: It’s not just for breakfast

6 Jun
100_3245

I’d eat this for breakfast, lunch or dinner!

ORIGINALLY POSTED MAY 10, 2013: The other day I came across a great new recipe for baked oatmeal. It was on Skinnytaste.com, a blog I follow on Facebook. I love all kinds of oatmeal from steel cut to overnight to baked.

This recipe also had a fruity combination that I love: strawberry and rhubarb. I didn’t have rhubarb, but I noticed that it had bananas in it, and strawberry and banana is another top favorite combination of mine so I decided to make it without the rhubarb.

Besides the fact that I skipped the rhubarb, the other thing about this recipe is that I made it as an after school snack, not for breakfast! It was so good, and everyone had seconds, everyone loved it and there was very little left over.

I would definitely make this recipe again and if I had rhubarb, I’d throw it in there, but it was also fine without!

Without further ado, here, from the Skinnytaste Blog
For the fruit filling:

  • 2 1/2 cups strawberries, hulled and quartered
  • 3/4 cup rhubarb, cut into 1/2-inch pieces
  • 1 medium ripe banana, sliced thin
  • 1 tbsp cornstarch
  • 1/3 cup honey
This snack was quick to put together with simple ingredients.

This snack was quick to put together with simple ingredients.

For the Oats:

  • 1 cup uncooked quick oats (use GF oats if Gluten Free)
  • 1/3 cup slivered almonds
  • 1/2 tsp baking powder
  • 1/2 tsp cinnamon
  • pinch of salt
  • 1 tbsp honey
  • 3/4 cup fat free milk (or any milk you desire)
  • 1 large egg
  • 1 tsp vanilla extract

DIRECTIONS
Preheat the oven to 375° F.  Lightly spray a 9 x 9″ ceramic baking dish with cooking spray; place banana slices on the bottom of the baking dish and set aside.

Combine the strawberries and rhubarb in a large bowl. Add honey, sprinkle with cornstarch and toss until fruit is well coated and place in prepared baking dish over the bananas.

In a medium bowl, combine the oats, half of almonds, baking powder, cinnamon, and salt; stir together.  In a separate bowl, whisk together the remaining honey, milk, egg, and vanilla extract, then add to the oats.

Pour the oat mixture over the strawberries and rhubarb, making sure to distribute the mixture evenly.  Sprinkle the remaining almonds over the the top.

Bake the oatmeal for about 40 minutes, or until the top is golden brown and the oatmeal has set. Serve warm from the oven.

What’s for Dinner Wednesday: Summer Pasta Salad with Peaches

4 Jun
This salad was a hit all around!

This salad was a hit all around!

I’m always getting emails with recipes in my inbox, and every so often one of them will catch my eye and I’ll open it up. The other day I happened to notice a recipe from Cooking Light for a Summer Peach and Tomato Salad.

The name of the recipe, the combination of peaches and tomatoes made me click on it and read it. Of course other than peaches and tomatoes, yet not all the kinds of tomatoes they recommended, I didn’t have most of the ingredients for the salad. I didn’t have Sherry Vinegar or red onions or Feta cheese (I don’t even like Feta cheese) or fresh Basil.

Even still, the recipe stayed on my mind. I knew I wanted to try it one day. In the meantime, I still had to come up with my meal planning for this week, and one night we were going to be grilling pork chops. I went downstairs to my pantry to see what I could put as a side dish or two with the chops, and of course, we had next to nothing since we hadn’t done our “big shopping” yet. However, we had a box of pasta, we had honey and olive oil, I knew we had tomatoes, cucumbers, mozzarella cheese and….fresh summer peaches. I decided to do a variation on the Cooking Light recipe and make my pasta salad for the side dish, but add in some peaches with the other veggies.

“Ewwww….” my daughter said. “That sounds gross together.”

Excellent. A vote of confidence.

Not.

But no worries, I was going to try it anyway. To me, the tomatoes and peaches sounded like they’d go well together, and I looked up a substitution for Sherry Vinegar which said Rice Wine Vinegar which we always have and like to use.

I put on the water to boil and began slicing my peaches. As my pasta cooked and I sliced, that same daughter wandered into the kitchen.

“Can I help?” she asked.

I let her help despite her lack of confidence in this new recipe. As I sliced up the peaches, she threw them into a big bowl and added in the tomatoes, honey, olive oil and vinegar. As I drained the pasta, she peeled and sliced the cucumber and threw that in too. She took a taste.

“This is actually pretty good together!” she said.

I might’ve said, “I told you so,” but I will neither confirm or deny that.

We tossed in the pasta and mixed it all together noting how pretty the reds and yellows looked together. I was wishing I had fresh Basil to add a touch of green, and I debated adding another peach, but decided for this first time out, just to leave it all as is, and see how well this Summer Pasta Salad with Peaches went over with the rest of the family.

Well….I couldn’t have been happier. Everyone loved it and the combination of the peaches with the other fruits, veggies and seasonings was perfect.

My daughter redeemed herself by exclaiming over and over again how great this was together, and I was happy.

I would definitely recommend bringing some summer into your recipes too, adding in peaches and other summer fruits to some of your regular meals. Making this recipe made me even more excited for the end of school and the summertime and for all the delicious summer-only items that are starting to come into season now.

Next time you’re making a salad, think of Cooking Light and their recipe, of my Summer Pasta Salad with Peaches, and see what variation you can come up with!

Even though initially she thought this salad didn't sound appealing at all, she was my biggest helper and biggest fan of the recipe at mealtime!

Even though initially she thought this salad didn’t sound appealing at all, she was my biggest helper and biggest fan of the recipe at mealtime!


What’s for Dinner Wednesday: Tiffany’s Care Package

28 May
I had the opportunity to meet Tiffany and her mom last week at Tiffany's graduation ceremony.

I had the opportunity to meet Tiffany and her mom last week at Tiffany’s early graduation ceremony at Home & Hospice Care of Rhode Island.

UPDATE: At about 11:30 am today, June 6, I posted this update on the Tiffany’s Care Package GoFundMe page:

Although I knew that at some point I’d have to share this message with you all, I am sorry that this time has come.

I’d like you all to please keep Tiffany and her family in your prayers as I received the news this morning from Cranston West that Bernadette has passed away.

Please know that all of you who have donated to Tiffany’s Care Package and who have been keeping Tiffany in your prayers without even knowing her, have made a huge difference in her life.

As always,
Thank you.


UPDATE: As of 1:oo pm on June 4, one week since beginning our fundraiser, the GoFundMe account is up to $4,235.00. We have also delivered additional cash and checks to the school for Tiffany’s Care Package. Thanks for all your support, we are almost 85% of the way there!

UPDATE: As of 6:30 am on May 30, 2014, we have surpassed our goal of $3000! I am so proud of how hard everyone is working to spread the word about this amazing girl. Thanks to everyone!

UPDATE: As of 11:00 pm on May 29, we are 96.8% of the way to our goal! We have raised $2904. If you haven’t read Tiffany’s story yet, please do. If you haven’t checked out our fundraising site for her on GoFundMe.com, please do!

THANK YOU ALL!!!

**********************************

If you’re a longtime reader of my blog, you know that today is Wednesday and on Wednesdays I usually post a recipe for dinner; a little inspiration to kick-start your day.

Not today.

Today I’m still hoping to give you some inspiration for your day, but it’s way more inspiring than a recipe.

Here’s my story. It’s not really my story actually, it’s Tiffany’s story and I hope you’ll be as moved by her story as I was.

Last week, I received an email from my editor, Dan at the paper. He had a “story opportunity” for me. A high school senior at one of our city high schools, the one my daughter will attend next fall, was about to lose her mom to cancer. With graduation just a few weeks away, it seemed that the occasion would come too late for Tiffany’s mom, Bernadette to see her receive her diploma. The high school, Cranston High School West, was going to be teaming up with the Hospice center where Bernadette was now being cared for, Home & Hospice Care of Rhode Island, and throwing her an early graduation ceremony the very next afternoon.

My editor’s question: Would I cover the ceremony?

I knew that of course I would cover the story, my concern was whether or not I could cover the story. Could I be strong enough to be there to witness this moment in Tiffany and Bernadette’s life and take pictures and notes, and could I then be able to even do them justice by writing them not a news article, but a true story; a keepsake for them to have which would document these final, special moments in Bernadette’s life, the end of one chapter in Tiffany’s life but yet the beginning of another?

One of my favorite photos of Bernadette as Tiffany was receiving her diploma

One of my favorite photos of Bernadette as Tiffany was receiving her diploma

I knew that ultimately my desire to be there for this girl who was just a few years older than my own oldest daughter, to be there for this mother who will miss all of the things I hope to be there to see with my own daughters, would outweigh my fear of not being good enough or strong enough to cover the story.

I said yes, and then I braced myself mentally, as much as I could in the next 24 hours for the graduation ceremony. It was as wonderful as such an event could be. I was so proud to be a part of the day, and to be a part of the group of people who pulled together to make it happen. My proudest moment of all though, was when I spoke to Bernadette before I left, kneeling down beside her and placing my hand on her arm as I spoke to her to say who I was, letting her know that their story would be in the newspaper, something her daughter would treasure and something which would memorialize the event forever.

Writing the story was hard, very hard, almost as hard as covering it had been, but my biggest concern was whether or not it was good enough for them. Had I done it as perfectly and beautifully as I could, had I captured every moment I could for them?

It seems I had. The article ran on our Beacon Communication websites early, days before it printed in the paper, so that Tiffany could share it with her family. Within hours it had a couple thousand hits, and within two days’ time it had almost 4000. You can read it here and see for yourself.

But after I sent in the story and after it ran online, I couldn’t get Tiffany and her mom off my mind. I know that I’d done a lot by writing this story for them, but I wanted to do more. I worried about Tiffany, an only child raised by a single mom, finishing high school alone, having to manage going off to college out of state alone. I worried about her. Who would take her shopping for extra long sheets for her bed in her dorm? Who would buy her towels or a college-sized fridge or send her care packages while she was away? As a mom, it was these things that weighed on my mind, in addition to the overall sadness of the situation. I knew that Tiffany was her mom’s primary caretaker all these years prior to Hospice, but who would take care of Tiffany? I know that friends and neighbors were pulling together, sometimes bringing her dinner these past few weeks, but I wondered and I worried.

Today, I decided to do more. In collaboration with Tiffany and her guidance counselor at Cranston West, where a fundraiser is currently taking place for her, I have decided to set up a GoFundMe fundraising page for Tiffany. When prompted by GoFundMe to choose a color for the page accents, I chose red, in honor of Tiffany’s Cranston West Falcon graduation cap and gown. When I was asked to choose a title for the page, I chose the name, “Tiffany’s Care Package,” because it is my hope that we can all show we care and help Tiffany over the next weeks and months as she is faced with saying goodbye to the mother who raised her alone, and tries to look ahead to her college days on her own. I want this to be a giant care package for Tiffany.

When asked to choose a goal amount to raise, I wasn’t sure what to put, and then I thought of 1:25 pm today when my article received its 3000th hit, when the 3000th person read Tiffany’s story. I took a picture of my computer screen with my phone to preserve the moment. So when asked to choose my goal amount to raise, I thought to myself, “If each of those 3000 people had even donated $1.00, that’d be a tremendous help to Tiffany.”

And so, although I’d love to surpass that goal, that’s the goal I’ve set for Tiffany’s Care Package.

I hope that you’ll consider donating to Tiffany through my Go Fund Me account. I purposely did not have anyone sending me money or writing checks out to me personally, so that everyone would know that this was a legitimate fundraiser. Although I know many of my readers do not know me, I hope that you will consider sending Tiffany a care package when you read her story, and donate to her page.

Tossing her graduation cap in the private function room at Home & Hospice Care of Rhode Island while her mom looked on.

Tossing her graduation cap in the private function room at Home & Hospice Care of Rhode Island while her mom looked on.