Archive | dessert RSS feed for this section

Fun Friday: Blizzard Juno

30 Jan
The calm before the storm.

The calm before the storm.

The last time I wrote, it was Monday, and now it’s Friday, just like that.

So we had a blizzard!

Yep, just as the forecasters had predicted for days prior, we got approximately two feet of snow, give or take an inch or twelve, depending on the drifts.

I spent most of Monday running from store to store to gas station getting the rest of what we needed for food, batteries, and gas for the car. By the time I sat down to start my actual work for the day it was 2pm and by the time I finished it, it was midnight, but I’d beat the storm both in my work and in my preparations at home. I was ready.

Thankfully, we didn’t ever lose power. The temps were frigid and the winds were howling, and we thought for sure it was going to go at any moment, but it did not. That made the week of days out of school and work much more enjoyable. It was like a surprise vacation.

At times we could barely see out the window, especially at the height of the storm.

At times we could barely see out the window, especially at the height of the storm.

We spent the first part of Tuesday literally just hanging out. People slept late, some later than others, and we watched the snow falling furiously and listened to the wind. The term “white-out conditions” was fitting for most of the day and night. We’d gone to bed with about 5″ of snow Monday night and woken up to find 12″ in the morning. By the next day we had at least 18 inches, maybe more. The plows would come by, and seemingly minutes later, you could barely see the path they’d made. We sat and watched TV until about 1pm and then we shut it off for most of the rest of the day.

Even though we didn’t lose power, we made use of the meals we’d planned, and we had several days to hang out, do things we never get to do (including put laundry away), and relax. The kids still had things from Christmas they hadn’t gotten to play with or use yet, things that are more involved and take time, so those things came out early on and I tried my best to make sure we made use of at least one of each child’s “things” during the week, so that no one felt left out. Because we had power, we baked; making special snacks using some fun kits the

The day after the storm dawned so bright and beautiful, a perfect, sunshiny day.

The day after the storm dawned so bright and beautiful, a perfect, sunshiny day.

kids had gotten for Christmas–individual pie makers, giant sugar cookie makers, and the like, all things I’ll focus on for upcoming blog posts throughout the next month or so. We had a family movie night, right in the middle of the week, all piled into the living room, watching an older movie that most of us had never seen.

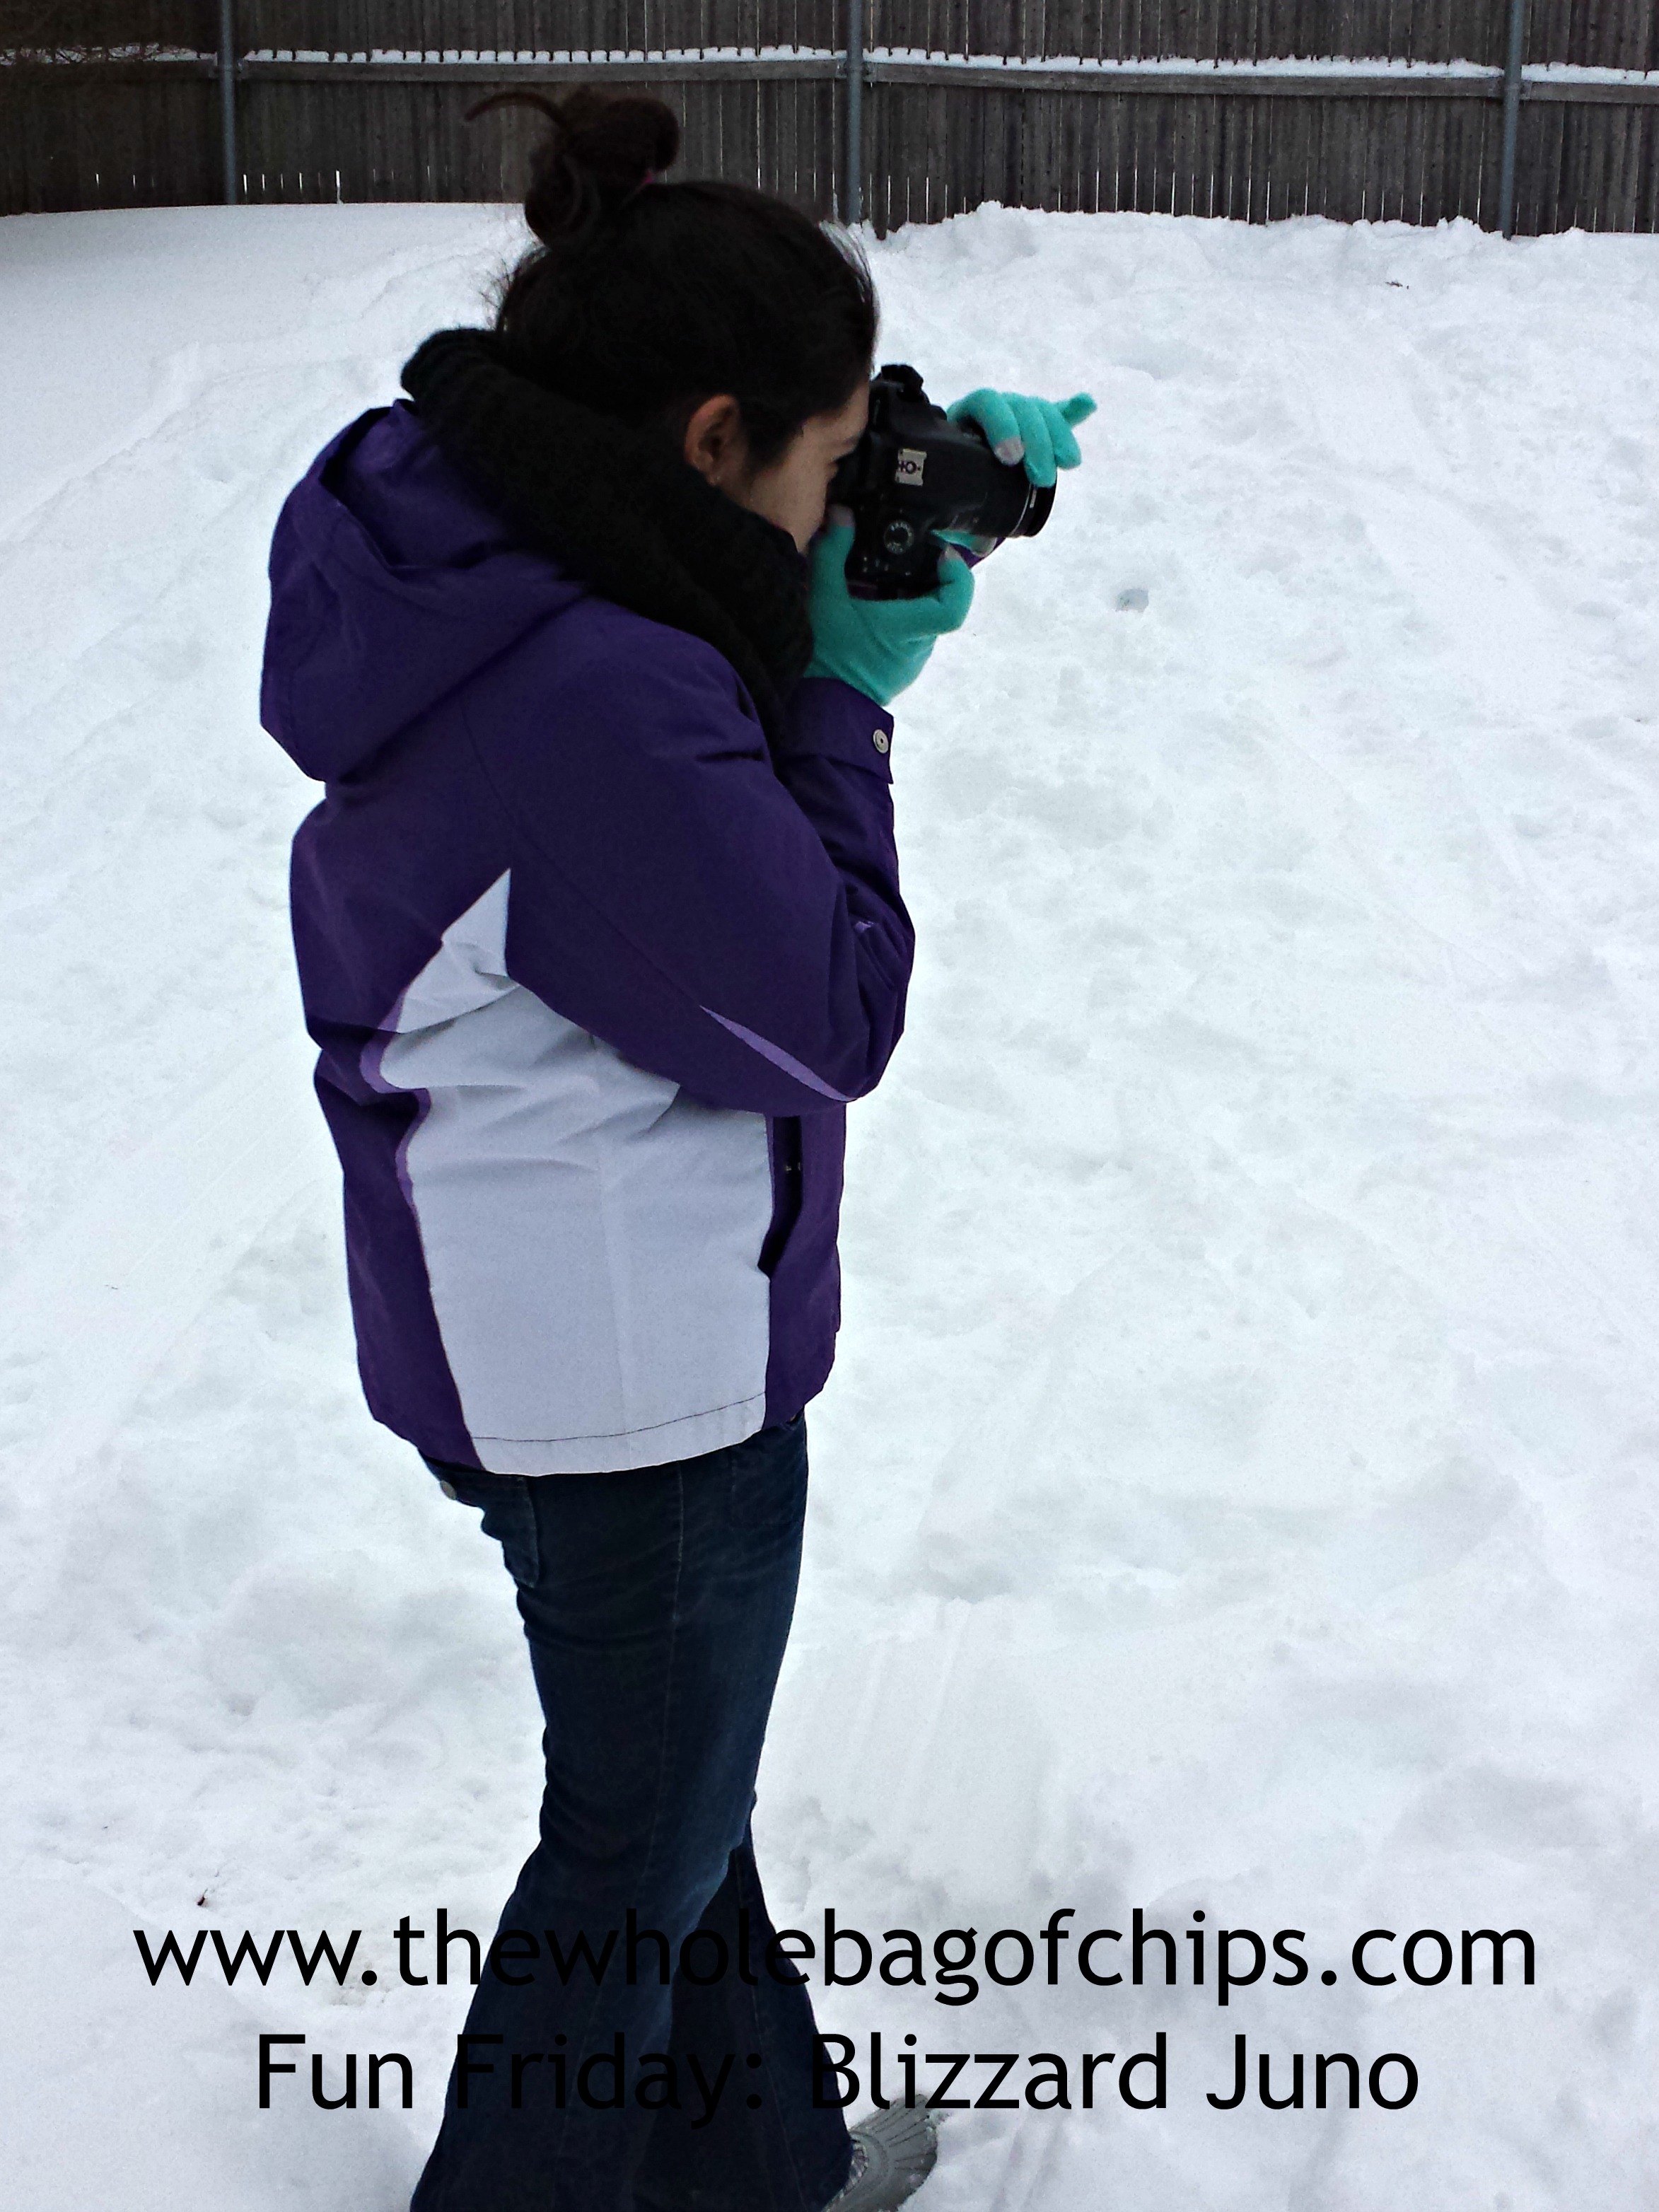
We had three days out of school and on the second day out, they all got to go outside and play, and as cold as it was, they were in snow-day heaven, as was I. It was so great to see them free and relaxed, enjoying outdoor play time in the middle of the day, in the middle of a week. So much time is spent working on work at school and then working on even more work after school, and doing extra-curricular activities, that many a day go by when outdoor play time just isn’t in the cards. Although everyone had homework this week, some more than others, they still had time to play inside, to play outside, to catch up on sleep, to relax, to cook, to create and to hang out.

For a blizzard, it was a great week.

And guess what?
It’s going to snow on Sunday and Monday. A big Nor’Easter. Again.

I’m not returning my extra batteries and hand-warmers yet!

No matter how old you are, you can always find something fun to do in the snow.

No matter how old you are, you can always find something fun to do in the snow.

Hooray for snow days!

Hooray for snow days!

Fun Friday: Apple Pie Bites from Megan’s Frugalista Diaries

2 Jan
The house smelled so good when the kids arrived home from school on this particular afternoon!

The house smelled so good when the kids arrived home from school on this particular afternoon!

Happy New Year!

After taking some time off from my blogging this past week, I’m sliding back into my regular routine. As I often do, next week I’ll begin blogging some great toy and gift reviews from the holidays. I’ll continue this during the month of January in order to give you some gift-giving ideas for the rest of the year, but before I do, I thought I’d put out a new Fun Friday recipe for you.

Today is Friday and it’s still school vacation, so there’s lots of time to relax and do some fun things together before heading back to the school routine. I love school vacation weeks exactly for this reason. We get to do some fun things that we normally don’t have time for during the craziness of the school year. This is a perfect recipe to try out today. It’s a great recipe for little hands to help with (or for bigger hands to complete on their own) and it’s warm and delicious.

The recipe comes from Megan Zietz over at The Frugalista Diaries blog, but I actually saw it on another blog where she was guest blogging for the day. The ingredients and directions are simple and quick, making it a perfect after school snack, dessert or school vacation day treat.

Megan made a note (see below) that she used Immaculate Baking Company’s crescent rolls. I did not have those on hand but I did use a lowfat version of another company’s crescent rolls. I also skipped the vanilla ice cream since I was using this as an after school snack, but if I were making them for a more involved dessert, I’d definitely put ice cream out.

These all got thumbs up. There were eight crescents and five people here, so next time I’d definitely do two packs of crescents to double the recipe. I think you could also throw in some dried cranberries or some raisins to this recipe, and I bet it’d be great.

I hope you’ll visit Megan’s blog. She’s got lots of great posts on there and she covers more than food, so pay her a visit!

Here’s Megan’s recipe:

Apple Pie Bites – Serves 8
1 (Tart) Apple Sliced
3 Heaping Tbsp. Brown Sugar
2 Tbsp. Cinnamon ( I used a homemade Cinni-Sugar Mix)
1 Tbsp. Melted Butter
1 Pkg. Of Immaculate Baking Co. Crescent Rolls
*(I use immaculate baking co. when I’m not doing homemade – no hydrogenated oils and non gmo –  it’s the only thing I feel safe about giving my kids when it’s not from scratch)
Preheat Oven to 350˚
1. Roll out the dough on a greased cookie sheet, brush with butter and sprinkle Brown Sugar and Cinnamon in individual pieces of dough.
2. Roll up an apple slice in the dough forming a crescent, brush with melted butter and top with cinnamon.  Repeat for others.
3. Bake for 12-15 Mins at 350˚.

4. Remove from Oven, filling will be hot! Serve alone or with a dollop of Vanilla Ice Cream.


Christmas Dessert: Mocha Roll and Christmas Cookies

29 Dec
Christmas cookie tray

All together now: all of the cookies made by my mom, me and both grandmas, all on one tray.

ORIGINALLY POSTED DECEMBER 29, 2011

This week I’ve been posting in retrospect about our Christmas Dinner. To me, the best part of any dinner is always the dessert. And like our Christmas Dinner, which is much the same every year, our dessert selection is as well.

First off, there’s the tray of Christmas Cookies. Together with my mom and two grandmothers, we put together a tray of cookies that has about 13 different varieties to choose from. We all have our favorites.

But…we’ve been eating cookies on and off now for two weeks. Well, at least I have. So we have to have another choice also. Enter…the Mocha Roll.

My mom makes the most fabulous frozen dessert called a Mocha Roll.

The Mocha Roll, before the first piece has been cut.

The Mocha Roll before the first piece has been cut.

This picture looks nice enough, but you truly can’t get a good enough idea of what this dessert really is unless you see it cut into a serving, which you will in a minute, when I post the recipe. However, I first must give tons of thanks to my mom here, because I decided to ask her for the recipe *just* as she was getting ready to leave for a cross-country, day-after-Christmas trip and I’m sure she had better things to be doing than emailing me recipes, but sure enough, there it was in my inbox this afternoon. So 1) She made it for yesterday’s dessert, 2) she typed up the recipe for me already so I don’t have to do it and 3) she took the time to send it to me. Thank you Mom!!

Single serving mocha roll

Here’s my dish, whipped cream on the side because I don’t actually like whipped cream. I did that just for you!

Here’s the recipe for her Mocha Roll for you!

FROZEN MOCHA ROLL

(Good Housekeeping Magazine – 1974 or earlier)

Note:  Can be made and frozen one month ahead.

INGREDIENTS

5 eggs, separated, at room temperature

1 cup confectioner’s sugar, divided

Cocoa

Dash salt

Mocha cream (recipe follows)

DIRECTIONS

Day before or early in day:

Preheat oven to 400º.  Grease 15½ X 10½ jelly roll pan with shortening.  Line plan with waxed paper, then grease again and flour.

Separate eggs while they are cold, taking care not to get any yolk mixed in with the whites because if any egg yolk is present in whites, the whites will not beat to their highest volume.  Also, for greatest volume, cover bowl and let egg whites warm to room temperature before beating.

In large bowl, with mixer at high speed, beat egg whites until soft peaks form.  Beating at high sped, sprinkle in 1/2 cup confectioner’s sugar.  Beat until sugar is completely dissolved.  Do not scrape sides of bowl.  (Egg whites should be stiff with glossy peaks.)  Set aside.

In small bowl, with mixer at high speed, beat egg yolks until thick and lemon-colored.  At low speed, beat in 1/2 cup confectioner’s sugar, 3 Tablespoons cocoa, and dash of salt, occasionally scraping bowl with rubber spatula.  Gently fold yolk mixture into whites until blended.  (To do this, with a gentle downward motion and using a spatula, cut through the center of the whites, across the bottom and up the side of the bowl.  Then, give the bowl a quarter turn and repeat the cutting motion until egg-white mixture is broken to the size of small peas.  Fold just until all ingredients are combined, using spatula or whisk.  Over-folding breaks air bubbles, causing a flat jelly roll.)

Spread batter evenly in pan and bake 12-13 minutes.  Cake is done when top springs back when lightly touched with finger.  Do not overbake.

Meanwhile, sprinkle a clean cloth towel with cocoa.  (A flat weave towel, rather than a terry towel, works best.)

When cake is done, use a small spatula to immediately loosen edges from sides of pan.  Invert cake onto prepared towel.  Gently peel waxed paper from cake.  Roll towel together with cake from one of the narrow edges (jelly-roll fashion).  Roll as tightly as possible, but do not press down on cake.   Cool completely, seam-side down, on a wire rack.  Meanwhile, prepare mocha cream.

When cake is cool, unroll from towel.  Evenly spread Mocha Cream on cake almost to edges.  Starting at same narrow end, roll up cake without towel.  Place cake seam-side down on top of plastic wrap.  Wrap cake and then place on heavy duty foil; wrap and freeze cake for several hours or overnight.

About 15 minutes before serving, remove cake from freezer; unwrap; let stand for easier slicing.

MOCHA CREAM:

In medium bowl, whip together, until soft peaks form:

1 cup heavy cream

1/4 cup light brown sugar

3 teaspoons instant coffee (prefer decaf, but not required)

(You can buy 16 oz. container and use remaining 1 cup to whip and serve with cake; add a little confectioner’s sugar to cream before whipping.)

Serves 8 to 10. This can be refrozen if there are leftovers!

Fun Friday: Weelicious Pumpkin muffins with cream cheese frosting

7 Nov
We needed a Fun Friday snack. It was only Wednesday, but we needed it.

We needed a Fun Friday snack. It was only Wednesday, but we needed it.

We’re having an awfully rough semester. Since August 26, we’ve been hit with “flu-like” viruses, pneumonia, sinus infections and bronchitis. We’ve had ambulance rides, hospital visits, doctor visits and prescriptions galore. My husband had two weeks of jury duty. I think I visited my local CVS at least 25 times in October alone, and I’m not really even exaggerating. We get a $5 reward every time we fill ten prescriptions there. We have three people (the maximum allowed) registered for the reward program and I think I’ve earned $15. Throughout all of it, I’ve been fighting something upper respiratory, myself and I can’t really say I’m coming out the winner in this fight, either.

It’s only November 7.

It’s been a long couple of months, with trying to still stay on top of work, school, birthdays, holidays, food drives and all the other daily “stuff,” but we’re surviving. We’re getting through it and trying to keep all our chins facing in the upward direction. We’ve had plenty of bright spots mixed in throughout the rough spots and we try to make those our focus. We have wonderful friends and family who check in daily, weekly, and more. We know of people who are worse off than we are. Things could be much worse.

Even still, some days we need a little bit of help.

Enter the delicious pumpkin muffins with cream cheese frosting from Weelicious.

I have been getting the Weelicious emails in my inbox for a couple of years now. My wee little ones are not so wee or so little any longer, but I find that her recipes are great for all ages.

Because we needed even more help seeing the bright spots on this particular day that I tried these, I made them into Pumpkin Chocolate Chip Muffins with cream cheese frosting, because chocolate chips make everything seem better.

And they did.

It leads though, to our previous conversation: are they a muffin or a cupcake?

I put in chocolate chips, so that might mean cupcake. If they were just pumpkin, that could mean muffin for sure. But with chocolate chips AND frosting for those who chose to use it, it might be a cupcake.

Honestly, with the week we have been having, I didn’t care.

Pumpkin-chocolate chip-frosting-muffin-cupcake.

They were our after-school snack, late night snack, breakfast and lunch.

Whatever they were, they were delicious. Weelicious did not disappoint. She never does.

Here is her recipe, so that when you’re in need of a pick-me-up you can give them a try. We loved them!

If you love them too, you might want to sign up for the Weelicious emails as well.

WEELICIOUS PUMPKIN MUFFINS WITH CREAM CHEESE FROSTING

Ingredients

  • 1 1/2 cups all purpose flour
  • 2 teaspoons baking powder
  • 1/2 teaspoon baking soda
  • 1/2 teaspoon salt
  • 1 1/2 teaspoon pumpkin pie spice
  • 6 tablespoons unsalted butter, melted (I used “I Can’t Believe It’s Not Butter to suit our dietary needs.)
  • 3/4 cup brown sugar, packed
  • 1 cup pumpkin puree
  • 1 large egg
  • 1/4 cup milk
  • 1 teaspoon vanilla extract
  • cream cheese icing:
  • 4 ounces cream cheese, softened (I used 1/3 fat cream cheese to suit our dietary needs.)
  • 4 tablespoons unsalted butter, softened
  • 1 cup confectioner’s sugar
  • 1 teaspoon vanilla extract

Preparation

  1. 1. Preheat oven to 400 degrees.
  2. 2. Place the first 5 ingredients in a bowl and whisk to combine.
  3. 3. In a separate bowl whisk the remaining ingredients.
  4. 4. Add the dry ingredients into the wet and whisk until just combined. *This is where I added in about a cup of chocolate chips.*
  5. 5. Pour into greased muffins cups 3/4 full.
  6. 6. Bake for 20 minutes.
  7. 7. To make the frosting, combine all ingredients and beat for 1-2 minutes, until fluffy
  8. 8 . Cool, frost and serve.


Fun Friday: Pumpkin Pie Nutella Chocolate Chip Snickerdoodle Bars

24 Oct
Talk about getting a bang for your buck! These treats have it all!

Talk about getting a bang for your buck! These treats have it all!

I’m not sure if I’m an emotional-stress eater or not, but I’m definitely an emotional-stress baker and cooker. I always crave the opportunity to get into the kitchen and cook something or bake something (or in a perfect world, both) to relax after a tough day, week or lately, a tough month. I like cooking and baking for others and trying out new things to get myself to chill out and relax. Oftentimes after my initial piece of whatever I’ve baked, I’m pretty happy and relaxed til the next time. I don’t need to eat the entire thing, just a taste.

Last weekend, after two particularly tough weeks scattered with illness, elementary school death threats, jury duty for my husband and all the usual daily work and school stress, I was in quite a mood, looking to bake SOMETHING good for the family to take the edge off. I went onto Pinterest, a place I hadn’t visited in a while, found their search bar (which seemed slightly different than the last time I’d been on) and I typed in all the things I was currently craving: pumpkin, Nutella, chocolate chips.

All those things had to go together in something, I was sure of it.

I was in luck! Sure enough, Parsley, Sage & Sweet had a recipe for me! I knew someone would. It’d be hot and out of the oven in just an hour or so.

Pumpkin Pie Nutella Chocolate Chip Snickerdoodle Bars.

Yes, seriously.

I got to work, feeling better and better by the minute.

I won’t lie, the recipe has some steps to it, but believe me, it was worth it in the end!

Through this baking experience, I also learned a valuable lesson that I’ll pass on to you, just as I shared it on Facebook that same evening:

“If you try to put the plastic jar of Nutella into the microwave to soften it up for baking, all the while thinking just how smart you are thinking of this little shortcut, you must remember that the wrapper over the top was originally metal and that there might be some left on there which will potentially catch fire and giant, bright blue sparks will fly inside the microwave, scaring you and your children half to death while making your husband jump higher and run faster than you’ve seen in a long time when you gasp out loud in the kitchen. You’re welcome.”

That said, this was a delicious treat! Everyone was anxious to try it out so I served it warm, waiting just ten minutes to cut into it, rather than the suggested hour cooling time, and it was a hit. However, I had one more piece a day or so later, after the whole thing had been refrigerated, and YUM!! Even better cold, in my opinion, just like pumpkin pie.

I plan to make them again this weekend for a get together I’ll be attending on Saturday.

Here’s the recipe as it’s seen on the Parsley, Sage and Sweet blog. The only thing I did differently was to use regular sized chips instead of mini. I really don’t “do” mini chocolate chips.

Pumpkin Pie Nutella Chocolate Chip Snickerdoodle Bars
Adapted from Megan’s Cooking via Julia, author Of Dozen Flours- with my revisions

Snickerdoodle Layer
3 cups all-purpose flour
2 teaspoons baking powder
1 teaspoon salt
1 teaspoon ground cinnamon
2 cups packed brown sugar
1 cup butter, at room temperature
2 eggs, room temperature
1 tablespoon vanilla
1 cup mini-chocolate chips or chopped chocolate.

Pumpkin Pie – Nutella Layer
1 cup all-purpose flour
1 cup white sugar
1 stick butter, at room temperature
1 teaspoons baking powder
1 teaspoons salt
1 teaspoon pumpkin pie spice
2 eggs, at room temperature
1 1/2 cups fresh roasted or canned pumpkin puree
1/2 to 3/4 cup Nutella

Topping
2 tablespoons white sugar
2 teaspoons cinnamon

DIRECTIONS:
1.  Lightly butter or oil spray a 9 x 13 inch baking pan or dish.  If desired, line with parchment paper, two edges hanging over, so you can lift the whole uncut bar out of the pan for easier cutting.

2. Sift together flour, baking powder, cinnamon and salt and set aside. In large bowl, beat together butter, sugar, egg and vanilla until smooth. Stir in the flour mixture into the egg mixture until uniform. Stir in the mini-chocolate chips. Spread the dough as evenly as you can on the bottom of the pan.

3. In a mixer bowl (you can use the same one you used to make the snickerdoodle dough) with a paddle attachment, mix together butter and sugar (You can also use a hand mixer, or a just a spoon) Add the rest of the ingredients and mix until well combined. This mixture is looser, so pour/scrape over the snickerdoodle layer, smoothing out the top. Preheat oven to 350F.

4.  Drop tablespoons of Nutella over the top of the pumpkin pie mixture.  About 4 rows of three dollops.  Marble gently with a knife or spoon.

5. Combine white sugar and cinnamon in a little bowl. Evenly sprinkle cinnamon sugar mixture over the top of the batter.

6. Bake at 350F for about 35-45 minutes, (depending on your oven..for some, it has taken longer) or until a toothpick inserted into the center comes out clean. Let the bars cool completely (about an hour).
.
7. Use the parchment paper to lift the bars out of the pan. Place on a cutting board and cut into bars.  Drizzle cut bars with melted chocolate (better to drizzle them when cut so some chocolate drips down every side).

8. Let chocolate set or eat them before the chocolate sets (which we did). Store any remaining bars in a covered container, preferably in the fridge so they last longer.


Stop by and visit us on….

20 Oct
Stop by either of two websites to see my blog post for Pilgrim Pies featured!

Stop by either of two websites to see my blog post for Pilgrim Pies featured!

Everything is coming up Pumpkin!

Everywhere you go, everything is featured in flavors of fall.

If you go on over to either this website, or this one, you’ll see my blog post from The Whole Bag of Chips “Pumpkin Palooza” series, featuring the recipe for Pilgrim Pies, which is such a seasonal favorite.

It’s the greatest form of flattery when someone wants to feature your work on their site, and it’s even greater when they credit you for your work. Thanks so much to the crew over at cpnewsnet.com for featuring my work and doing such a great job!

Happy Fall, Y’all!

Fun Friday: S’Mores Mug Cake

3 Oct
Everything tastes better in a mug!

Everything tastes better in a mug!

We have lots of mugs in our kitchen cabinets. Big mugs, little mugs, colored mugs, white mugs, kids’ mugs, teacher mugs, matched mugs, mismatched mugs and every kind of mug you can think of.

I almost never drink my coffee out of a regular coffee mug, ever. I almost always drink it in a re-usable travel mug.

So what to do with all those mugs?

Mug cakes!

I’m sure you all remember the notorious Four Ingredient Nutella Mug Cake recipe that’s my all-time favorite mug cake thus far, but there are plenty of other mug cake recipes out there which deserve equal opportunity to shine. A quick Google search will yield you plenty to try, and recently I even saw a link to breakfast recipes that can be cooked in a mug. I can tell you, that’s in my future for sure.

Last fall, my brother sent me a link which contained multiple mug cake recipes to try, probably 20 or so. I filed it away for future use, and this summer I pulled it back out again. The kids and I were craving something sweet (okay, when are we NOT craving something sweet??) and we couldn’t really agree on what it was that we wanted. I decided to pull up the link to the various mug cakes and let them each choose one to make, and go to town.

I think that for us, half the fun of the mug cakes is baking something so small, so individual rather than a full-sized anything. The other half the fun is eating your creation, sharing a bite with someone else, and taking a taste of theirs. Cooking mug cakes is a fun, easy way to involve kids in the kitchen. In general the recipes are quick and easy, a little less messy (sometimes), and still incorporate important math and science skills, an added bonus to cooking with kids.

On this night, I don’t think anyone even finished their whole mug cake, as they were pretty filling, but everyone definitely enjoyed their chosen creations.

I’ll share both recipes we tried eventually, but today I thought I’d share the 5 Minute Chocolate Fudge S’More Mug Cake recipe from How Sweet Eats because it was the more unique and different recipe we tried. I will say, ours wasn’t exactly like the one over at How Sweet Eats because I didn’t have exactly the same ingredients on hand, but it was pretty close and it still got a thumb’s up at the end of the taste test. I’ll also say, it took us much longer to prepare than five minutes, but I was told that it was worth every minute spent.

Here is their recipe, just as it appears on their site, and my photo of our finished version is here at the top of my post. I’ve tried to add in any notes where I made some changes, using an *.

5 Minute Chocolate Fudge S’More Mug Cake

from How Sweet Eats

INGREDIENTS

2-3 tablespoons graham cracker crumbs

3 1/2 tablespoons unsalted butter, melted  *We used I Can’t Believe It’s Not Butter.

2 tablespoons granulated sugar

1 large egg

1/2 teaspoon vanilla extract

1/4 cup whole wheat pastry flour  *She said we could use all-purpose flour, so that’s what we did.

2 tablespoons unsweetened cocoa powder (mine was dark cocoa, hence the dark color)

1/8 teaspoon baking powder

pinch of salt

1 1/2 ounces milk chocolate (chopped or morsels)  *We used chocolate chips, semi-sweet.

marshmallow fluff, cream or actual marshmallows  *We had giant-sized marshmallows designed for campfire S’Mores. We used one big one, right on top.

DIRECTIONS

Combine 3 tablespoons butter and 1 ounce of chocolate in a small bowl, then melt in the microwave for 20-30 seconds. Set aside. In another bowl, combine remaining melted butter with 2-3 tablespoons of graham cracker crumbs and stir until moistened. Press graham crumbs into the bottom of your mug.

In a bowl. whisk egg, sugar and vanilla until smooth. Add in flour, baking powder, salt and cocoa, stir until a thick batter forms. Stream in melted butter and chocolate, mixing to combine. Fold in remaining chocolate chips. Add half of the mixture on top of the graham crust, then throw on a scoop of marshmallow fluff/cream or a few marshmallows. Add remaining batter on top, then pop in the microwave for 1 minute and 20 seconds to almost 2 minutes. Remove and top with additional marshmallow if desired. You can pop it back in the microwave for 5-10 seconds to make them melty, or pop them directly under the broiler for about 10 seconds to toast if desired. You can also use a kitchen torch if you have one. Sprinkle with graham crumbs!

Notes: If you don’t have whole wheat pastry flour, you can use all-purpose. I would not recommend using regular whole wheat. Additionally, I have made this by substituting coconut butter for the full amount of butter. It was just as delicious, albeit slightly drier. You cannot taste coconut at all. Finally, take into account the power of your microwave. Mine has a mind of it’s own and is insanely powerful, so I cooked this on 80% power. Judge accordingly and add/subtract a few minutes of cooking if you know yours is wonky too. Unfortunately it may take 1-2 trial runs to get the right consistency because all microwaves are different, but I promise it’s worth it!


Get your pumpkin on and Go Orange for No Kid Hungry!

1 Oct
Thanks to Paula over at My Soup For You for teaming up with me today to bring you some great pumpkin recipes, and for bringing even more awareness to No Kid Hungry!

Thanks to Paula over at My Soup For You for teaming up with me today to bring you some great pumpkin recipes, and for bringing even more awareness to No Kid Hungry!

It’s October! It’s fall. It’s the season of beautiful leaves, fun autumn events like apple picking, hay rides and pumpkin carving.

Pumpkin….mmmmm…..does it make you think of pumpkin spiced coffee, pumpkin ice cream, pumpkin muffins and pumpkin pie?!

Me too!!

We’re a lucky bunch, most of us. We can run through the drive through at the local donut shop and get this month’s pumpkin flavored muffin or drink, without too much of a struggle. We can pop a recipe for my good friend Paula’s Pumpkin Chocolate Chip Bread or her Pumpkin Soup right into the oven and enjoy it without too much trouble. All those warm, orange flavors warm our bellies and our thoughts all throughout the fall.

We’re very lucky.

Not everyone is so lucky, however. According to the No Kid Hungry statistics for our local area, as of June 2013 (more than a year ago), 22% of kids in our little state were struggling with hunger. Fifty-five percent of them were eligible for free or reduced lunch at school, and only 51% of those students were eating school breakfast.

At a recent school event I covered for the newspaper earlier this month, when a room full of young students were asked what the most important thing was that they’d miss if they were late to school, their answer wasn’t attendance, or morning math, or reading, it was breakfast. Every student who raised their hand was worried that if they were late to school in the morning, they’d go hungry until lunchtime.

Childhood hunger across our nation is a growing problem, but we can do something to help.

Last year, you may remember that our own family started a local Go Orange Day for No Kid Hungry after seeing a television commercial about the nationwide effort to help end childhood hunger. Nationally, the official Go Orange Day for No Kid Hungry is at the end of September, but we opted to do ours just a little bit later at the start of October. It was a big success. We rallied our large school district, the superintendent’s offices and City Hall all to Go Orange for No Kid Hungry, and raised over $1000 in monetary donations as well as bringing in hundreds of pounds of non-perishable food items for our local food pantry. We were helping to put food on the tables of families all around us, and it was a great feeling.  All around us, local restaurants and other establishments went Orange as well, donating portions of their proceeds to the No Kid Hungry effort, and wearing orange to show their spirit.

This year, we’re doing it again. We’ve pushed our date out slightly further, and this year on Friday, October 31, Halloween Day we’ll be getting our pumpkin on, going Orange for No Kid Hungry again. We’ve rallied our school district, our superintendent’s office, City Hall, and even our church to help us put an end to childhood hunger again this year. So far we’ve had TEN local responses for going Orange on Halloween Day. Even more exciting, we’ve had some inquiries from local folks wanting to spread this year’s local Go Orange day to their communities and schools within our state and neighboring areas. All around our city, people will be showing their Halloween spirit, dressing in orange, donating money and/or non-perishable food items on Halloween Day and helping out their neighbors all in a day’s work.

We are thrilled. Wouldn’t it be great if we could really make a difference EVERY YEAR?

Wouldn’t it be great if just by spreading awareness and spreading the word, we could help feed other families?

We are foodies, we are blessed, we are thankful to be able to cook and bake and eat our fun pumpkin flavors in the spirit of the season, all month long.

So I ask you: will you get your pumpkin on this Halloween Day too? Will you spread the awareness of childhood hunger in your area and continue the good work of No Kid Hungry and their Go Orange efforts in your city or town, at your school or church or temple? Will you help?

Get your pumpkin on. Visit Paula’s blog over at My Soup for You and help her spread the word too. Make some Pumpkin Soup. Grab some Pilgrim Pies, eat some pumpkin spiced Chex snack mix, and be thoughtful, be thankful that you can help another family in such a simple way.


Fun Friday: Blueberry Crisp

12 Sep
We had the most perfect day for our blueberry picking trip!

We had the most perfect day for our blueberry picking trip!

At the end of the summer we had the opportunity to go blueberry picking just over the state line with my cousin Val and her husband Bob. I have been wanting to go blueberry picking for years. The last time I went, my oldest daughter was two and a half years old and I had a newborn in a front pack. All I remember about that day was that it was incredibly hot.

This summer we were able to check both strawberry picking and blueberry picking off of our list of things we’ve wanted to do.

I have used this cookbook for years and years.

I have used this cookbook for years and years.

That day when we came home I knew immediately what I wanted to make with my blueberries: Blueberry Crisp from my favorite Blueberry cookbook that my parents gave us years and years ago. I use it every summer.

Once I put aside those berries for baking, I divided the rest and bagged them up to freeze so that as the summer turned to fall I’d have extra berries for cooking. As of now, I have one bag left.

In my cookbook I have marked the inside front cover with all of my favorite recipes and their page numbers. Blueberry Crisp is on page 82. I always mark the date that I tried the recipe, on the page that the recipe appears on. I first made this recipe on 6-27-99.

1999!!!

At the time I was four months shy of having my first baby. That was a hot summer, and I bet this dessert made an incredible treat!

The recipe is simple and quick, perfect for summer, and it’s delicious with ice cream on top. I especially love chocolate frozen yogurt on top of my homemade blueberry crisp.

If you have some blueberries in your freezer, I hope you’ll give this recipe a try!

Delicious topped with chocolate frozen yogurt!

Delicious topped with chocolate frozen yogurt!

Blueberry Crisp

INGREDIENTS

4 cups blueberries

2-4 Tablespoons sugar

2 tsp. lemon juice

1/4 cup butter or margarine (I use I Can’t Believe It’s Not Butter)

1/3 cup packed brown sugar

1/3 cup flour

1/4 tsp. cinnamon

Dash salt

3/4 cup quick oats or old fashioned rolled oats


DIRECTIONS

Place blueberries in buttered 8×8 square baking dish; sprinkle with 2-4 tablespoons sugar and lemon juice. In a medium bowl mix together butter, brown sugar, flour, cinnamon and salt until mixture is crumbly. Stir in rolled oats, sprinkle evenly over blueberries. Bake 375 degrees 35-40. Serve warm with whipped cream.


Fun Friday: Chocolate Bark from “American Girl” Magazine

22 Aug
A very kid-friendly recipe from "American Girl" magazine provided our whole family with a yummy treat all week!

A very kid-friendly recipe from “American Girl” magazine provided our whole family with a yummy treat all week!

I love that my kids love to read, they love to get magazines in the mail and they love to cook and bake. Each of them receives two magazines in the mail geared to their age level, and as soon as they’re out of the mailbox, the kids are looking for any great new recipes that I might say “yes” to.

It’s not that I say “no” about trying out a new recipe very often, it’s more of “Not now, we don’t have time to do that today,” or “I don’t have all the ingredients for that right now, but remind me later.” The girls have even learned to preface their immediate “Can we make this today?!?!?” with more of, “Do we have any plans later today?” or even, “Do we have flour, sugar, butter, and apples?” for example.

Quick studies, they are.

Earlier this week one of my daughters received her latest edition of “American Girl” magazine, which she absolutely loves, but which only comes every other month. Clearly not often enough.

As soon as she opened it, she began looking for any easy recipes for which we had the time and

There were several versions of bark to choose from, and she found one for which we had all of the ingredients.

There were several versions of bark to choose from, and she found one for which we had all of the ingredients.

ingredients, and lo and behold….she found a great one! It was a quick, easy and kid-friendly recipe spread containing several Halloween-themed chocolate bark recipes. We had all the ingredients for one in particular, and she made it for our family the very next day.

We had limited time on this particular day, just a couple of hours in the afternoon to clean up from lunch and prep for dinner. I personally had no time to be making a dessert, so I was thrilled when we realized that she could do this recipe 100% on her own.

She used a 12 oz. bag of milk chocolate melts that we had on hand. The recipe called for two cups of dark chocolate melts  and our bag worked out fine. She needed 1/2 cup of crispy rice cereal and 1/2 cup of marshmallows. We used the same measuring cup for both items, less to clean later on!

The recipe gave instructions for covering a baking sheet with wax paper and melting the chocolate melts in the microwave. She melted 30 seconds at a time, stirring in between each time. Once melted, the mix-ins of rice and marshmallows were stirred into the chocolate and the chocolate was spread evenly onto the wax paper and carried down to the freezer.

I love to see how proud my kids are whenever they make something for the whole family to enjoy.

I love to see how proud my kids are whenever they make something for the whole family to enjoy.

As we left for the rest of the afternoon, I knew that my daughter couldn’t wait to get home so that she could check the freezer and see if her bark was done.

Sure enough, after being gone only a few hours, we came home and she went straight down to the freezer, carrying up the tray of hardened bark. It was ready to eat! She was so excited!

After dinner, she grabbed a tray, broke the bark into semi-even pieces and served the family her dessert. She was so proud as everyone complimented her tasty dessert and her hard work.

As we talked later on about how great the recipe was, we came up with some other mix-in ideas, including graham crackers instead of the crisp rice cereal, which would make more of a S’Mores type of dessert.

The “American Girl” magazine also showed five other types of bark, so be sure to check it out! I know that we’ll be making this again soon!