Archive | Kids RSS feed for this section

What’s for Dinner Wednesday: Breakfast for dinner

26 Feb
These were a fun, different kind of dinner! Of course, they'd be great for breakfast too!

These were a fun, different kind of dinner! Of course, they’d be great for breakfast too!

I’m a football widow.

Not all the time, not all season long, which is FOREVER long, but towards the end, during the playoffs and the Superbowl itself.

I can’t fault my husband in any way. He loves the sport, but even so, he’ll record a game and watch it later on so that he’s available for our family’s needs.

So, during playoffs and the Superbowl itself, it’s only fair that he be able to hang out with his friends and watch the game.

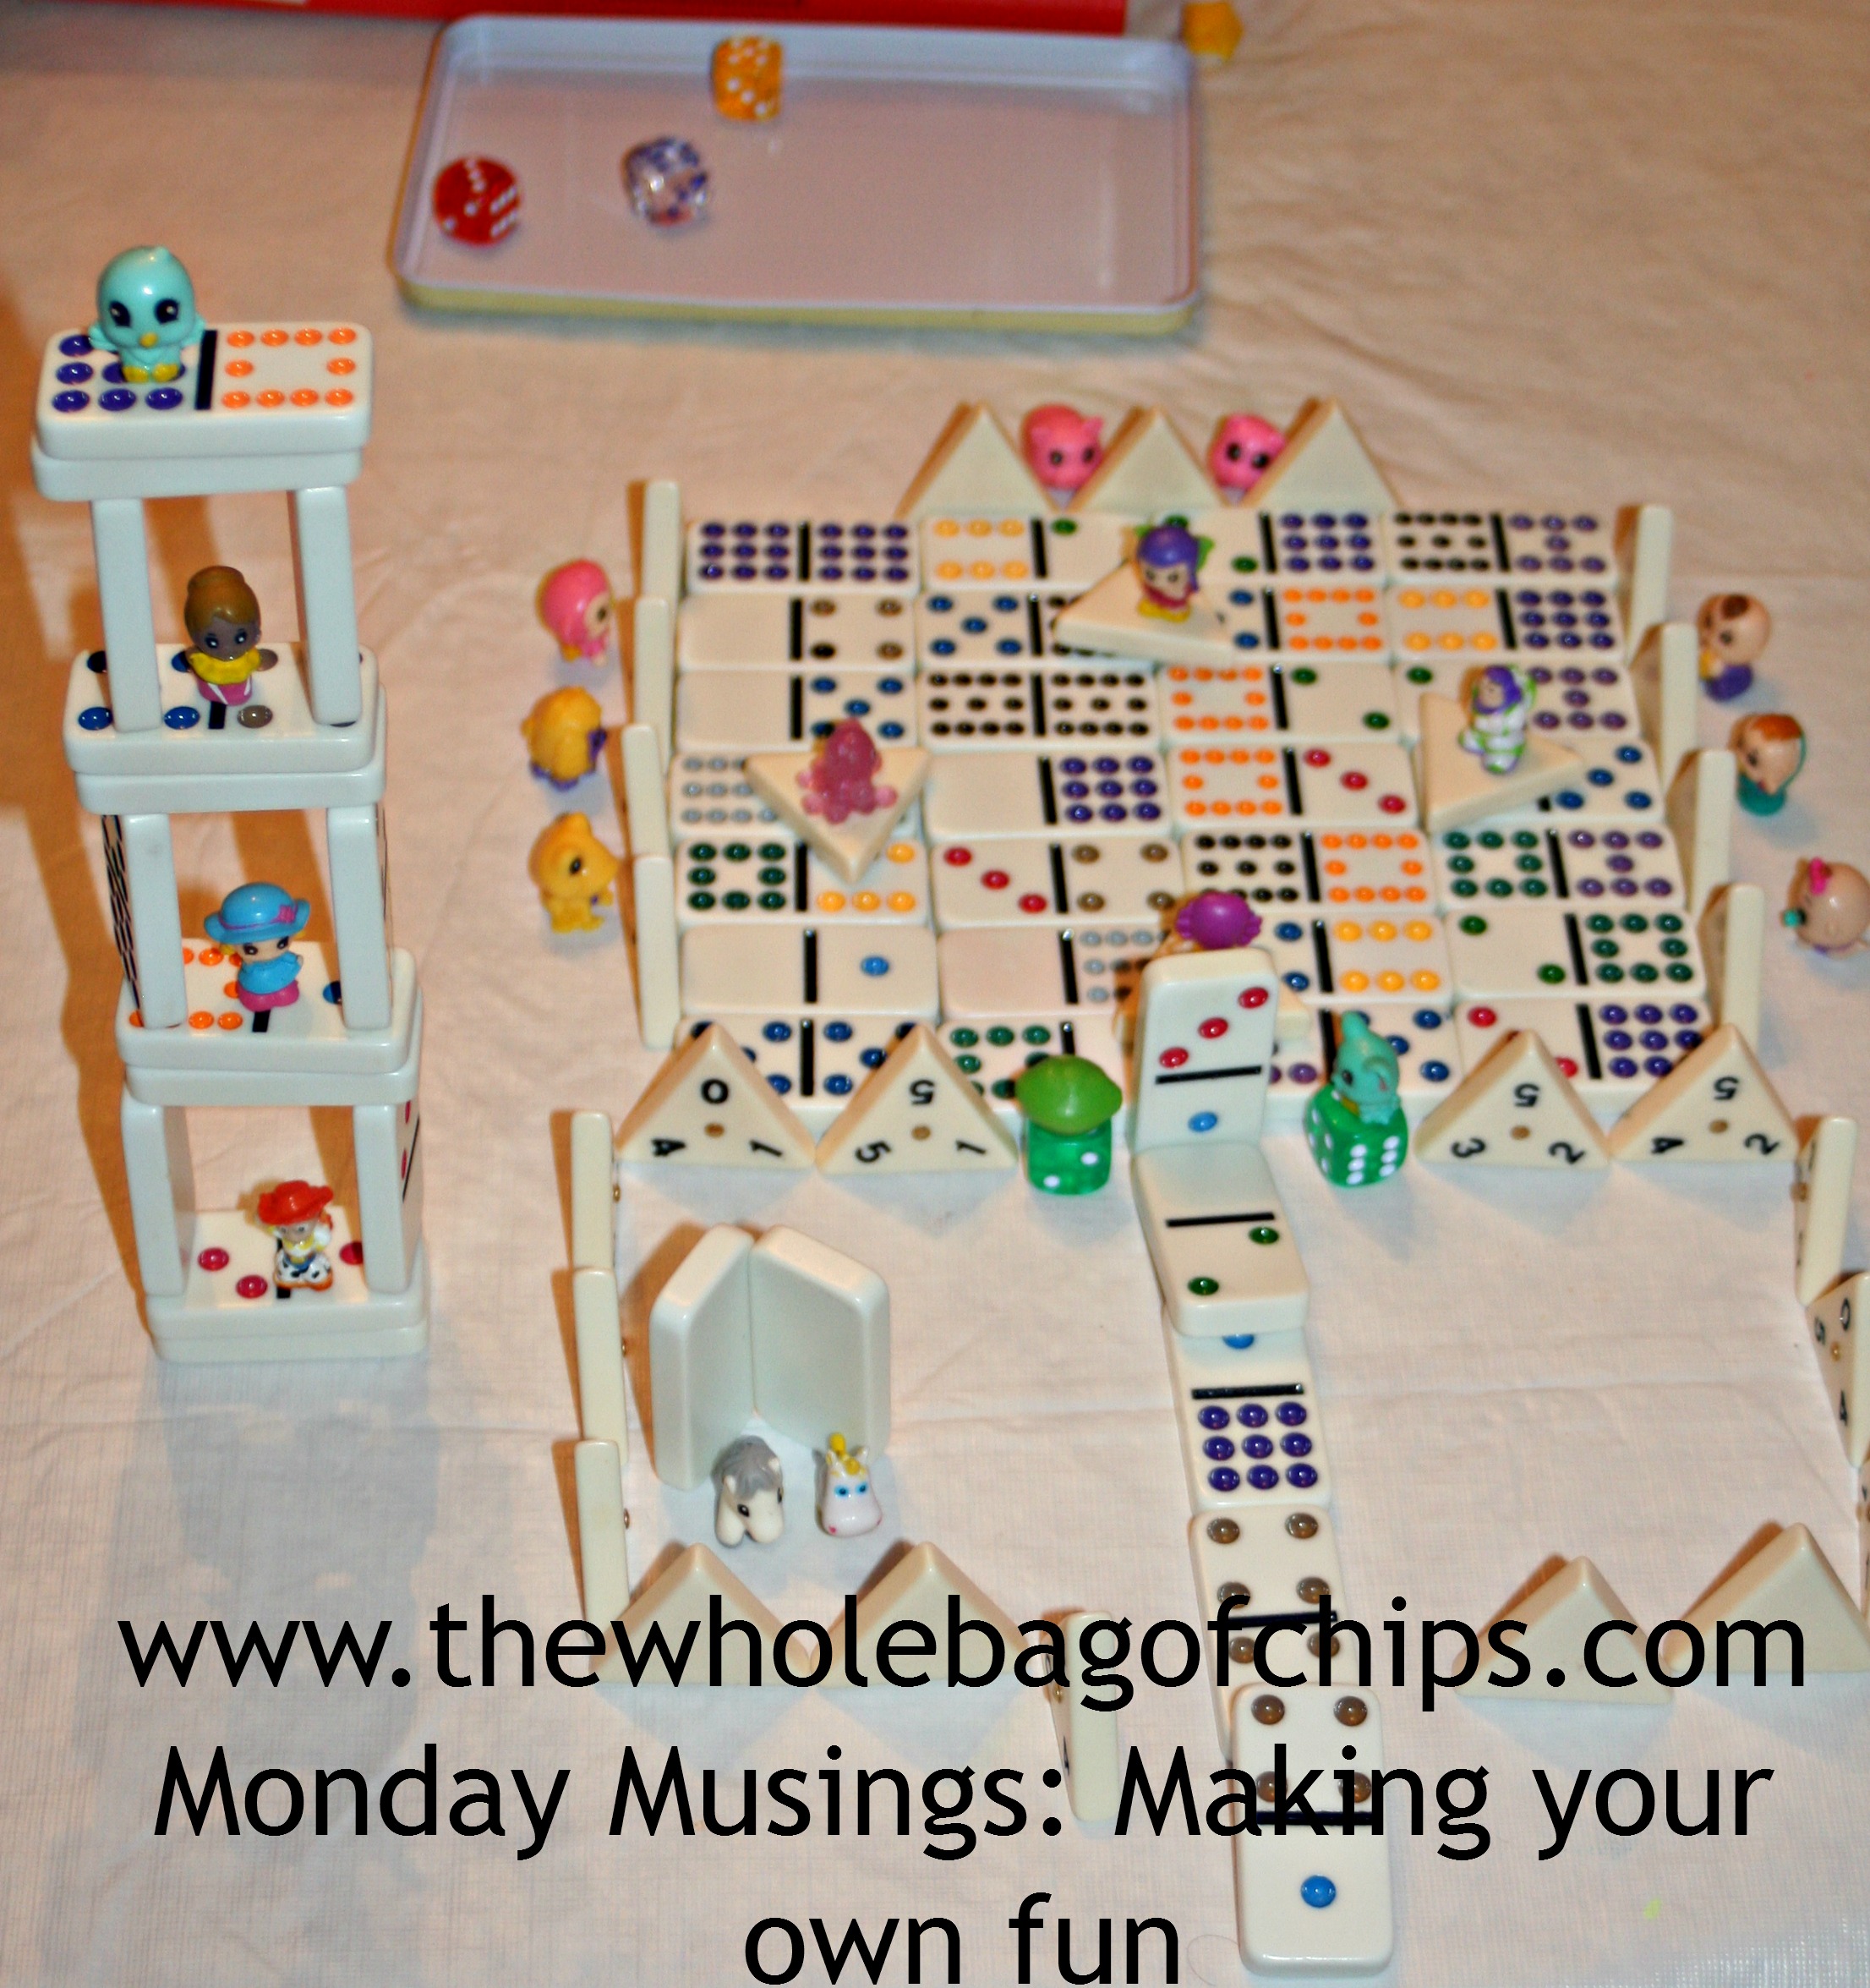
That leaves the girls and I with a few meals that are just for us, and sometimes I try to do something fun. Sometimes I’m just totally out of ideas.

Today’s meal is one of the totally out of ideas meals. It was a Sunday night playoff game and I had no idea what to cook when I got home that night with the kids. We’d been running errands, it was evening, it was winter, it was dark, and it was really any other excuse I can come up with not to want to make dinner.

But, then I remembered that a friend had sent me a fun looking recipe to try, some pancake cups, which she thought looked right about my style. She was right! Except they were breakfast, not dinner. But really, does it matter? Nope! Not in my house it doesn’t.

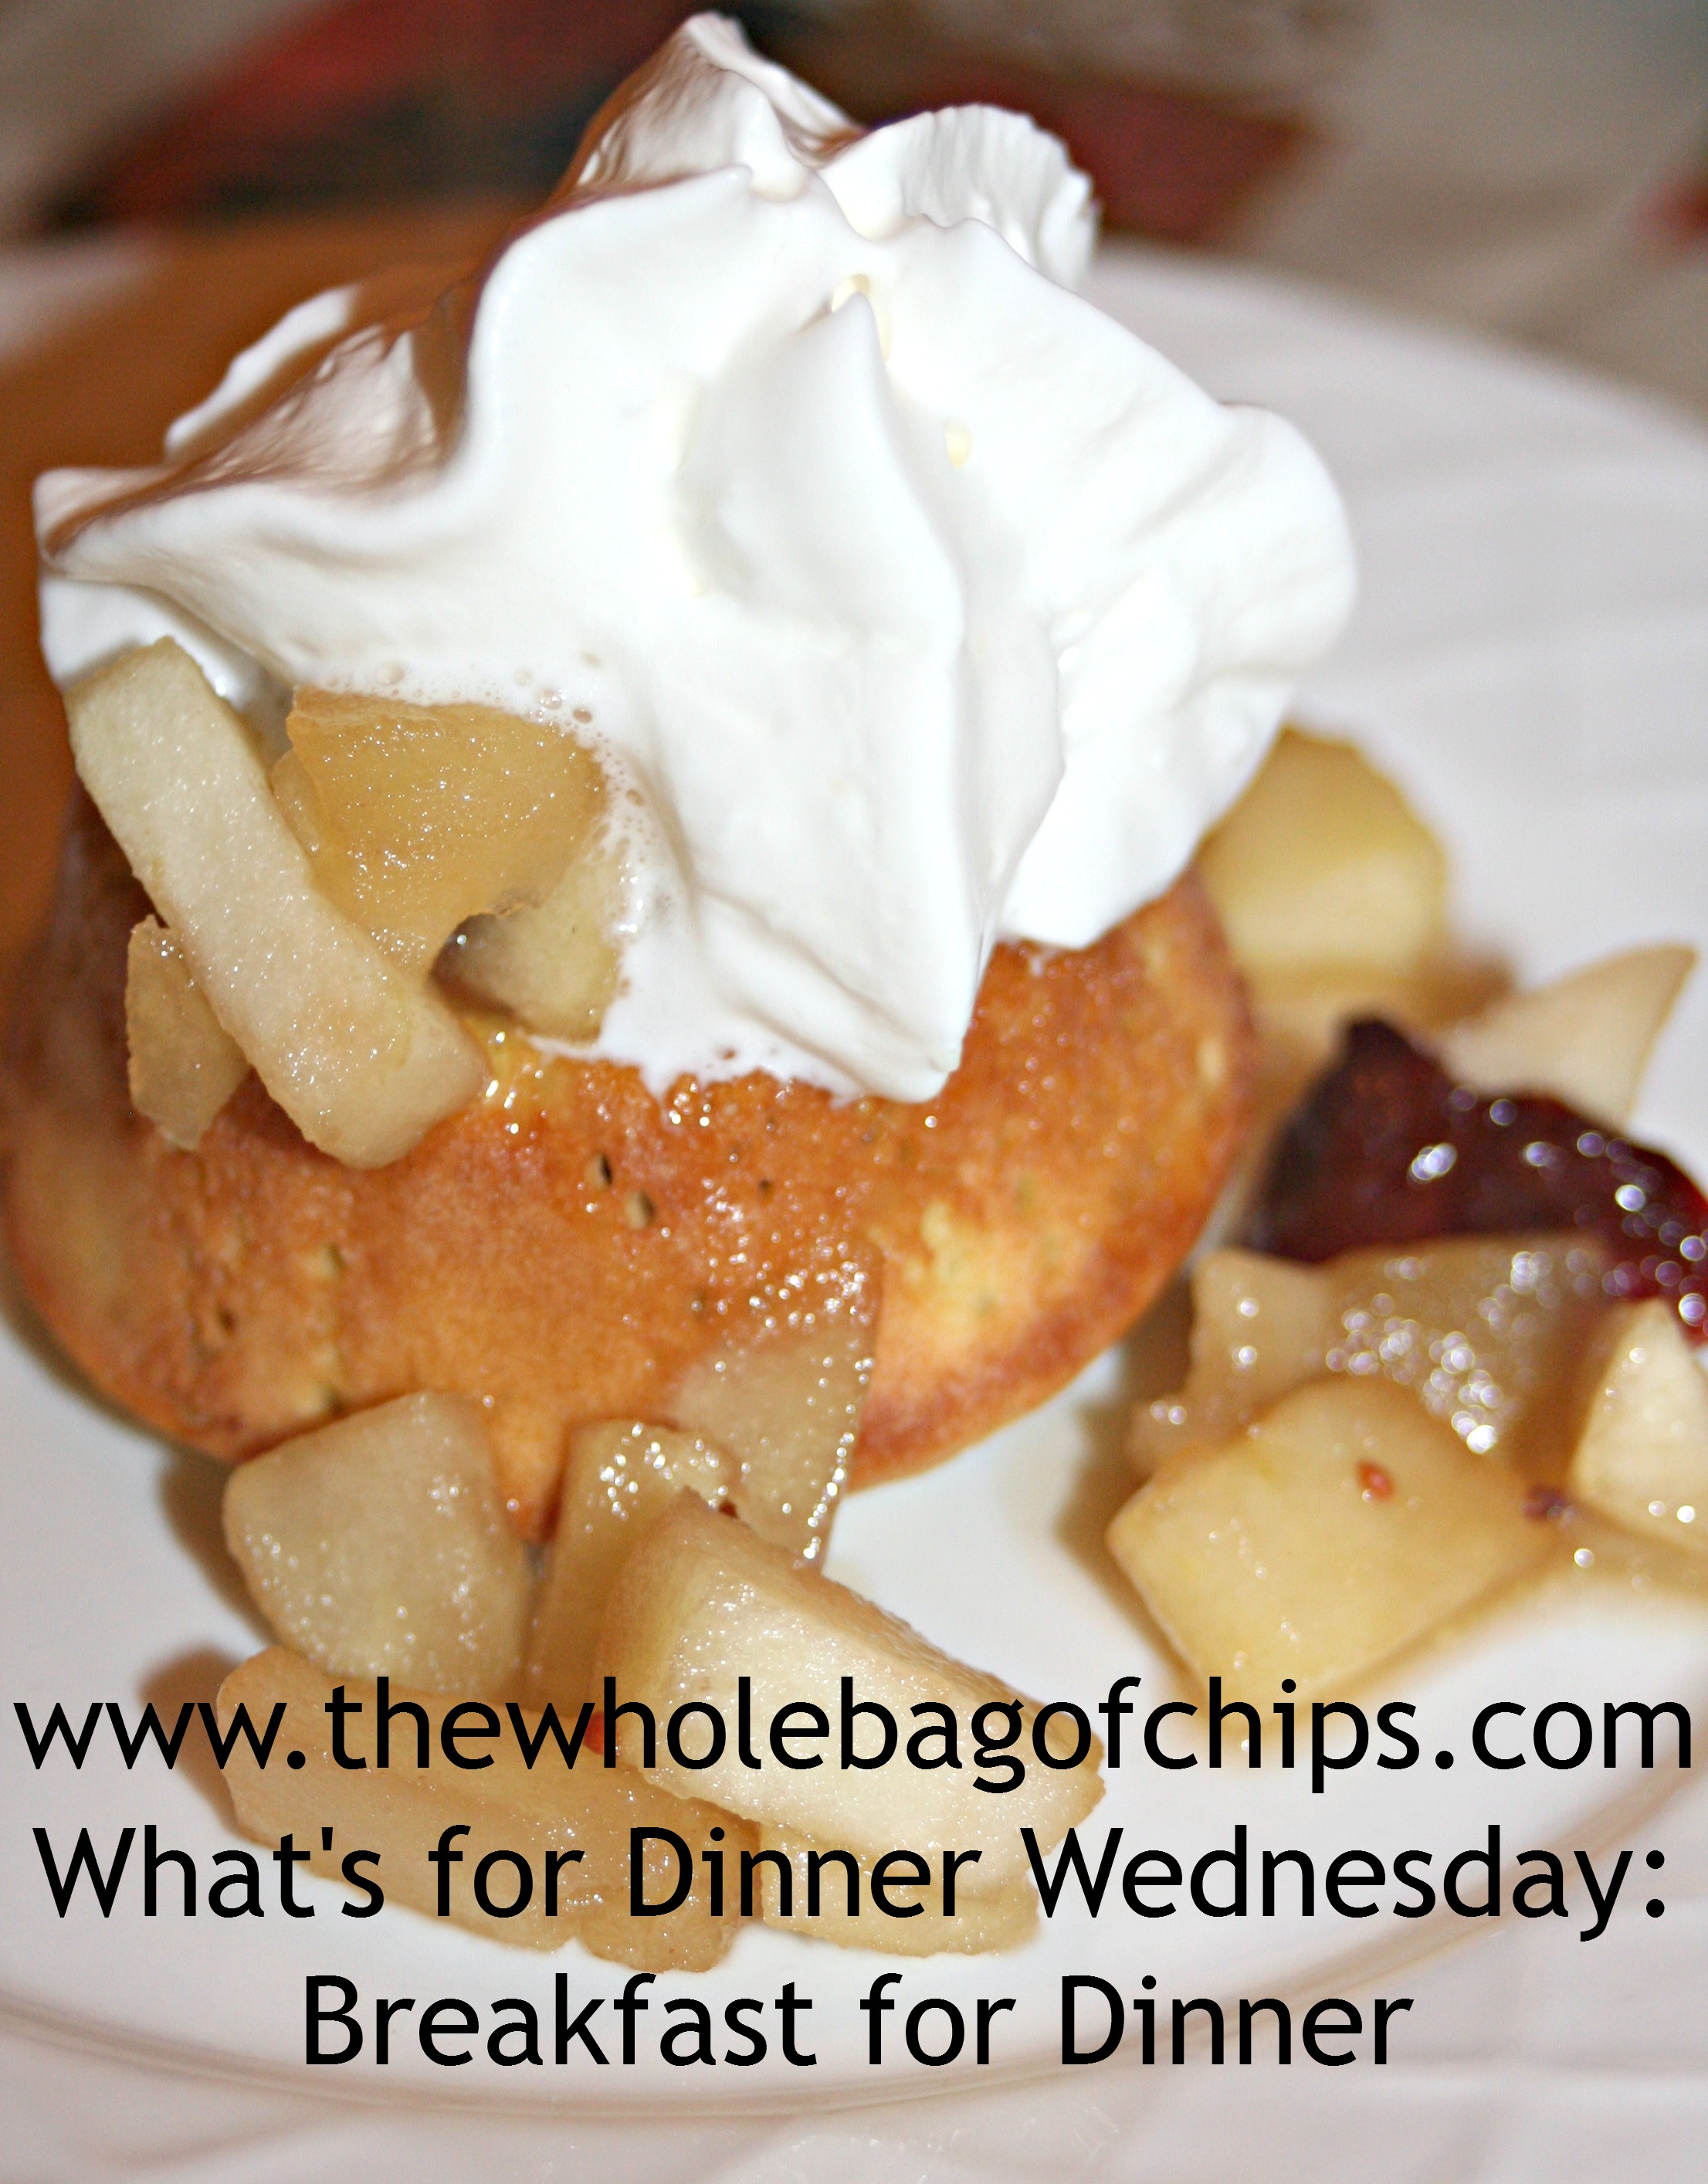
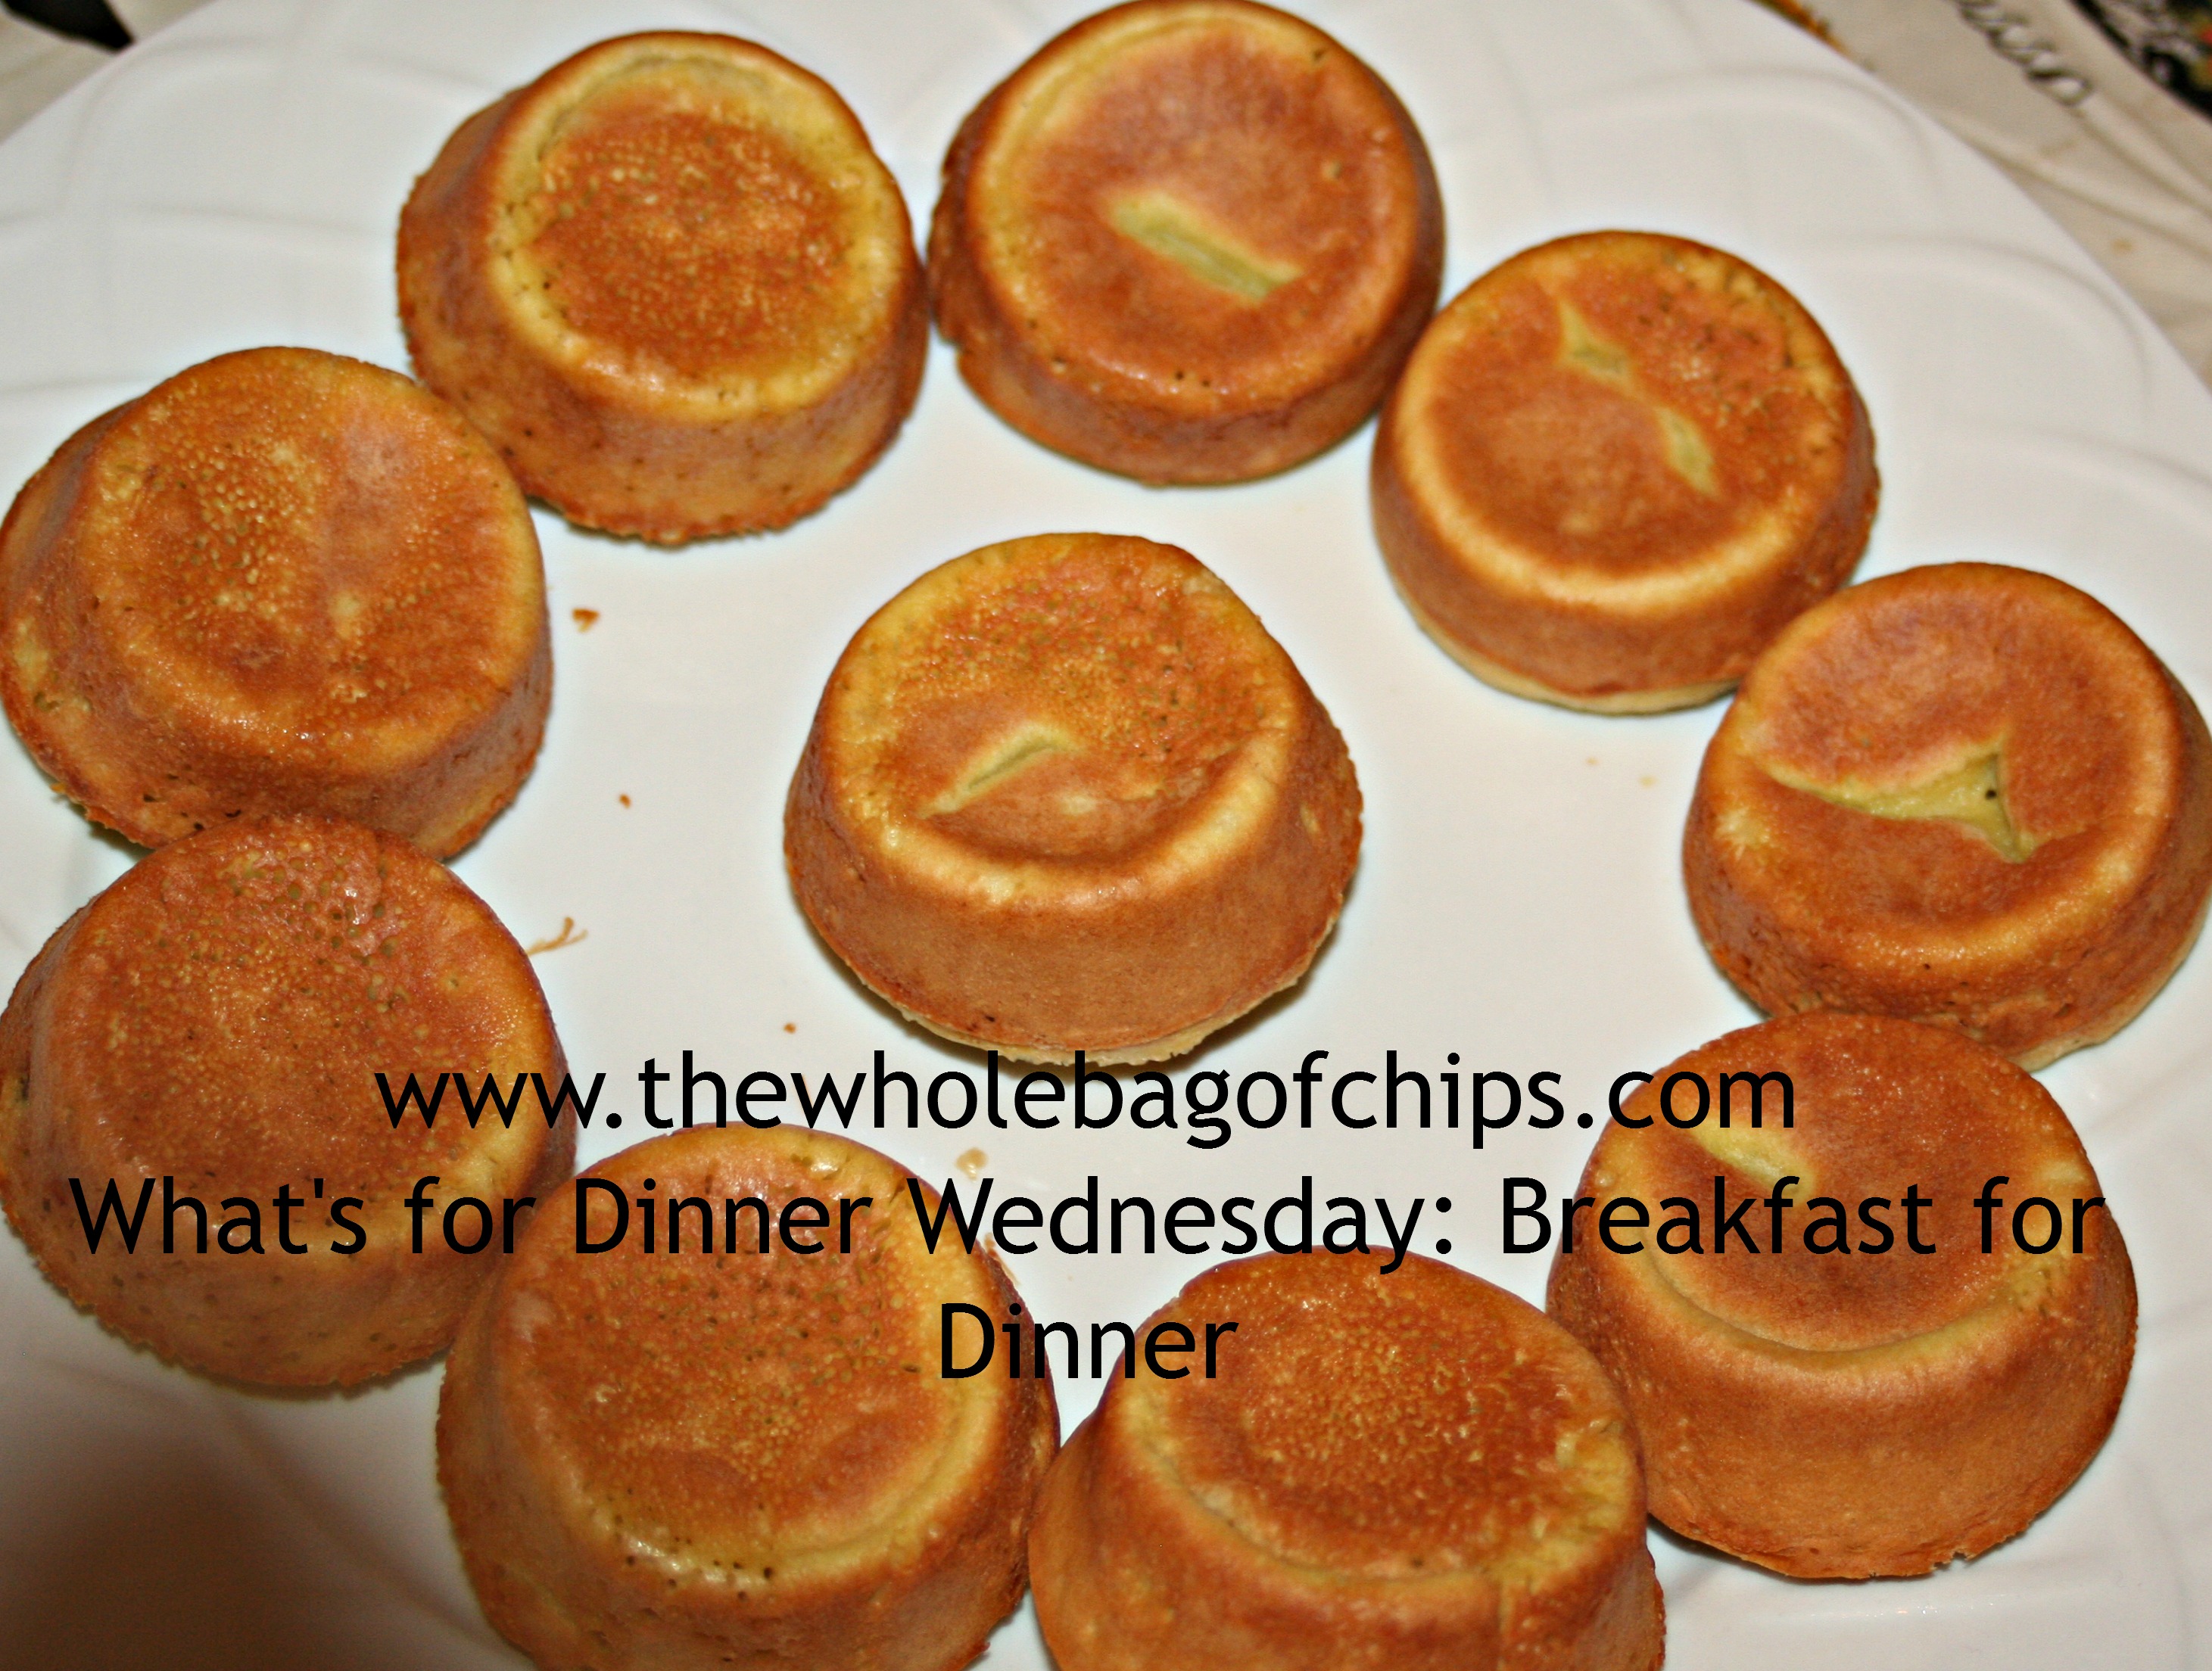
So on that night (the cold, winter, dark night where I didn’t want to make dinner) I made breakfast instead, trying out these cute little pancake cups, which I have fondly renamed Upside Down Pancakes, because they are made in muffin tins, and when I cooked them there was a better well for my fruit compote when I turned them upside down than there was when I left them right-side up.

And so, with a recipe from “Racing and Saving Mama,” sent to me by my friend Gina, here are the Upside Down Pancakes for your next brunch, or dinner! I have put any modifications I may have made, in parentheses.

When I flipped my pancakes over after taking them out, they had a great well for toppings!

When I flipped my pancakes over after taking them out, they had a great well for toppings!

UPSIDE DOWN PANCAKES
INGREDIENTS
1 cup milk (we use skim)

6 eggs

1 cup flour

1/2 tsp. salt

1 tsp vanilla

1 tsp orange zest -optional- (I didn’t use it)

1/4 cup butter (I use I Can’t Believe It’s Not Butter) melted

(I also added in some Jimmy Dean Turkey Sausage Crumbles to half of my tins.)

The directions state to serve the pancakes with your favorite toppings so I created an apple-cranberry compote and served with whipped cream. YUM!

The directions state to serve the pancakes with your favorite toppings so I created an apple-cranberry compote and served with whipped cream. YUM!

DIRECTIONS
Preheat oven to 400 degrees.

Blend first six ingredients in a blender. (I used a hand blender to blend them.)

Be careful to see that any flour clumps are well-blended.

Blend in butter a little at a time in order to temper the eggs.

Grease muffin tins well and distribute the batter evenly between the 24 tins (I got 12 but I think my tins are larger than hers.)

The author of the recipe recommends using 1/4 cup of batter in each tin.

Bake for 15 minutes until puffy and golden on top.

What’s for Dinner Wednesday: Not your Grandma’s Fried Chicken

19 Feb
With the added spices and Panko bread crumbs, this chicken was a huge hit!

With the added spices and Panko bread crumbs, this chicken was a huge hit!

Ever think you just can’t do one more original thing with chicken? Ever feel like you have just done it all and can’t look at another piece of boneless, skinless chicken?

It’s not just me, is it?

Usually when I shop, I grab a bag or two of frozen chicken tenderloins, and this time when I did I thought to myself, “I don’t even know what to do with this chicken, I’m so done with chicken.”

But then, a wonderful thing happened! I got a surprise goodie bag in the mail from SheKnows, the company I’ve been working with lately, and they saved my dinner that day. Inside my box was a new cookbook, “Chop Chop: The Kids’ Guide to Cooking Real Food with Your Family.” Elizabeth receives Chop Chop, the magazine, from a birthday gift she got this summer, so we were *very* excited to see this newest addition to our cookbook collection.

You’ll be seeing other recipes from the cookbook, I can guarantee, but as we thumbed through it, I saw a recipe for “Not Your Grandma’s Fried Chicken.”

Now I happen to really like my Grandma Rose’s fried chicken cutlets, but I gave this recipe a second look. It called for Panko bread crumbs, which I had, but it also called for Dijon mustard and thyme in the recipe. Most importantly, it gave a tip which I wanted to try out: It said that refrigerating the chicken after it’d been coated with the egg mixture and the bread crumbs for at least 30 minutes, would help to keep the coating on the chicken.

I love breaded chicken and I hate leaving the breading in the pan and eating naked chicken for dinner, don’t you?

For that reason alone, I decided to try this recipe out that night, and I’m so glad I did! The flavor with the added mustard and thyme was delicious and the tip about the refrigeration really did work! Everyone at this, all five of us gave it a thumbs up. That type of five out of five rating is rare in this house!

I served this dish with one of our favorite side dishes from our dinner at the White House: Quinoa Corn and Black Bean Salad. You can click on it to get the recipe.

I found the recipe online, and I have put the link to it here, but I found it interesting that the online version from the magazine doesn’t have the refrigeration tip. It was in the cookbook though and I wouldn’t do breaded chicken without it from here on in!

Here’s the recipe from the online version, with their cookbook’s refrigeration tip added in.

Ingredients

2 tablespoons

olive or canola oil

1 cup fine bread crumbs or panko

1⁄2 cup whole-wheat flour
1 teaspoon kosher salt
large eggs
1 tablespoon dijon mustard
1 teaspoon dried thyme
skinless chicken thighs
1⁄2 teaspoon black pepper
lemon

Instructions

  1. Wash your hands with soap and water, then gather all your equipment and ingredients and put them on a counter.
  2. With the help of your adult, turn the oven on and set it to 400 degrees.
  3. Pour the oil on the baking sheet and, using your clean hands or a paper towel, spread it around.
  4. Put the bread crumbs, flour, salt and pepper, and, cayenne (if you like it) on a large plate. Mix well.
  5. Crack the eggs into a bowl (throw the shells away). Add the mustard and thyme and mix well. Add the chicken pieces and swish them around until they are well coated with the egg mixture.
  6. Remove the chicken pieces, one at a time, from the egg mixture and let any extra egg mixture drip off.
  7. Dip the chicken pieces, one at a time, in the bread crumb mixture, rolling them and pressing down to coat each side.
  8. Shake off any extra coating, then put the chicken pieces on the baking sheet. **Cover and refrigerate for at least 30 minutes and up to 2 hours. This step is very important in order to make the coating stick.**
  9. With the help of your adult, put the baking sheet in the oven and bake for 15 minutes. Using a spatula or tongs, turn the chicken pieces over and bake until golden brown, 15–20 more minutes. Serve right away, with a quarter of a lemon on each plate.

Ingredients

2 tablespoons

olive or canola oil

1 cup

fine bread crumbs or panko

1⁄2 cup

whole-wheat flour

1 teaspoon

kosher salt

1⁄4 teaspoon

cayenne pepper

2  

large eggs

1 tablespoon

dijon mustard

1 teaspoon

dried thyme

6  

skinless chicken thighs

1⁄2 teaspoon

black pepper

1  

lemon

Instructions

  1. Wash your hands with soap and water, then gather all your equipment and ingredients and put them on a counter.
  2. With the help of your adult, turn the oven on and set it to 400 degrees.
  3. Pour the oil on the baking sheet and, using your clean hands or a paper towel, spread it around.
  4. Put the bread crumbs, flour, salt and pepper, and, cayenne (if you like it) on a large plate. Mix well.
  5. Crack the eggs into a bowl (throw the shells away). Add the mustard and thyme and mix well. Add the chicken pieces and swish them around until they are well coated with the egg mixture.
  6. Remove the chicken pieces, one at a time, from the egg mixture and let any extra egg mixture drip off.
  7. Dip the chicken pieces, one at a time, in the bread crumb mixture, rolling them and pressing down to coat each side.
  8. Shake off any extra coating, then put the chicken pieces on the baking sheet.
  9. With the help of your adult, put the baking sheet in the oven and bake for 15 minutes. Using a spatula or tongs, turn the chicken pieces over and bake until golden brown, 15–20 more minutes. Serve right away, with a quarter of a lemon on each plate.

– See more at: http://www.chopchopmag.org/content/not-your-grandmas-fried-chicken#sthash.ceJP57AG.dpuf

Monday Musings: Making your own fun

17 Feb
Using the components from games you already have to create a new game is a fun way to spend a day out of school!

Using the components from games you already have to create a new game is a fun way to spend a day out of school!

It’s school vacation week for us this whole week ahead. Monday, President’s Day, is a day off for many kids around the country, even if they don’t have the whole week off.

For many parents, a whole week out of school during the winter months can seem daunting. What to do? Where to go?

As a mom, I often find that the most fun and memorable moments come from an unplanned event or from the kids’ own minds when left to their own devices.

And I don’t mean electronic devices.

Often we’ll allow some electronics time and then all devices go off and it’s time to find something to do, whether they need to read a book, occupy themselves in their rooms, or play a board game.

Over our last school vacation week, my younger two girls decided to play dominoes after my youngest had played them at school during indoor recess time on a rainy or snowy day. She was thrilled to find out that we had dominoes here as well, and what began as making “domino effect” structures and watching one domino lead to their demise, ended up being an hours-long project, using all of the dominoes plus all of the previously-popular “Squinkies” to create two entirely new games.

Without any parental direction or involvement whatsoever, the girls created a challenge for themselves, to each take a set of the dominoes and some of the Squinkies, and create their own game and rules for the game, which they’d then teach each other to play.

I know I said it, but this bears repeating: this took them several hours.

Creating the box for storing their game components was almost as much of a challenge for them as creating the games themselves.

Creating the box for storing their game components was almost as much of a challenge for them as creating the games themselves.

Between coming up with the game they wanted to create, coming up with the rules for it, playing it for and with each other, and then the next part: creating a box to store the games in, complete with some marketing images on the boxes, took them hours.

The box they created had a challenge to it as well. They decided to use one box, which had originally contained a pair of men’s boots, to store both games. However, they split the box down the middle and each came up with completely unique packaging to market their particular game.

I swear to you, I had nothing to do with this. I was downstairs sorting through *last* school year’s papers that I was archiving into bins to save.

They were completely engaged, not bored, not arguing, not asking us for ANYTHING, for hours.

And best of all, they had a blast. It was a highlight of their week.

It didn’t cost us a dime, we didn’t leave the house. They never even changed out of their pajamas.

It was excellent. And they were so, so proud of themselves.

Sometimes, as parents, I think we get caught up in the pressures of planning the perfect day off, the perfect vacation week, and I think sometimes if we leave some down time in the schedule it can be a good thing.

I know that there’s a fine line between leaving too much time free, and leaving no time free, but I think it’s important as we enter this school vacation week, to remember to leave at least some time for the kids to tap into their own creativity and ability to entertain themselves. Nothing pleases me more than to see my kids all playing together, laughing, talking, thinking out loud and being creative. It’s a valuable skill to foster in kids, and who knows what they’ll create!

Give it a try this week or on your next snow day, holiday, day off or weekend and see what your kids come up with! They just might surprise you.

Fun Friday: Valentine’s Day Edition

14 Feb
Valentine's M&Ms made these cookies extra special!

Valentine’s M&Ms made these cookies extra special!

It’s a Friday, and it’s Valentine’s Day! I love when special days fall on a Friday or a weekend day. It makes them all the more enjoyable.

I got a sweet treat myself this week, when my kids who give out Valentine’s Day cards both decided to hand make them and to do it with absolutely no direction from me. For years we made them together and the last couple of years I’ve had to buy them. I just couldn’t pull it all off. It warmed my heart to come home from a meeting earlier this week and see that they were making them.

In addition to Valentine’s Day, we’ve also had a snow day this week, which has provided an extra opportunity for Valentine’s treats, and school vacation is coming up next week, which even though we don’t go anywhere special, is still a fun week off.

Earlier this week, we were having a friend over for one of the kids after school so I decided that in between my morning and afternoon work schedules, I’d make a quick little Valentine’s treat to greet them when they got home.

It called for only three ingredients and one of them was Valentine’s- themed M&Ms. The recipe didn’t use the entire bag, so I used them instead of chocolate chips in the cookies you see above when we had the snow day, and that’ll make a great treat today in the kids’ lunchboxes.

The after school treat was a three ingredient Skinny Dark Kisses treat which a friend posted on Facebook, shared from the Skinny Kitchen site. I can tell it’s going to be a site that I visit often! I hope you’ll check it out.

The recipe is shown below, just as they have it on their site. It was easy, other than unwrapping all of the Hershey Kisses, and a word of warning: they say you need to cool them for two hours, or put them in the fridge to speed up that time. I had a 1:30 story to cover, so I made them on my lunch break at 12:30, left in time for my story, and when I came home with the kids after 3, it had been just enough time for them to cool and be ready to eat!

The recipe below makes 25, but I made slightly more than that since I had a bigger tray. I was able to make 45 and I still had half a bag of M&Ms leftover and a quarter of a bag of Hershey Kisses left as well.

A cute Valentine's treat, you won't be able to eat just one!

A cute Valentine’s treat, you won’t be able to eat just one!

Another word of warning: you can just eat one. They’re slightly addicting!

Prep Time: 15 minutes total (for 25 of them)
Bake Time: 5 minutes
Set Time: 2 hours for chocolate to firm up or 1 hour in refrigerator


Ingredients


25 Special Dark Hershey’s kisses, un-wrapped

25 mini pretzels

25 dark chocolate M&M’s available in bags of Valentine’s Day colors or use a regular bag


Instructions


1. Preheat oven to 325 degrees. Line a cookie sheet with parchment paper or foil.

2. Place pretzels on cookiesheet. Top each pretzel with one unwrapped chocolate kiss.

3. Bake 4 to 5 minutes or until chocolate begins to soften, but not melt. Remove from oven; top each with 1 M&M. Be sure to press it down a bit to set into the chocolate kiss.

4. Cool completely. This takes about 2 hours. To cool quickly, refrigerate until chocolate is firm.

Makes 25 total

What’s for Dinner Wednesday: Skillet Lasagna…with a twist

12 Feb
This meal was a lifesaver for us one Friday night, and we'd definitely make it again!

This meal was a lifesaver for us one Friday night, and we’d definitely make it again!

Friday nights have been tough for us the past few years. It’s generally our night for Dance, at least for one daughter, although some years it was for all of them. Lately it’s also been a Girl Scout night for my youngest too.

This year, twice a month, she goes from Dance to Girl Scouts with one hour in between, so dinner has to be fast and easy. Recently, I had a Friday where I looked on my weekly menu to see what was on there, and lo and behold….there was nothing.

Friday was blank.

Well, that’s inconvenient.

My first thought was to order out pizza but I don’t love doing that. It’s expensive for one thing and it’s not the healthiest for another.

What to make, what to make?

I kept thinking on it all day.

Shortly before the end of the afternoon, I was scrolling through Facebook, and there it was: Friday night’s dinner. A friend of mine had share a recipe for a One Skillet Lasagna that she’d found on Pinterest from a blog called Number 2 Pencil. I had found my dinner. She and her family had tried it the night before and loved it. I was going to try it on my family that night.

The recipe called for a couple of things I had to modify because of what I had on hand:  Italian Sausage and Ravioli. I didn’t have Italian Sausage, but I did have some Jimmy Dean Turkey Sausage Crumbles. I didn’t have Ravioli, but I did have two 12 oz. bags of Tortellini. Both those items would work out just fine.

So, with a slight twist in the ingredients, I created Number 2 Pencil’s One Skillet Lasagna at my house too.

It was a hit, everyone loved it. I still want to make it with Ravioli next time, just to try it, but it was good with Tortellini too.

In my exploration of the Number 2 Pencil blog I have seen lots of great recipes. I hope you’ll pay the blog a visit too!

Here is their recipe just as it appears on the blog itself. Other than the switch-a-roo I pulled with the pasta and sausage, I followed the recipe to a T.

Ingredients

  • 2 tablespoons of olive oil
  • 1 pound of Italian Sausage, Italian Turkey Sausage or Lean Ground Beef
  • 1/2 a medium onion, diced
  • 2 cloves of garlic, minced
  • 28 oz can of whole peeled tomatoes, crushed tomatoes or diced tomatoes
  • 1 8 oz can of tomato sauce
  • 1 1/2 cups of low sodium chicken broth
  • 2 9 oz packages of Buitoni four cheese ravioli, from the refrigerated section
  • 8 oz of fresh mozzarella cheese, cubed
  • 1/2 cup of freshly grated parmesan cheese
  • Flat leaf parsley for garnish

Instructions

  1. Add olive oil to large skillet.
  2. Sautee onions and garlic, over medium heat, until onions are soft and translucent.
  3. Add sausage and cook, breaking up with wooden spoon while it browns.
  4. Once sausage is cooked through, add tomatoes, tomato sauce, chicken broth, and ravioli.
  5. If using whole peeled tomatoes, use kitchen shears to chop them up while still in the can before adding to skillet.
  6. Bring mixture to a boil, then reduce heat and simmer over medium heat.
  7. Simmer until ravioli are tender and sauce has reduced and thickened, 15-20 minutes
  8. Remove from heat and stir in mozzarella and parmesan.

Fun Friday: Peanut Butter Oatmeal Chocolate Chip Bars

7 Feb
This was an after school snack that was quick to make and disappeared just as fast!

This was an after school snack that was quick to make and disappeared just as fast!

As you know, we love a good after school snack at our house! It holds us over from when we get home from school, through homework and after school activity time, until dinner, which can sometimes be pushing 7:00.

This recipe is just a slight modification from a site that I follow, Skinny Ms. I love their site and I have featured many of their recipes in the past. They always get rave reviews from my house and this one was no different.

Of course, my main modification is the fact that I had to add chocolate chips to my version of these bars. I couldn’t help it. They just wouldn’t be the same without them!

Below is their recipe with my modifications noted in parentheses.

Please visit their site and check out all their great recipes! You’ll want to follow them too!

My Version of the Skinny Ms. Peanut Butter and Honey Oat Bars

INGREDIENTS

1/2 cup honey

1 tablespoon coconut oil (I used canola)

1/3 cup peanut butter

1/2 tsp. vanilla

1/4 tsp. cinnamon

2 cups oats

1/2 cup chopped honey roasted peanuts (this is where I substituted 1/2 cup chocolate chips instead)

DIRECTIONS

Preheat oven to 300 F

Line an 8 x 8 pan with parchment paper, making sure the parchment paper hangs over the sides.

(I did not have parchment paper so I did not line my pan with it.)

In a microwave safe bowl, add honey, coconut oil (canola oil) and peanut butter. Microwave for 30 seconds, stir until mixture gets runny and peanut butter completely melted in. You may have to heat for another 20 seconds or so. Mix in vanilla extract and cinnamon.

Add oats and peanuts, mix until everything is combined and the mixture is completely coated with honey and peanut butter mixture.

Pour mixture into prepared pan and press down with a back of a spoon; bake in the oven for 20 -25 minutes until lightly brown.

Once you take the bars out of the oven, press down with the back of a spoon to insure the oats are pressed firmly together. Let the oat bars cool slightly and carefully take out bars by grabbing onto the parchment paper and cut into 16 slices. Let bars cool completely and harden at room temperature.

Store bars in an air tight container in the refrigerator.

Makes 16 bars.

Ingredients

  • 1/2 cup honey
  • 1 tbsp coconut oil
  • 1/3 cup peanut butter
  • 1/2 tsp vanilla extract
  • 1/4 tsp. cinnamon, ground
  • 2 cups oats (I used Gluten Free Oats)
  • 1/2 cup chopped honey roasted peanuts

Directions

Preheat oven to 300 F

Line an 8 x 8 pan with parchment paper, making sure the parchment paper hangs over the sides.

In a microwave safe bowl, add honey, coconut oil and peanut butter. Microwave for 30 seconds, stir until mixture gets runny and peanut butter completely melted in. You may have to heat for another 20 seconds or so. Mix in vanilla extract and cinnamon.

Add oats and peanuts, mix until everything is combined and the mixture is completely coated with honey and peanut butter mixture.

Pour mixture into prepared pan and press down with a back of a spoon; bake in the oven for 20 -25 minutes until lightly brown.

Once you take the bars out of the oven, press down with the back of a spoon to insure the oats are pressed firmly together. Let the oat bars cool slightly and carefully take out bars by grabbing onto the parchment paper and cut into 16 slices. Let bars cool completely and harden at room temperature.

Store bars in an air tight container in the refrigerator.

Makes 16 bars.

Read more at http://skinnyms.com/peanut-butter-and-honey-oat-bars/#gfP0EJKu3Sr2DuA5.99

Fun Friday: Hot Fudge Sundae Cake

31 Jan
My mom used to make this all the time when we were growing up, but I'd forgotten all about it!

My mom used to make this all the time when we were growing up, but I’d forgotten all about it!

Today’s recipe for Fun Friday truly is a fun recipe! It’s fun to make and fun to eat. Like many recipes, it’s got a touch of science to it, and I always love recipes that show the kids something very cool. This one definitely does that as it creates a soupy, fudgy sauce underneath a crisp yet cake-like top.

The funny thing about this recipe is it’s one I grew up eating all the time. It was a go-to recipe in our house growing up. However, it’s been so long since I’ve made it myself, that none of my kids (the oldest being 14) even remembered ever having it.

I was recently reminded of it when a friend sent me a link to a similar recipe; she thought it was something I’d like. She was right, I love it! Seeing the link jogged my memory and I went to my oldest cookbook, a Campbell’s Soup photo album type of recipe binder and I pulled out my mom’s recipe for Hot Fudge Sundae Cake.

Elizabeth came into the kitchen, as she often does, and asked if she could help me. And, as she often does, she made almost the entire thing herself, with just some direction from me. It’s a great recipe for kids to learn to make themselves.

First group of dry ingredients get mixed right in the baking dish!

First group of dry ingredients get mixed right in the baking dish!

This recipe is a favorite because it’s a one-dish recipe. You make the entire thing in an 8×8 or 9×9 square baking dish. I used a glass Pyrex dish. You can mix the ingredients in four steps: dry, wet, dry, wet, and then you’re done!

Below is my mom’s recipe for Hot Fudge Sundae Cake, just as I copied it off her recipe card and put it into my first cookbook all those years ago. I hope you’ll give it a try this weekend and you too, will see what a fun, easy recipe it is!

INGREDIENTS and DIRECTIONS

                Step 1:  Preheat oven to 350 degrees.

 In an ungreased 9×9 square baking dish mix together the following ingredients with a fork:

1 cup flour

¾ cup sugar

2 TBL. Baking cocoa

2 tsp. Baking Powder

¼ tsp. salt

Spread evenly in baking dish.

                Step 2: In a two-cup measuring cup mix together the following ingredients and pour over first five ingreidents.

½ cup milk

2 TBL canola oil

1 tsp. vanilla

Spread batter evenly in baking dish.

Before the water goes on top, this is what your baking dish looks like.

Before the water goes on top, this is what your baking dish looks like.

  Step 3: Sprinkle the following two ingredients over batter:

1 cup brown sugar packed

¼ cup baking cocoa

                Step 4: Pour the following over all:

1 ¾ cup Hot Water

Bake 40 minutes at 350 degrees. Let stand15 minutes and serve.

Spoon sauce over ice cream if desired.

The secret is in the sauce. Underneath the crispy chocolate cake is a fudgy sauce to top your ice cream and cake!

The secret is in the sauce. Underneath the crispy chocolate cake is a fudgy sauce to top your ice cream and cake!

Fun Friday: GAK!!

17 Jan
*This* is GAK.

*This* is GAK.

Nope, not a terrifying “acckkk!!”

GAK.

Recently, one of the girls had read about sixth-grader Jordan Hilkowitz, in a “TIME For Kids” magazine at school. The article talked about how he conducts science experiments at home and posts them on his YouTube channel, Doctor Mad Science. She had to visit the site herself when she got home, to see just what Doctor Mad Science, who also happens to be autistic, does on his channel.

GAK.

He does lots of fun experiments on that channel, but GAK was the one she chose.

It’s like Silly Putty, and from the moment my daughter saw it, she had to make it. Every day she asked me, “When can we make GAK?”

I’ve made GAK before, way back in my teaching days. I knew it was easy and the ingredients were simple, but it wasn’t something I could just whip up with her right then and there, or any of the quite-a-few times she asked me, especially the one time she asked me while I was baking Christmas Cookies.

“When can we make GAK?”

Every. Day.

Finally, it was school vacation time and her GAK dreams came true. We had all the ingredients needed, right here at home, and a perfect neon green food coloring to make it happen. In fact, she and her dad made it happen.

It doesn’t take long at all to make GAK, and once you’ve got it, there’s lots you can do with it.

Out came the cookie cutters, tools, plastic containers and all kinds of fun took place for several hours with the GAK. It’s fun like Playdoh, but oozy and gooey.

There are lots of recipes out there for GAK, but the one we used had Elmers Glue and Borax in it, like this one. This site, Lil’ Luna gives great step-by-step directions for you once you have your ingredients. Or you can tune in to Doctor Mad Science and watch him make it right before your eyes.

You can Google it, but in general, you too can make GAK if you have the following supplies:

– TWO 4 oz. bottles of Elmer’s Glue (or that type of white, gooey glue)

– 1 tsp. Borax (found in the laundry detergent section of the store)

– Water

– Plastic Cup

– Bowl

– Food Coloring

The website I listed above, has all the instructions on it, as does Doctor Mad Science. And the site above also has an idea at the bottom of her page for the cutest GAK gift and a tutorial to go with it. I hope you’ll check both sites out and try making GAK with your kids too! It’s a great craft, it’s a science experiment and it’s fun and easy! Your kids will love it!

Another fun gift from the holidays

13 Jan
They opened these Nerf Rebelle gifts from Santa so fast, with such excitement, I barely had time to snap this photo of the box!

They opened these Nerf Rebelle gifts from Santa so fast, with such excitement, I barely had time to snap this photo of the box!

This year, two of the girls asked for “weapons” on their Santa lists.

They’d seen commercials and ads for the new Nerf Rebelle Heartbreaker Bow and the Nerf Rebelle Pink Crush Blaster; both in perfect “girl colors” of pinks and purples, blacks and turquoise.

With the advent of strong female characters like Merida and Katniss in recent movies such as Disney’s “Brave,” and “The Hunger Games,” it wasn’t all that shocking to us that they’d instantly fall in love with such toys.  A bow and arrow, with a female pulling back to aim, was nothing unusual to see, although many years ago such a thing was unheard of.

Being Girl Scouts, my kids have shot a bow and arrow many times at camp. They’re actually quite good at it, and we’ve seen many “bulls-eye” hits between them. They enjoy archery very much and it’s always a favorite activity at camp. It was even part of the physical education curriculum at our middle school for our oldest daughter.

So on the one hand, when I could’ve been shocked that they were asking for these “weapons” along with their dolls, dollhouses and Snap Circuits, on the other hand, I was rather thrilled. I was actually happy that Nerf had come up with “weapons” that were attractive to girls and that let girls do something that’s exciting, active, and sporty, rather than stereotyping those types of activities as being just for boys. I equated this gift item on their lists to them to asking for a squirt gun or a Super-Soaker pool toy, which we’ve never had a problem with.

On Christmas morning, they were so excited to see their Nerf toys among the gifts that had been delivered. They were definitely a favorite choice all throughout the school vacation weeks, even though they’re designed to be outside toys. We have a decent-sized hallway and one of the kids’ doors has vinyl decals in the shape of circles on the door; a perfect target. Being Nerf, the “ammunition” was soft-tipped and completely safe, as long as no one was aiming at anyone’s eyes; a rule we set right away.

Although this gift request was one that initially made me do a quick double-take, it turned out to be a favorite, and I’m glad that Santa delivered. It’s nice to see the girls imitating Katniss and Merida when they play and it’s nice to see them utilizing skills that they’ve learned as scouts. It will be lots of fun to bring these toys outside in the springtime. We have a fenced-in yard and the fence would be an easy target for practicing.

If you have a daughter and she expresses interest in the Nerf Rebelle toys, you too, may hesitate as you consider whether or not you’re “weapons” people, but I encourage you to give it some thought, and maybe give it a try too. You might be surprised as you see your mini-Katniss and Merida characters utilizing skills you might not have even known they had.

Fun Friday: Chocolate Chip Zucchini Cake

10 Jan
I was actually shocked at how much everyone liked this cake!

I was actually shocked at how much everyone liked this cake!

Last week we had some very cold weather here; colder than our normal winter weather tends to be. When the weather gets cold, the first thing I think of doing is baking. I like the warmth of the kitchen when the oven is on, and the warmth of the atmosphere in the house when something delicious is baking as everyone is coming home.

On this particular day, I wasn’t sure what I wanted to make for an after school snack but I happened to be thumbing through an old issue of “Food Network Magazine” from July/August 2013. Being a summertime issue of the magazine, it was featuring recipes with zucchini; a garden staple for many.

It just so happened that I had two zucchinis that I’d bought to use for Christmas dinner and hadn’t used. This recipe would be perfect for making use of at least one of my zucchinis. Even better, it wasn’t just any zucchini cake, it was a *chocolate* zucchini cake! When I looked at the ingredients I actually had them all and it looked rather healthy, considering that it was a cake. I knew I could healthify it even more by making the flour a mix of white and wheat.

I decided to try it.

Well, it was d.e.l.i.c.i.o.u.s!!!!!!  Everyone loved it! They enjoyed it with a nice, cold glass of milk, which made me even happier. I’d definitely make it again, and I think I was a little bit shocked at just how rave the reviews actually were.

The only thing that I didn’t love about the recipe was that it used a lot of bowls. Not having a ton of work space, I prefer recipes that don’t need a ton of space. With so many bowls, this one took up some space. However, it was so delicious, it was well worth the extra bowls!

I am posting the recipe below, just as it appears in their magazine and on their website.

Besides changing the flour to include both wheat and white, I used a bigger baking dish and therefore doubled the ingredients for the frosting so that it would frost the whole cake.

Next time you’re looking for a healthier cake recipe, I recommend this one!

Thanks to “Food Network Magazine” for sharing such a great recipe!!

Look at that healthy, secret ingredient in the chocolate cake batter!

Look at that healthy, secret ingredient in the chocolate cake batter!

FOOD NETWORK MAGAZINE’S CHOCOLATE ZUCCHINI CAKE

IngredientsUnsalted butter, for the pan (*I used a fat free cooking spray instead*)
1 1/2 cups all-purpose flour, plus more for the pan (*I used a mix of 1/2 cup wheat, 1 cup white flour*)
1/2 cup plus 1/3 cup semisweet chocolate chips
1/4 cup unsweetened cocoa powder (not Dutch process)
1/2 teaspoon kosher salt
1/2 teaspoon baking soda
1/4 teaspoon ground nutmeg or allspice (*I went with nutmeg*)
1 1/4 cups sugar
1/2 cup plus 1 teaspoon extra-virgin olive oil (separated)
2 large eggs
1/2 teaspoon vanilla extract
1 medium zucchini, grated and squeezed dry
1 teaspoon honeyDirectionsPreheat the oven to 350 degrees F. Butter the bottom and sides of a 9-inch-square cake pan (I used 11×7). Dust the pan with flour, tapping out the excess.Toss 1/2 cup chocolate chips with 1 tablespoon flour in a small bowl. Whisk the remaining flour, the cocoa powder, salt, baking soda and nutmeg in a medium bowl; set aside.Beat the sugar, 1/2 cup olive oil, the eggs and vanilla in a large bowl with a mixer on medium speed until smooth and pale, about 3 minutes. Add the flour-cocoa mixture; beat on low speed until combined, about 2 minutes (the batter will be thick). Add the zucchini and beat until combined, about 2 more minutes. Fold in the flour-coated chocolate chips with a wooden spoon.Transfer the batter to the prepared pan and bake until a toothpick inserted into the center comes out clean, 30 to 35 minutes. Transfer to a rack and let cool completely.

Make the glaze: Combine the remaining 1/3 cup chocolate chips, 1 teaspoon olive oil and the honey in a microwave-safe bowl. Microwave on medium-high power in 30-second intervals, stirring, until the chocolate is melted. Spread over the cake, then cut into pieces. (*I doubled this glaze recipe*)