Archive | Cooking with Kids RSS feed for this section

Fun Friday: Blizzard Juno

30 Jan
The calm before the storm.

The calm before the storm.

The last time I wrote, it was Monday, and now it’s Friday, just like that.

So we had a blizzard!

Yep, just as the forecasters had predicted for days prior, we got approximately two feet of snow, give or take an inch or twelve, depending on the drifts.

I spent most of Monday running from store to store to gas station getting the rest of what we needed for food, batteries, and gas for the car. By the time I sat down to start my actual work for the day it was 2pm and by the time I finished it, it was midnight, but I’d beat the storm both in my work and in my preparations at home. I was ready.

Thankfully, we didn’t ever lose power. The temps were frigid and the winds were howling, and we thought for sure it was going to go at any moment, but it did not. That made the week of days out of school and work much more enjoyable. It was like a surprise vacation.

At times we could barely see out the window, especially at the height of the storm.

At times we could barely see out the window, especially at the height of the storm.

We spent the first part of Tuesday literally just hanging out. People slept late, some later than others, and we watched the snow falling furiously and listened to the wind. The term “white-out conditions” was fitting for most of the day and night. We’d gone to bed with about 5″ of snow Monday night and woken up to find 12″ in the morning. By the next day we had at least 18 inches, maybe more. The plows would come by, and seemingly minutes later, you could barely see the path they’d made. We sat and watched TV until about 1pm and then we shut it off for most of the rest of the day.

Even though we didn’t lose power, we made use of the meals we’d planned, and we had several days to hang out, do things we never get to do (including put laundry away), and relax. The kids still had things from Christmas they hadn’t gotten to play with or use yet, things that are more involved and take time, so those things came out early on and I tried my best to make sure we made use of at least one of each child’s “things” during the week, so that no one felt left out. Because we had power, we baked; making special snacks using some fun kits the

The day after the storm dawned so bright and beautiful, a perfect, sunshiny day.

The day after the storm dawned so bright and beautiful, a perfect, sunshiny day.

kids had gotten for Christmas–individual pie makers, giant sugar cookie makers, and the like, all things I’ll focus on for upcoming blog posts throughout the next month or so. We had a family movie night, right in the middle of the week, all piled into the living room, watching an older movie that most of us had never seen.

We had three days out of school and on the second day out, they all got to go outside and play, and as cold as it was, they were in snow-day heaven, as was I. It was so great to see them free and relaxed, enjoying outdoor play time in the middle of the day, in the middle of a week. So much time is spent working on work at school and then working on even more work after school, and doing extra-curricular activities, that many a day go by when outdoor play time just isn’t in the cards. Although everyone had homework this week, some more than others, they still had time to play inside, to play outside, to catch up on sleep, to relax, to cook, to create and to hang out.

For a blizzard, it was a great week.

And guess what?
It’s going to snow on Sunday and Monday. A big Nor’Easter. Again.

I’m not returning my extra batteries and hand-warmers yet!

No matter how old you are, you can always find something fun to do in the snow.

No matter how old you are, you can always find something fun to do in the snow.

Hooray for snow days!

Hooray for snow days!

Fun Friday: Apple Pie Bites from Megan’s Frugalista Diaries

2 Jan
The house smelled so good when the kids arrived home from school on this particular afternoon!

The house smelled so good when the kids arrived home from school on this particular afternoon!

Happy New Year!

After taking some time off from my blogging this past week, I’m sliding back into my regular routine. As I often do, next week I’ll begin blogging some great toy and gift reviews from the holidays. I’ll continue this during the month of January in order to give you some gift-giving ideas for the rest of the year, but before I do, I thought I’d put out a new Fun Friday recipe for you.

Today is Friday and it’s still school vacation, so there’s lots of time to relax and do some fun things together before heading back to the school routine. I love school vacation weeks exactly for this reason. We get to do some fun things that we normally don’t have time for during the craziness of the school year. This is a perfect recipe to try out today. It’s a great recipe for little hands to help with (or for bigger hands to complete on their own) and it’s warm and delicious.

The recipe comes from Megan Zietz over at The Frugalista Diaries blog, but I actually saw it on another blog where she was guest blogging for the day. The ingredients and directions are simple and quick, making it a perfect after school snack, dessert or school vacation day treat.

Megan made a note (see below) that she used Immaculate Baking Company’s crescent rolls. I did not have those on hand but I did use a lowfat version of another company’s crescent rolls. I also skipped the vanilla ice cream since I was using this as an after school snack, but if I were making them for a more involved dessert, I’d definitely put ice cream out.

These all got thumbs up. There were eight crescents and five people here, so next time I’d definitely do two packs of crescents to double the recipe. I think you could also throw in some dried cranberries or some raisins to this recipe, and I bet it’d be great.

I hope you’ll visit Megan’s blog. She’s got lots of great posts on there and she covers more than food, so pay her a visit!

Here’s Megan’s recipe:

Apple Pie Bites – Serves 8
1 (Tart) Apple Sliced
3 Heaping Tbsp. Brown Sugar
2 Tbsp. Cinnamon ( I used a homemade Cinni-Sugar Mix)
1 Tbsp. Melted Butter
1 Pkg. Of Immaculate Baking Co. Crescent Rolls
*(I use immaculate baking co. when I’m not doing homemade – no hydrogenated oils and non gmo –  it’s the only thing I feel safe about giving my kids when it’s not from scratch)
Preheat Oven to 350˚
1. Roll out the dough on a greased cookie sheet, brush with butter and sprinkle Brown Sugar and Cinnamon in individual pieces of dough.
2. Roll up an apple slice in the dough forming a crescent, brush with melted butter and top with cinnamon.  Repeat for others.
3. Bake for 12-15 Mins at 350˚.

4. Remove from Oven, filling will be hot! Serve alone or with a dollop of Vanilla Ice Cream.


And the winner is……

15 Dec
Announcing the winner of Baking Day at Grandma's!

Announcing the winner of Baking Day at Grandma’s!

Today’s the day!

Last week I told you that today I’d be announcing the person who had won a copy of Anika and Christopher Denise’s book, “Baking Day at Grandma’s,” and today’s the day!

The winner is……..Stephanie Bernaba!!!

Stephanie, just in time for the holidays, you can now add “Baking Day at Grandma’s” to your nine-book-a-night bedtime story routine!

I know that you will love the story as much as I do, and you’ll enjoy baking Grandma Rose’s special recipe at the end, too!

Please email your mailing address to: info@anikadenise.com so that a book can be sent to you!

If you were not a winner and you’d still like your own copy, you can find a copy on the Barnes and Noble website or on Amazon.com.

Congratulations Stephanie, and thanks to the author and illustrator, Anika and Chris for a beautiful story to share!

Fun Friday: Book Review and Giveaway!

5 Dec
I was so excited to go and get my copy of Anika and Chris's new book! You're going to want your own copy too!

I was so excited to go and get my copy of Anika and Chris’s new book! You’re going to want your own copy too!

What’s more fun on a Friday than a giveaway?!

You might be thinking, maybe a giveaway that includes something yummy to eat?

You’ve got it!!

I do lots of book reviews and lots of giveaways, but it’s always more special to me when I know the author of the book personally.

Therefore, today’s review and giveaway is an extra-special one.

Last spring, I participated in the 2014 Providence Listen To Your Mother show, and I had the honor and privilege of sharing the stage with so many wonderful, talented women.

Anika Denise was one of those women. Anika told a wonderful, funny and yet emotional story about her children and their experience with their pet fish. You can hear her story here.

Today’s book review is another story by Anika Denise, a children’s book author, and it holds special meaning for me personally as well. The story behind this sweet children’s book, “Baking Day at Grandma’s” is from Anika’s own childhood as she grew up spending time with her Grandma Rose. Her story reminds me of my own two grandmothers and my mother, and the rich tradition of baking together that has been instilled in me as well as the rich tradition of giving. It’s a tradition I’ve written about each December on my blog as I share my own Grandma Rose’s recipe for her Italian Wine Biscuits and as I’ve shared my Grandma Grello’s recipe for her Christmas Prune Cookies. I’ve written about the years I spent growing up, baking with my mom so that my brother and I could go off delivering trays of cookies each Christmas Eve day. It’s a memory that I hold dear to me, and I’ll continue to share them again this holiday season, beginning next week.

In the book trailer (link below), Anika talks about the fact that growing up she spent a great many summers and winter vacations with her Grandma Rose. I too, spent summers and school vacations with my grandparents, making special memories with them and learning their cooking skills. My kids now spend time baking with my mother as well and carrying on that special bond and tradition.

As I flipped through my book, I found each illustration to be more beautiful than the last.

As I flipped through my book, I found each illustration to be more beautiful than the last.

Christopher Denise is the amazingly talented illustrator of “Baking Day at Grandma’s” and in the trailer below he explains where much of his stunning scenery is derived. Each illustration in the book is more beautiful than the last, and the Denise team does a wonderful job of both showing and telling such a sweet story, one can’t help but love it.

One of the best parts of the book, is the recipe Anika shares in the back of the book. It’s her Grandma Rose’s recipe for chocolate cake, and it provides a perfect opportunity for families to bake together, to spend special time together and even (here goes the teacher in me again) to throw in a little hands-on kitchen math and science. I won’t share the recipe here, of course, but when you get your own copy of the book, you’re going to love that extra-special touch.

Given that the holidays are coming up, I think that “Baking Day at Grandma’s” makes a perfect gift! Being a person who loves themed gifts, I can just imagine a kid-sized apron, maybe a matching adult-sized apron, and some cute baking supplies added in. It’d be a wonderful treat for anyone–child or adult, and a great tradition starter or an add-on to an already existing tradition of baking and sharing!

Listen in this trailer for the book, as Anika and her husband Chris, speak about how this story came to be, and then enter my giveaway for your own copy of the book!

HERE’S HOW YOU WIN:

Leave me a comment below telling me who you’d like to have this book for, and why!

Entries will be accepted until Sunday, December 14, and one lucky winner of their very own copy of “Baking Day at Grandma’s” by Anika Denise and Christopher Denise will be announced on Monday December 15.

**This contest is open only to those in the continental United States!**

Stop by and visit us on….

20 Oct
Stop by either of two websites to see my blog post for Pilgrim Pies featured!

Stop by either of two websites to see my blog post for Pilgrim Pies featured!

Everything is coming up Pumpkin!

Everywhere you go, everything is featured in flavors of fall.

If you go on over to either this website, or this one, you’ll see my blog post from The Whole Bag of Chips “Pumpkin Palooza” series, featuring the recipe for Pilgrim Pies, which is such a seasonal favorite.

It’s the greatest form of flattery when someone wants to feature your work on their site, and it’s even greater when they credit you for your work. Thanks so much to the crew over at cpnewsnet.com for featuring my work and doing such a great job!

Happy Fall, Y’all!

Fun Friday: S’Mores Mug Cake

3 Oct
Everything tastes better in a mug!

Everything tastes better in a mug!

We have lots of mugs in our kitchen cabinets. Big mugs, little mugs, colored mugs, white mugs, kids’ mugs, teacher mugs, matched mugs, mismatched mugs and every kind of mug you can think of.

I almost never drink my coffee out of a regular coffee mug, ever. I almost always drink it in a re-usable travel mug.

So what to do with all those mugs?

Mug cakes!

I’m sure you all remember the notorious Four Ingredient Nutella Mug Cake recipe that’s my all-time favorite mug cake thus far, but there are plenty of other mug cake recipes out there which deserve equal opportunity to shine. A quick Google search will yield you plenty to try, and recently I even saw a link to breakfast recipes that can be cooked in a mug. I can tell you, that’s in my future for sure.

Last fall, my brother sent me a link which contained multiple mug cake recipes to try, probably 20 or so. I filed it away for future use, and this summer I pulled it back out again. The kids and I were craving something sweet (okay, when are we NOT craving something sweet??) and we couldn’t really agree on what it was that we wanted. I decided to pull up the link to the various mug cakes and let them each choose one to make, and go to town.

I think that for us, half the fun of the mug cakes is baking something so small, so individual rather than a full-sized anything. The other half the fun is eating your creation, sharing a bite with someone else, and taking a taste of theirs. Cooking mug cakes is a fun, easy way to involve kids in the kitchen. In general the recipes are quick and easy, a little less messy (sometimes), and still incorporate important math and science skills, an added bonus to cooking with kids.

On this night, I don’t think anyone even finished their whole mug cake, as they were pretty filling, but everyone definitely enjoyed their chosen creations.

I’ll share both recipes we tried eventually, but today I thought I’d share the 5 Minute Chocolate Fudge S’More Mug Cake recipe from How Sweet Eats because it was the more unique and different recipe we tried. I will say, ours wasn’t exactly like the one over at How Sweet Eats because I didn’t have exactly the same ingredients on hand, but it was pretty close and it still got a thumb’s up at the end of the taste test. I’ll also say, it took us much longer to prepare than five minutes, but I was told that it was worth every minute spent.

Here is their recipe, just as it appears on their site, and my photo of our finished version is here at the top of my post. I’ve tried to add in any notes where I made some changes, using an *.

5 Minute Chocolate Fudge S’More Mug Cake

from How Sweet Eats

INGREDIENTS

2-3 tablespoons graham cracker crumbs

3 1/2 tablespoons unsalted butter, melted  *We used I Can’t Believe It’s Not Butter.

2 tablespoons granulated sugar

1 large egg

1/2 teaspoon vanilla extract

1/4 cup whole wheat pastry flour  *She said we could use all-purpose flour, so that’s what we did.

2 tablespoons unsweetened cocoa powder (mine was dark cocoa, hence the dark color)

1/8 teaspoon baking powder

pinch of salt

1 1/2 ounces milk chocolate (chopped or morsels)  *We used chocolate chips, semi-sweet.

marshmallow fluff, cream or actual marshmallows  *We had giant-sized marshmallows designed for campfire S’Mores. We used one big one, right on top.

DIRECTIONS

Combine 3 tablespoons butter and 1 ounce of chocolate in a small bowl, then melt in the microwave for 20-30 seconds. Set aside. In another bowl, combine remaining melted butter with 2-3 tablespoons of graham cracker crumbs and stir until moistened. Press graham crumbs into the bottom of your mug.

In a bowl. whisk egg, sugar and vanilla until smooth. Add in flour, baking powder, salt and cocoa, stir until a thick batter forms. Stream in melted butter and chocolate, mixing to combine. Fold in remaining chocolate chips. Add half of the mixture on top of the graham crust, then throw on a scoop of marshmallow fluff/cream or a few marshmallows. Add remaining batter on top, then pop in the microwave for 1 minute and 20 seconds to almost 2 minutes. Remove and top with additional marshmallow if desired. You can pop it back in the microwave for 5-10 seconds to make them melty, or pop them directly under the broiler for about 10 seconds to toast if desired. You can also use a kitchen torch if you have one. Sprinkle with graham crumbs!

Notes: If you don’t have whole wheat pastry flour, you can use all-purpose. I would not recommend using regular whole wheat. Additionally, I have made this by substituting coconut butter for the full amount of butter. It was just as delicious, albeit slightly drier. You cannot taste coconut at all. Finally, take into account the power of your microwave. Mine has a mind of it’s own and is insanely powerful, so I cooked this on 80% power. Judge accordingly and add/subtract a few minutes of cooking if you know yours is wonky too. Unfortunately it may take 1-2 trial runs to get the right consistency because all microwaves are different, but I promise it’s worth it!


Get your pumpkin on and Go Orange for No Kid Hungry!

1 Oct
Thanks to Paula over at My Soup For You for teaming up with me today to bring you some great pumpkin recipes, and for bringing even more awareness to No Kid Hungry!

Thanks to Paula over at My Soup For You for teaming up with me today to bring you some great pumpkin recipes, and for bringing even more awareness to No Kid Hungry!

It’s October! It’s fall. It’s the season of beautiful leaves, fun autumn events like apple picking, hay rides and pumpkin carving.

Pumpkin….mmmmm…..does it make you think of pumpkin spiced coffee, pumpkin ice cream, pumpkin muffins and pumpkin pie?!

Me too!!

We’re a lucky bunch, most of us. We can run through the drive through at the local donut shop and get this month’s pumpkin flavored muffin or drink, without too much of a struggle. We can pop a recipe for my good friend Paula’s Pumpkin Chocolate Chip Bread or her Pumpkin Soup right into the oven and enjoy it without too much trouble. All those warm, orange flavors warm our bellies and our thoughts all throughout the fall.

We’re very lucky.

Not everyone is so lucky, however. According to the No Kid Hungry statistics for our local area, as of June 2013 (more than a year ago), 22% of kids in our little state were struggling with hunger. Fifty-five percent of them were eligible for free or reduced lunch at school, and only 51% of those students were eating school breakfast.

At a recent school event I covered for the newspaper earlier this month, when a room full of young students were asked what the most important thing was that they’d miss if they were late to school, their answer wasn’t attendance, or morning math, or reading, it was breakfast. Every student who raised their hand was worried that if they were late to school in the morning, they’d go hungry until lunchtime.

Childhood hunger across our nation is a growing problem, but we can do something to help.

Last year, you may remember that our own family started a local Go Orange Day for No Kid Hungry after seeing a television commercial about the nationwide effort to help end childhood hunger. Nationally, the official Go Orange Day for No Kid Hungry is at the end of September, but we opted to do ours just a little bit later at the start of October. It was a big success. We rallied our large school district, the superintendent’s offices and City Hall all to Go Orange for No Kid Hungry, and raised over $1000 in monetary donations as well as bringing in hundreds of pounds of non-perishable food items for our local food pantry. We were helping to put food on the tables of families all around us, and it was a great feeling.  All around us, local restaurants and other establishments went Orange as well, donating portions of their proceeds to the No Kid Hungry effort, and wearing orange to show their spirit.

This year, we’re doing it again. We’ve pushed our date out slightly further, and this year on Friday, October 31, Halloween Day we’ll be getting our pumpkin on, going Orange for No Kid Hungry again. We’ve rallied our school district, our superintendent’s office, City Hall, and even our church to help us put an end to childhood hunger again this year. So far we’ve had TEN local responses for going Orange on Halloween Day. Even more exciting, we’ve had some inquiries from local folks wanting to spread this year’s local Go Orange day to their communities and schools within our state and neighboring areas. All around our city, people will be showing their Halloween spirit, dressing in orange, donating money and/or non-perishable food items on Halloween Day and helping out their neighbors all in a day’s work.

We are thrilled. Wouldn’t it be great if we could really make a difference EVERY YEAR?

Wouldn’t it be great if just by spreading awareness and spreading the word, we could help feed other families?

We are foodies, we are blessed, we are thankful to be able to cook and bake and eat our fun pumpkin flavors in the spirit of the season, all month long.

So I ask you: will you get your pumpkin on this Halloween Day too? Will you spread the awareness of childhood hunger in your area and continue the good work of No Kid Hungry and their Go Orange efforts in your city or town, at your school or church or temple? Will you help?

Get your pumpkin on. Visit Paula’s blog over at My Soup for You and help her spread the word too. Make some Pumpkin Soup. Grab some Pilgrim Pies, eat some pumpkin spiced Chex snack mix, and be thoughtful, be thankful that you can help another family in such a simple way.


Fun Friday: Banana Split Smoothies

29 Aug
My kids never get tired of having homemade smoothies, especially on these hot days!

My kids never get tired of having homemade smoothies, especially on these hot days!

As I mentioned on Wednesday, this was our first week of school. It was a short week but being the first week, it feels approximately two full weeks long. Not only are we re-adjusting to the school year schedule, but we are also adjusting to a new schedule, an earlier schedule for our oldest daughter, who started her freshman year of high school this week.

To top it off, while our summer has been 8-10 weeks of perfect, not-humid, summer-like weather, not a day over 80 degrees, this first week back in our non-air conditioned schools on our not-air conditioned buses, it’s been nearly 90 degrees, hot and humid every.single.day.

On Day Two, the younger kids took the bus home. They were like soggy noodles getting off the bus; they were so hot, tired and sweaty. As soon as I saw them, I knew exactly what the quick fix would be: smoothies.

Even better, I had a new frozen yogurt in the freezer here at home, an Edy’s Slow Churned, Low Fat, Limited Edition yogurt. When companies call something “Limited Edition,” it almost always becomes a favorite flavor of mine and I almost always pine for it when they take it away from me.

As soon as I saw this, it went right into my shopping cart!

As soon as I saw this, it went right into my shopping cart!

This Limited Edition flavor was made for me: Fun ‘N The Sun Banana Split Frozen Yogurt.

No, I am not even kidding you right now.

It just so happened that I had this Banana Split yogurt, I had two frozen bananas, and I had chocolate syrup. I also had a freezer full of ice and some low fat vanilla yogurt (not the frozen kind) as well. My middle daughter was immediately intrigued by the idea of a banana split smoothie, having had her first-ever banana split dessert on her birthday at a local restaurant this summer.

Suddenly the heat wasn’t so unbearable anymore, and we got to work.

We use our Ninja blender all the time, and I’m so glad we made the investment. I was thankful this week as I put the frozen bananas, the ice, the frozen yogurt, milk and regular yogurt all into the blender. Our old blender could never have handled this type of all-out smoothie that we were creating.

We added some chocolate syrup in, and we turned it on.  Level 1 blending didn’t cut it, so we kicked it up a notch to Level 2. At the end, as I saw some of the ice still in decent sized pieces, I gave it a blast at Level 3.

I poured it into the glasses. My youngest daughter handed out straws. By this time, my oldest was home from her sports practice, which had been outdoors in the hot sun. She too, was melting on the spot. Her eyes lit up when she saw this smoothie that we’d concocted in her absence. She was just in time.

It

Was

Amazing.

If you have the chance, if you have the ingredients, and you’re in the mood, I *highly* recommend you try out your own banana split smoothie. The flavor was fabulous, it hit the spot on a hot day, and I will most definitely be making this again.

And when this limited edition frozen yogurt is gone, I’ll definitely be pining for it all year long until they (hopefully) bring it back again next summer.


What’s for Dinner Wednesday: A freezer full of food

27 Aug
Cooking for someone else this summer got me thinking about the school year dinner menu.

Cooking for someone else this summer got me thinking about the school year dinner menu.

At the beginning of last month, I helped out a young woman at our church who had recently had some surgery that left her on “light duty” for 4-6 weeks. She’s got a new baby and several other children, one of whom is a toddler himself.

You can laugh. A mom…on light duty. I know what you’re thinking.

Impossible right?

That’s what I thought too, so I sent her a message to see if I could help her out at all by making a few meals that she could just reheat. She said absolutely.

I had asked her because the next day I had some time to myself, just a few hours in the afternoon where I could run to the store and pick some things up and prep her a few meals. It wouldn’t take much time and at the moment, I was able-bodied with older kids who’d be away for part of the day, so I was able to help out.

That afternoon, I picked up my supplies and spent some time in my kitchen, cooking up ground turkey for Shepherd’s Pie, boiling pasta for a pasta bake and cooking some chicken for chicken noodle soup. As I stood there at the stove, stirring my various meats and pasta, I got to thinking, “I really need to do this for us before school starts, put some meals into the freezer early on.”

So often throughout my parenting life, I’ve had these moments of “Why didn’t I think of that sooner??” and this was one of those types of moments. Now clearly, I know how to cook ahead, I know how to freeze meals, but oftentimes I don’t do it soon enough. Like in the summer. I’m so carefree in the summer as compared to the school year, that the last thing I’m thinking about is dinner for the first month of school.

This had me thinking though. I was going to try to do better. Each year I find that I’m just a little more organized than the last year. Each year, I get better. As a friend joked with me recently, by the time my oldest goes to college, I’ll be all set, totally prepared and organized.

Oftentimes, I find myself making breakfast and dinner at the same time. Here I've got muffins for breakfast, and cooked chicken to freeze ahead for a future lunchbox salad or a dinner.

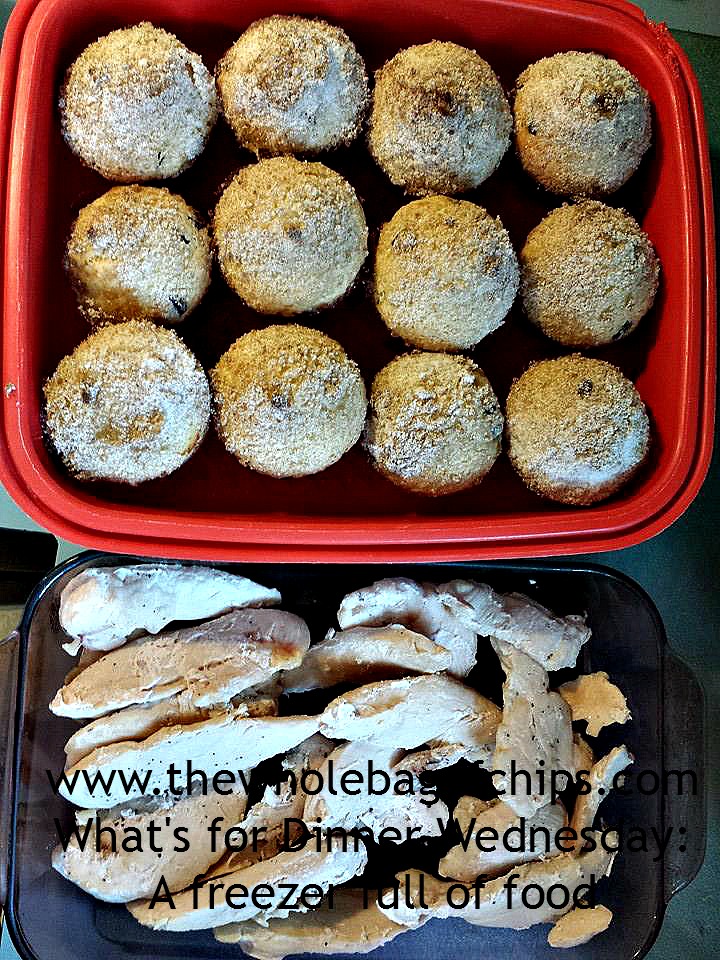
Oftentimes, I find myself making breakfast and dinner at the same time. Here I’ve got muffins for breakfast, and cooked chicken to freeze ahead for a future lunchbox salad or a dinner.

A few weeks later, I sat with one of my daughters who loves to menu-plan and we made two lists: the first list was a list of make ahead meals we wanted to make and the second list was a shopping list of all the things I’d need to pick up in order to make anything ahead; things that would be above and beyond my normal two weeks of meals shopping list.

On our list for the grocery store included things like multiple pounds of ground turkey, multiple bags of chicken tenderloins, multiple boxes of pasta and a jar of sauce (in this case I was not using our homemade sauce).

As the summer progressed I kept these things in mind, and as I planned out my meals, I tried to think of things I could make double of, eating one that night and freezing one for another night. One night that wasn’t too hot to bake, I cooked up enough ingredients for two chicken pot pies. I used the recipe linked here and used chicken instead of turkey. I also only use a top crust on my pies, so one box of two refrigerated crusts will equal two pot pie meals. One Sunday, my husband made a double batch of American Chopped Suey and we ate a batch and froze a batch. Now we had two frozen meals.

We were on a roll.

The weekend before school began, we did a shopping and picked up a family pack of ground turkey which contained three pounds. I split it into one pound and two pounds and cooked them up in two separate skillets, shown above at the left, where I was also hard-boiling eggs for the fridge for the first week of school breakfasts and lunches.

Into my one pound of ground turkey, I added a packet of Taco Seasoning. I had a packet on hand, but you can also make your own, which I’ve done in the past. I split that pound of taco meat into two half pounds and froze them. I now had enough taco meat for a taco meal and lunches of taco salads, or two taco meals or two sets of lunches with taco salads. Either way, I was set for a little bit with taco meat. All I needed to do now was thaw it and use it.

Into my second skillet containing two pounds of ground turkey, I put two cans of creamed corn for a Shepherd’s Pie. We found that we need two pounds for one pie, given the size of our family. It also provides us leftovers for another time.

I put those into the freezer with the taco meat.

The night before school, I made Chocolate Chip Muffins for the first day of school breakfast. After they baked, since the oven was already on, I cooked up an entire two-pound bag of chicken tenderloins. These I froze for future dinners, salads, lunches ( chicken caesar salad is a popular choice). I was making real progress.

I think this excited me the most of all: two loaves of bread made into sandwiches of the kids' choosing, and frozen for lunches.

I think this excited me the most of all: two loaves of bread made into sandwiches of the kids’ choosing, and frozen for lunches.

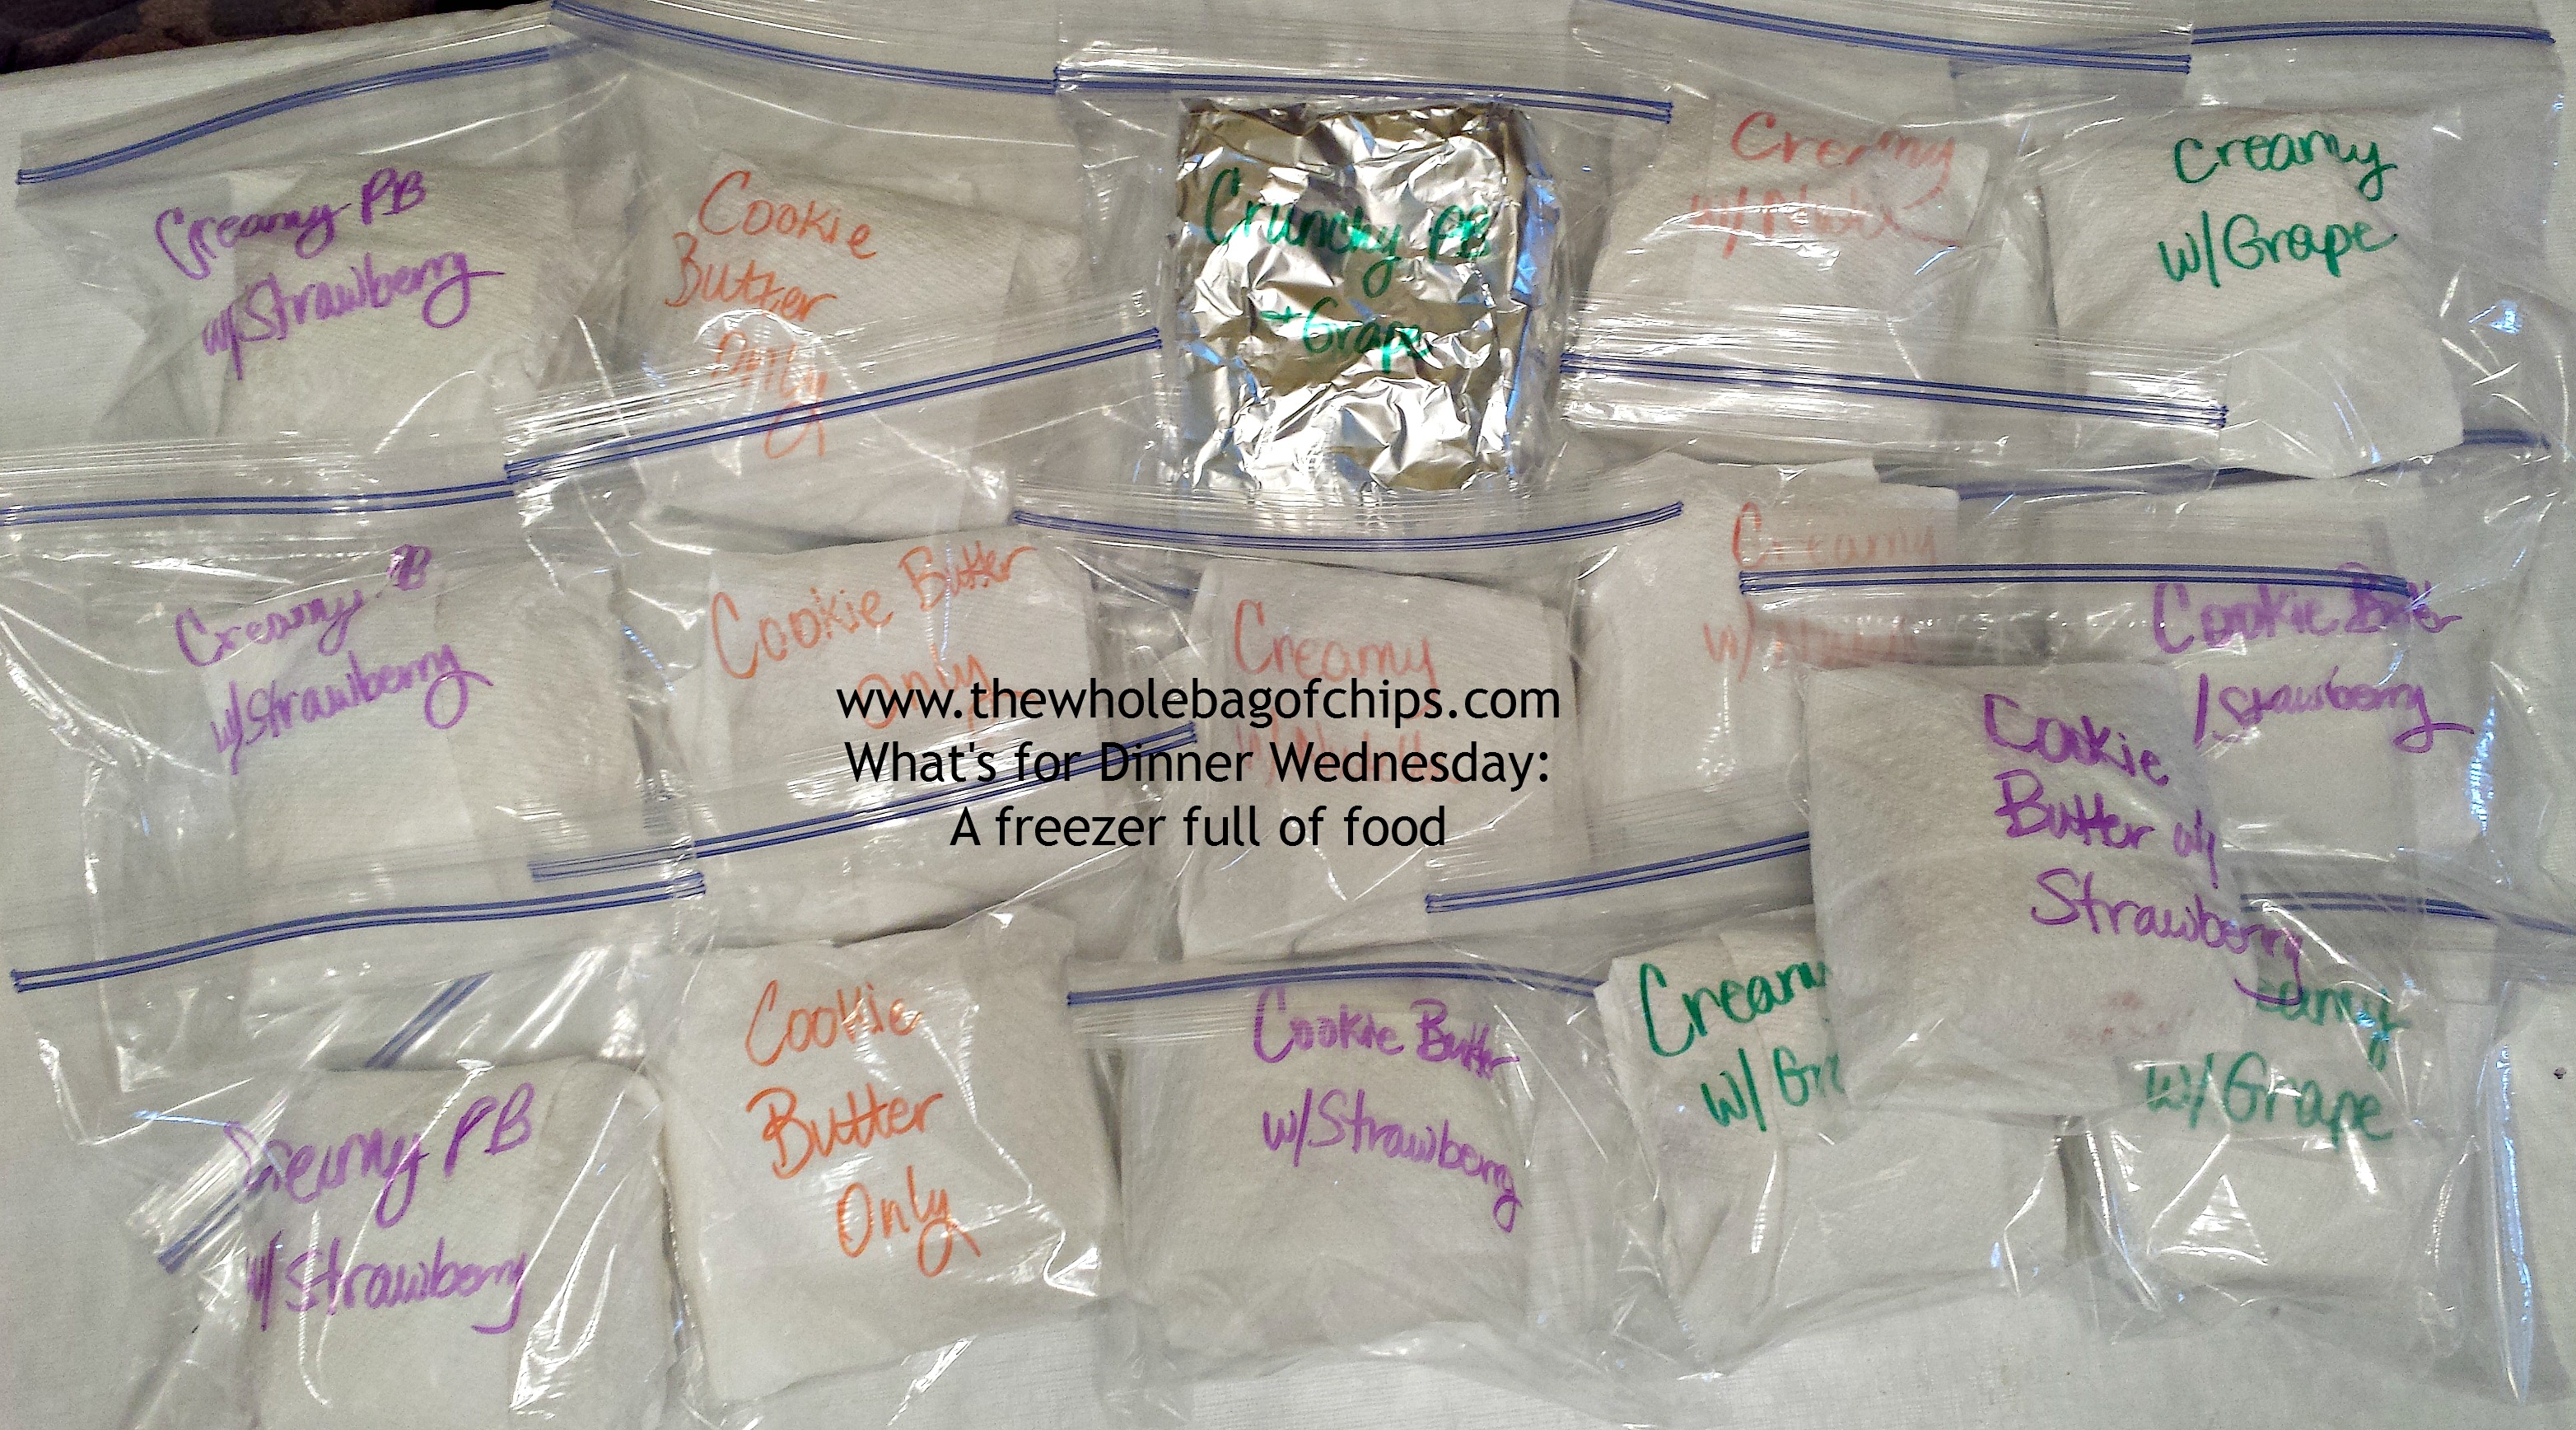
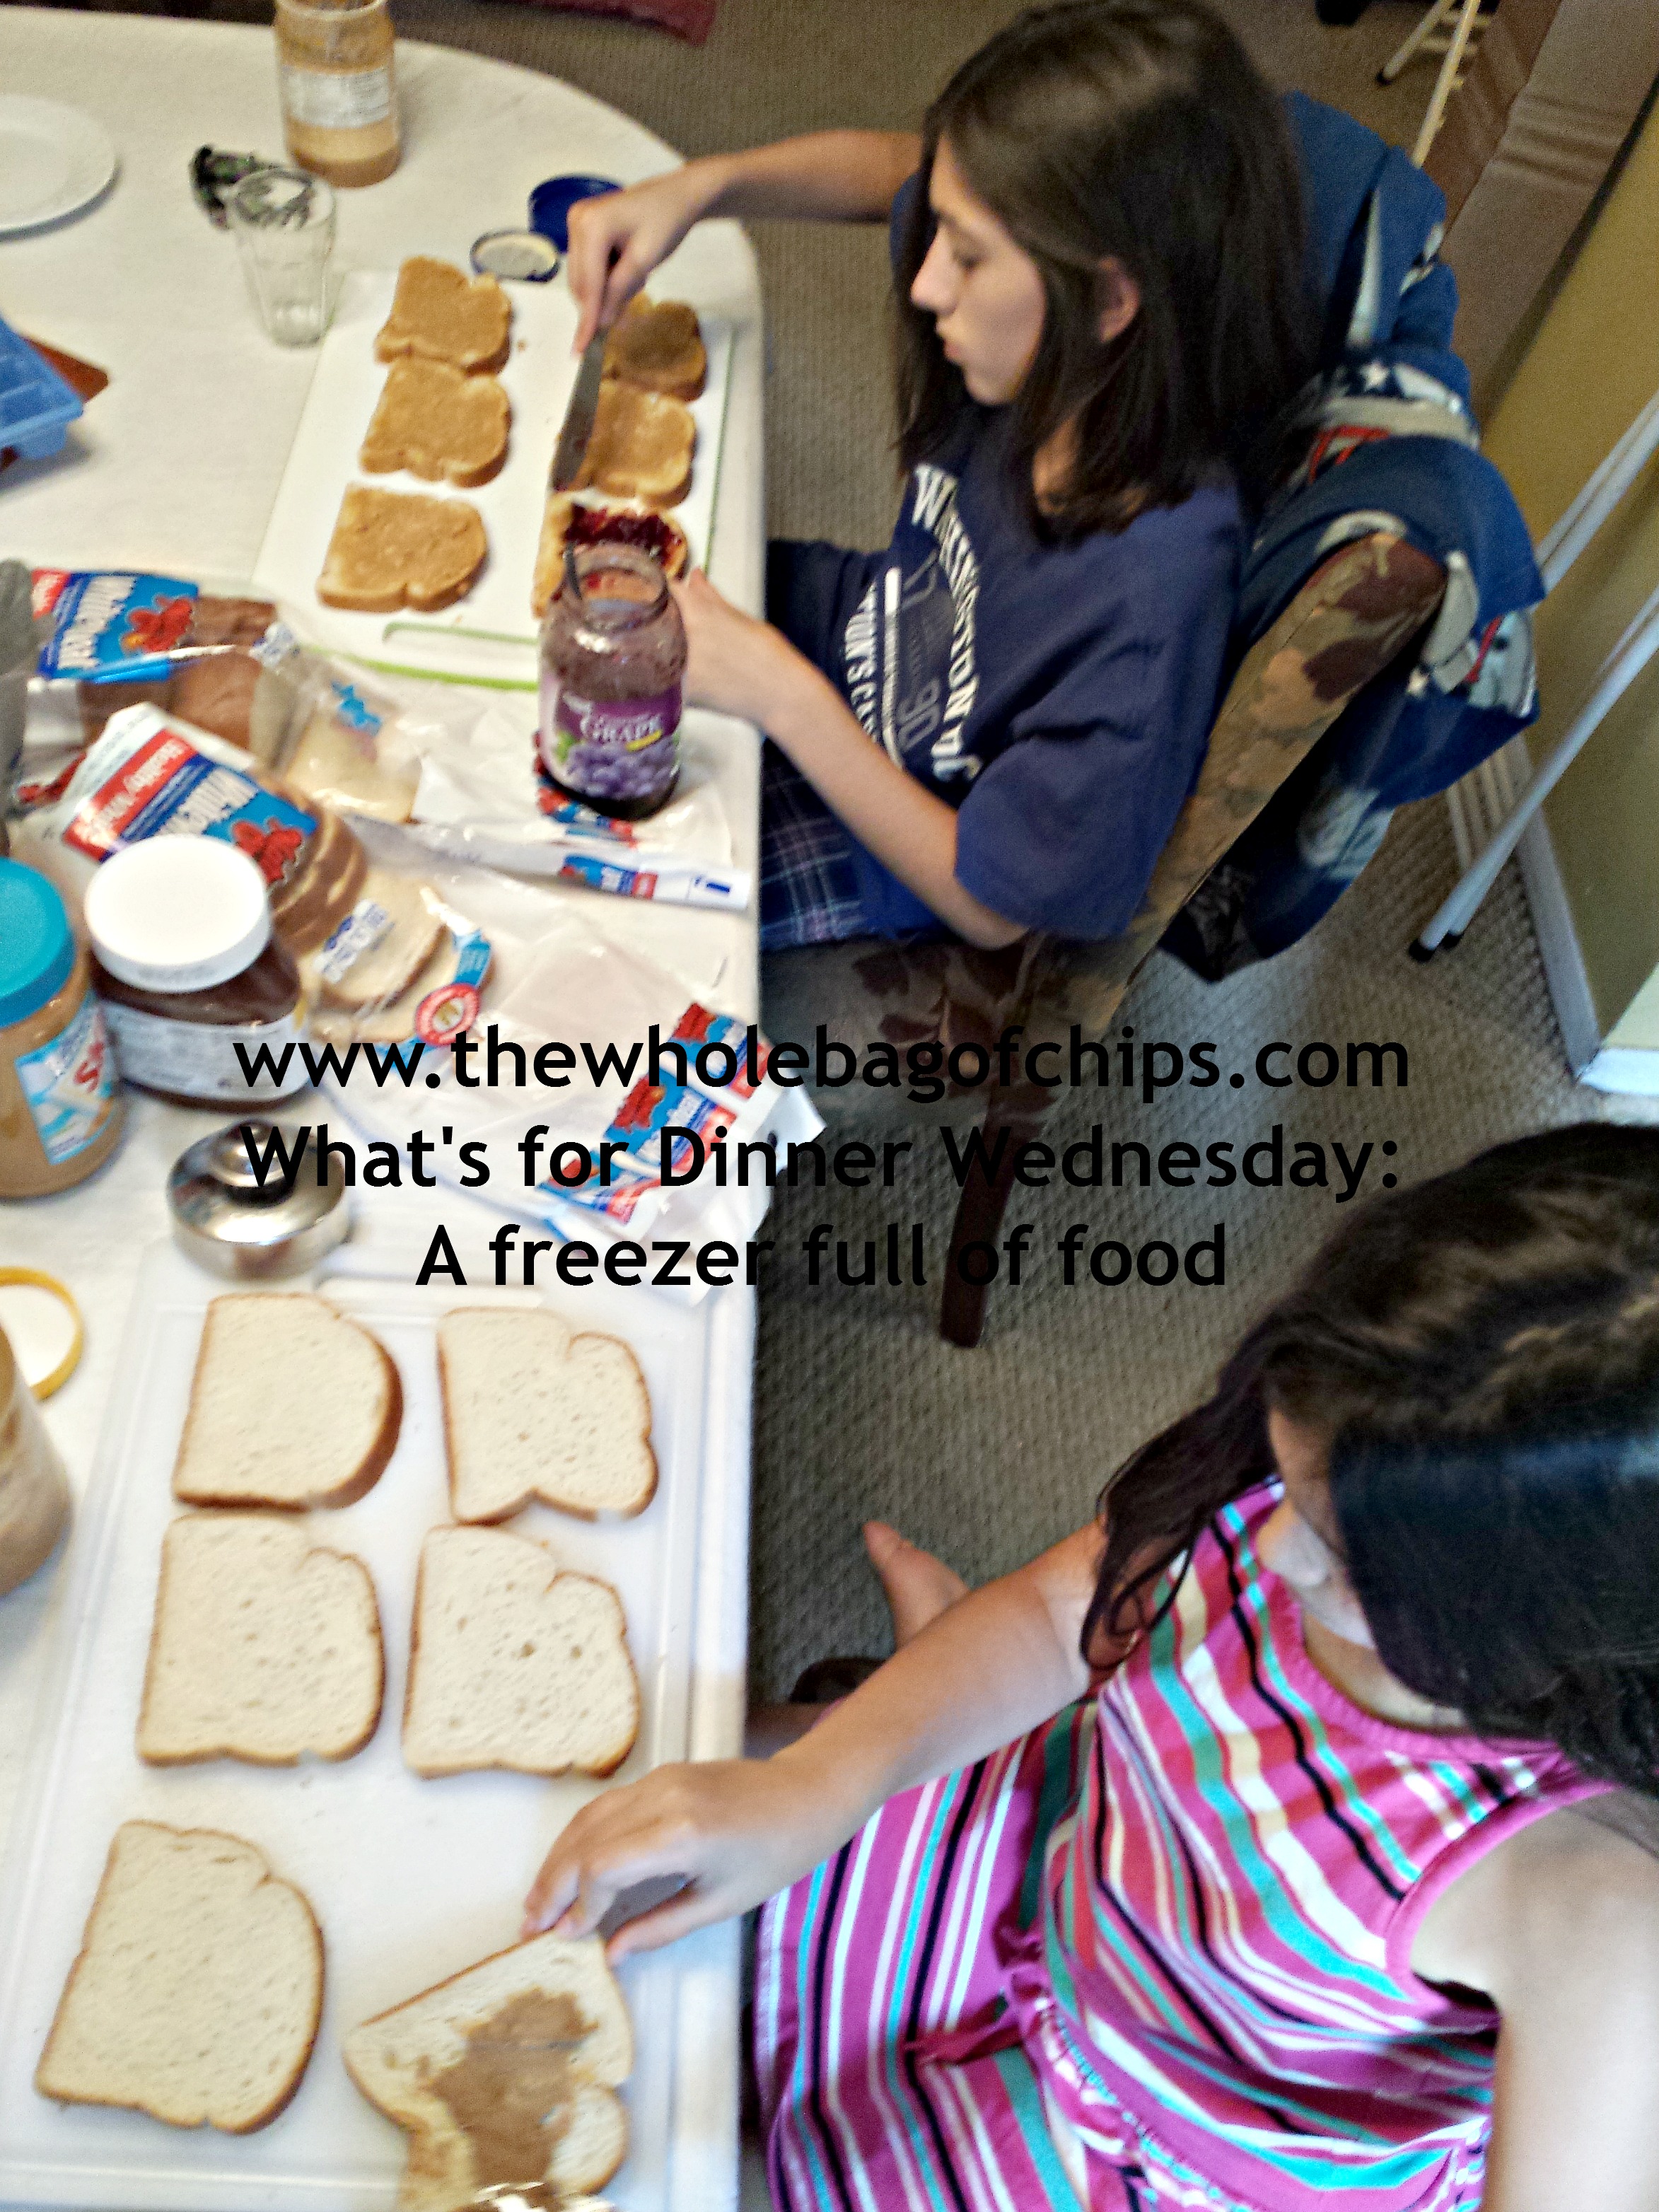
And finally, the thing I’m probably most proud of that I’d been wanting to do: my make ahead sandwiches for the freezer. I can’t take any credit for this idea. A friend who I get a lot of great ideas from in my menu-planning had the idea herself. Her thought was that if Smuckers “Uncrustables” could work for lunches, couldn’t we use our Pampered Chef Press and Seal tool to make our own and freeze them? I tried it a couple of times last year and it worked out fine, but I really wanted to make up a whole big load of sandwiches. I had two loaves of bread waiting for me.

The night before school, I got my supplies together: creamy peanut butter, crunchy peanut butter, strawberry jelly, grape jelly, Nutella and Trader Joe’s Crunchy Cookie Butter. I got a cutting board and a whole bunch of knives (no cross contamination!) and got to work. It took about one minute before my two kids who were nearby saw what I was doing and wanted to take over the project for me.

Excellent!

Many hands make for light work! We got a lot done in half as much time.

Many hands make for light work! We got a lot done in half as much time.

I got a second cutting board and they both got to work.

In under an hour they’d done both loaves of bread, creating and sealing any kind of sandwich they personally liked or knew someone else liked, and I bagged them and labeled them. Done. I put three in the fridge for the next morning and gathered the rest.

I was so excited. I went downstairs to my freezer and cleared a spot on the door for them. I looked into my freezer, so proud. We were ready to star off the school year right: a bit more organized and prepared than before.

I can’t promise that I can maintain this through the busiest parts of the year, but I feel like if I prep it during the slower parts of the year, then I can be ready when those crazy times hit, which for us is just prior to the holidays and during the last two months of the school year. We’ll see how it goes. For now though, we are better off than we were! My general philosophy is “anything I do is better than doing nothing at all” and I do believe that. One step ahead is better than being three steps back.

I hope everyone has a great fall, and a great school year!


Fun Friday: Chocolate Bark from “American Girl” Magazine

22 Aug
A very kid-friendly recipe from "American Girl" magazine provided our whole family with a yummy treat all week!

A very kid-friendly recipe from “American Girl” magazine provided our whole family with a yummy treat all week!

I love that my kids love to read, they love to get magazines in the mail and they love to cook and bake. Each of them receives two magazines in the mail geared to their age level, and as soon as they’re out of the mailbox, the kids are looking for any great new recipes that I might say “yes” to.

It’s not that I say “no” about trying out a new recipe very often, it’s more of “Not now, we don’t have time to do that today,” or “I don’t have all the ingredients for that right now, but remind me later.” The girls have even learned to preface their immediate “Can we make this today?!?!?” with more of, “Do we have any plans later today?” or even, “Do we have flour, sugar, butter, and apples?” for example.

Quick studies, they are.

Earlier this week one of my daughters received her latest edition of “American Girl” magazine, which she absolutely loves, but which only comes every other month. Clearly not often enough.

As soon as she opened it, she began looking for any easy recipes for which we had the time and

There were several versions of bark to choose from, and she found one for which we had all of the ingredients.

There were several versions of bark to choose from, and she found one for which we had all of the ingredients.

ingredients, and lo and behold….she found a great one! It was a quick, easy and kid-friendly recipe spread containing several Halloween-themed chocolate bark recipes. We had all the ingredients for one in particular, and she made it for our family the very next day.

We had limited time on this particular day, just a couple of hours in the afternoon to clean up from lunch and prep for dinner. I personally had no time to be making a dessert, so I was thrilled when we realized that she could do this recipe 100% on her own.

She used a 12 oz. bag of milk chocolate melts that we had on hand. The recipe called for two cups of dark chocolate melts  and our bag worked out fine. She needed 1/2 cup of crispy rice cereal and 1/2 cup of marshmallows. We used the same measuring cup for both items, less to clean later on!

The recipe gave instructions for covering a baking sheet with wax paper and melting the chocolate melts in the microwave. She melted 30 seconds at a time, stirring in between each time. Once melted, the mix-ins of rice and marshmallows were stirred into the chocolate and the chocolate was spread evenly onto the wax paper and carried down to the freezer.

I love to see how proud my kids are whenever they make something for the whole family to enjoy.

I love to see how proud my kids are whenever they make something for the whole family to enjoy.

As we left for the rest of the afternoon, I knew that my daughter couldn’t wait to get home so that she could check the freezer and see if her bark was done.

Sure enough, after being gone only a few hours, we came home and she went straight down to the freezer, carrying up the tray of hardened bark. It was ready to eat! She was so excited!

After dinner, she grabbed a tray, broke the bark into semi-even pieces and served the family her dessert. She was so proud as everyone complimented her tasty dessert and her hard work.

As we talked later on about how great the recipe was, we came up with some other mix-in ideas, including graham crackers instead of the crisp rice cereal, which would make more of a S’Mores type of dessert.

The “American Girl” magazine also showed five other types of bark, so be sure to check it out! I know that we’ll be making this again soon!