Archive | January, 2014

Fun Friday: Hot Fudge Sundae Cake

31 Jan
My mom used to make this all the time when we were growing up, but I'd forgotten all about it!

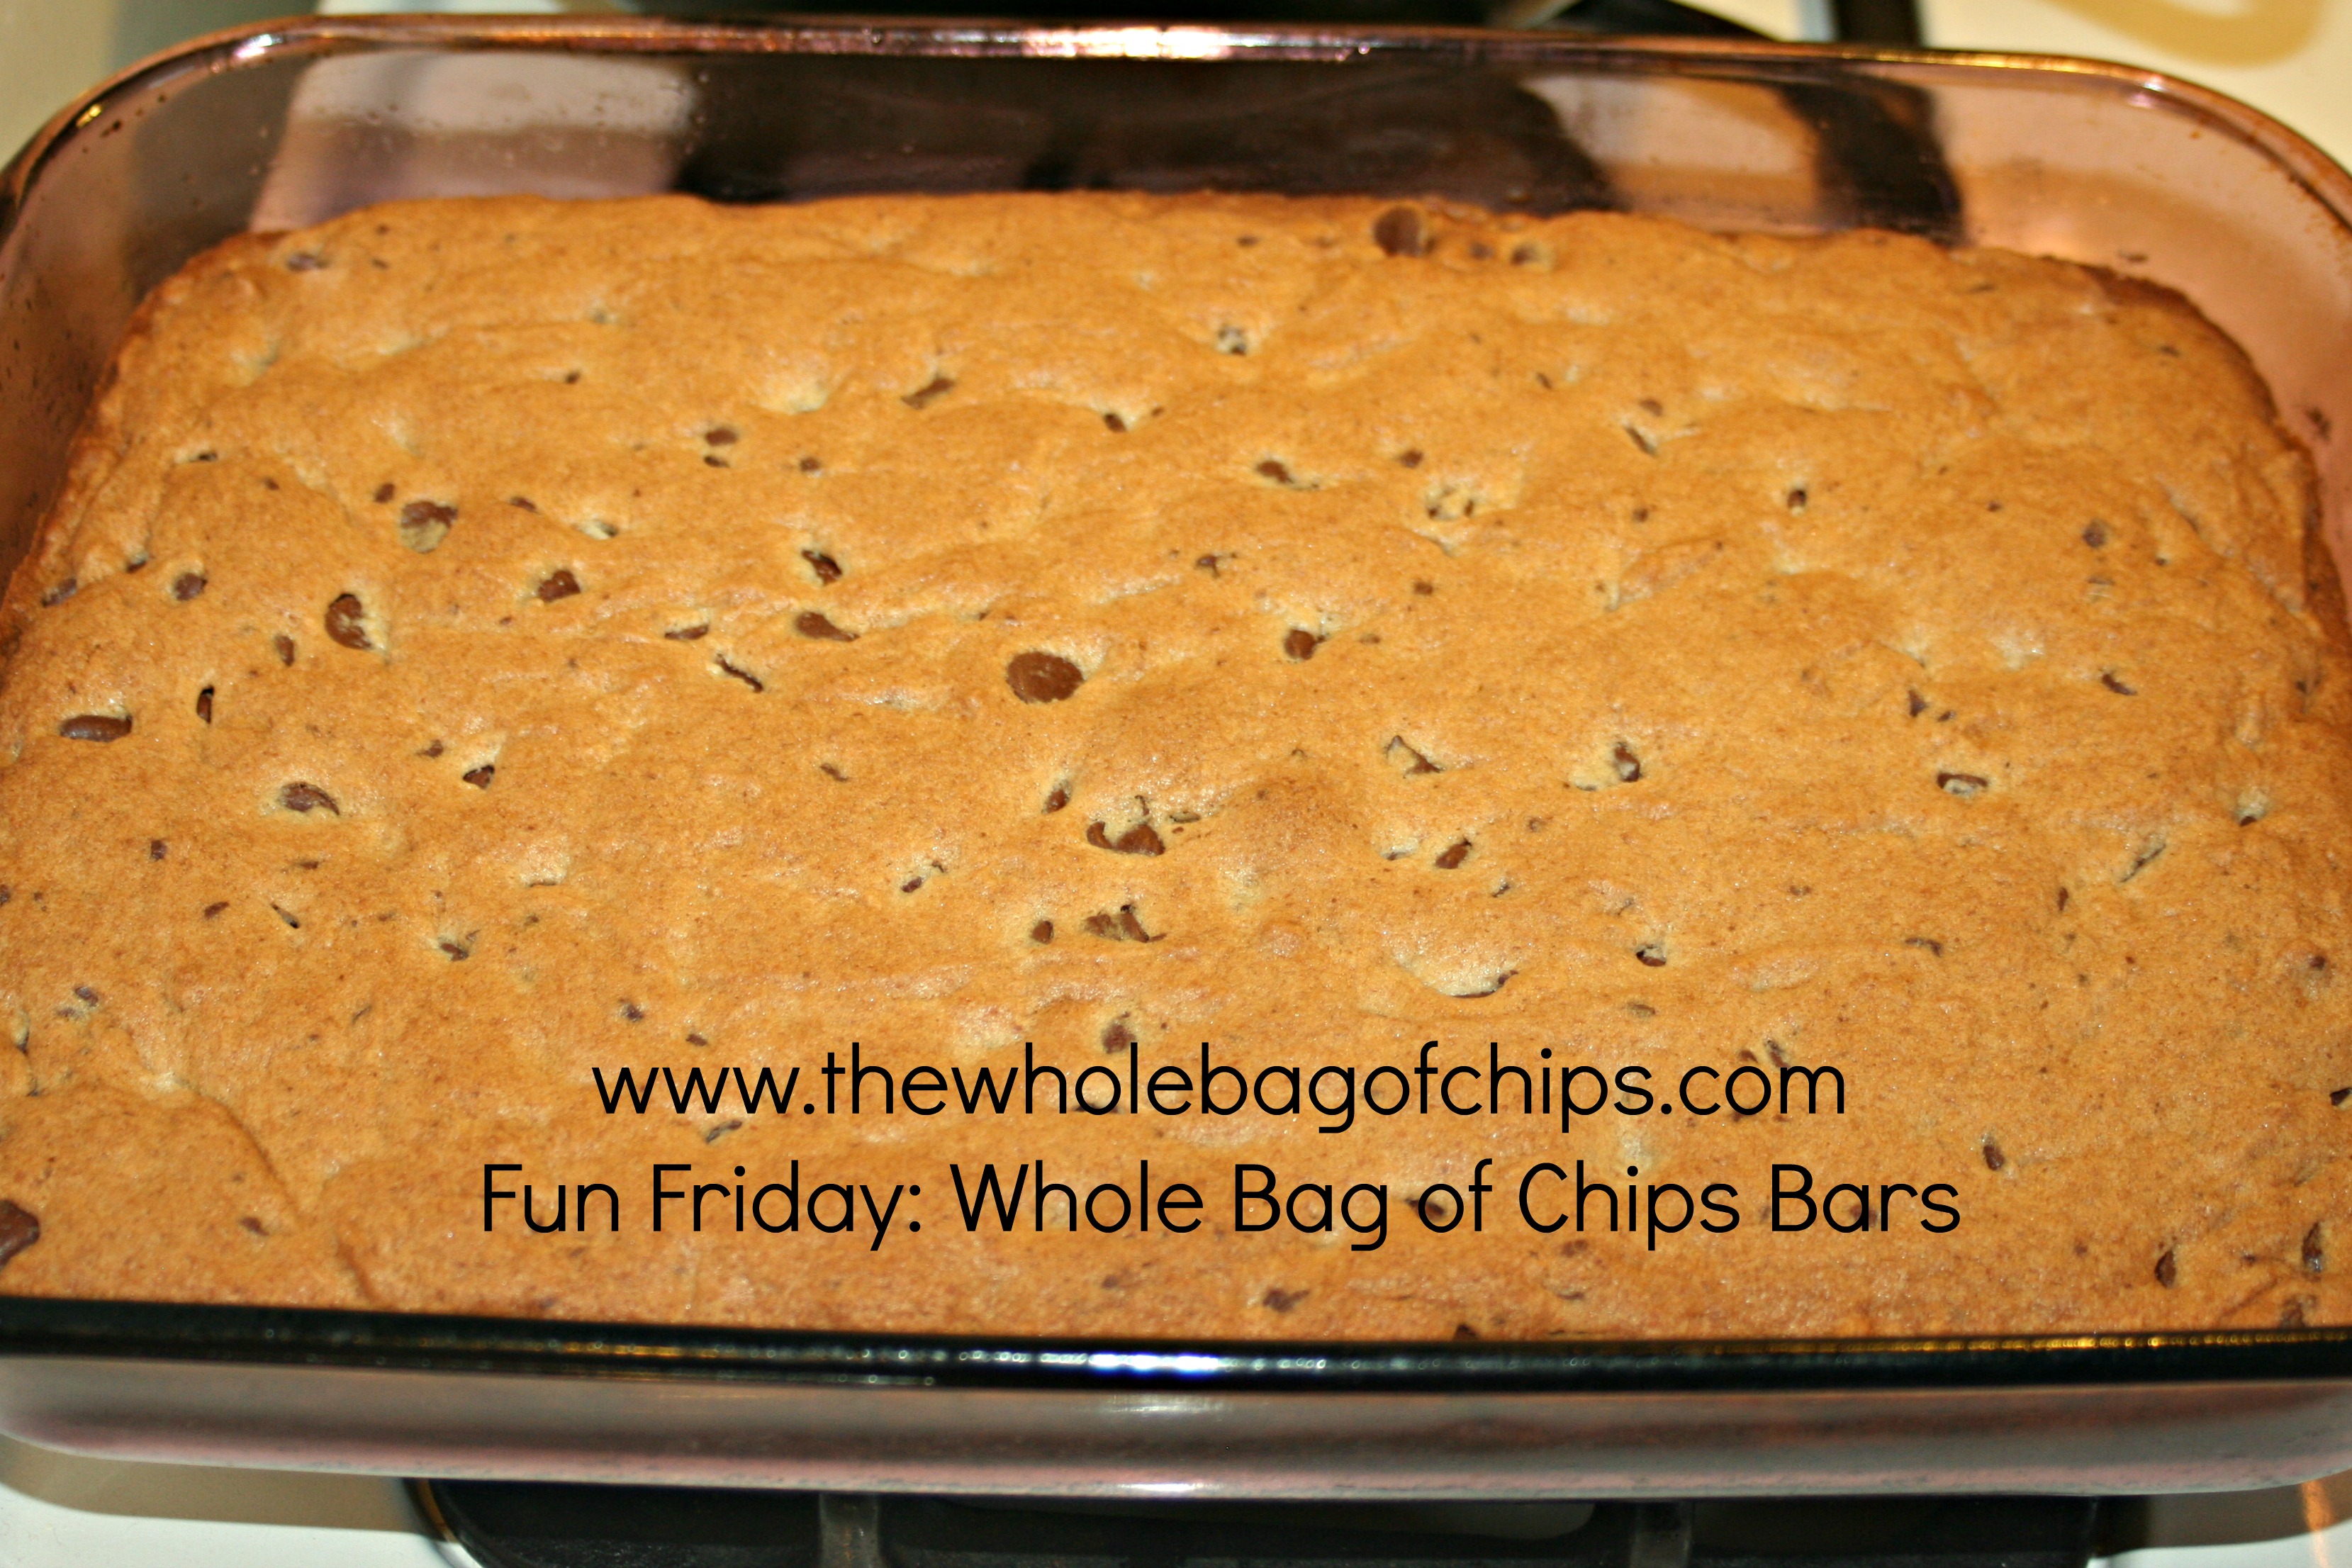
My mom used to make this all the time when we were growing up, but I’d forgotten all about it!

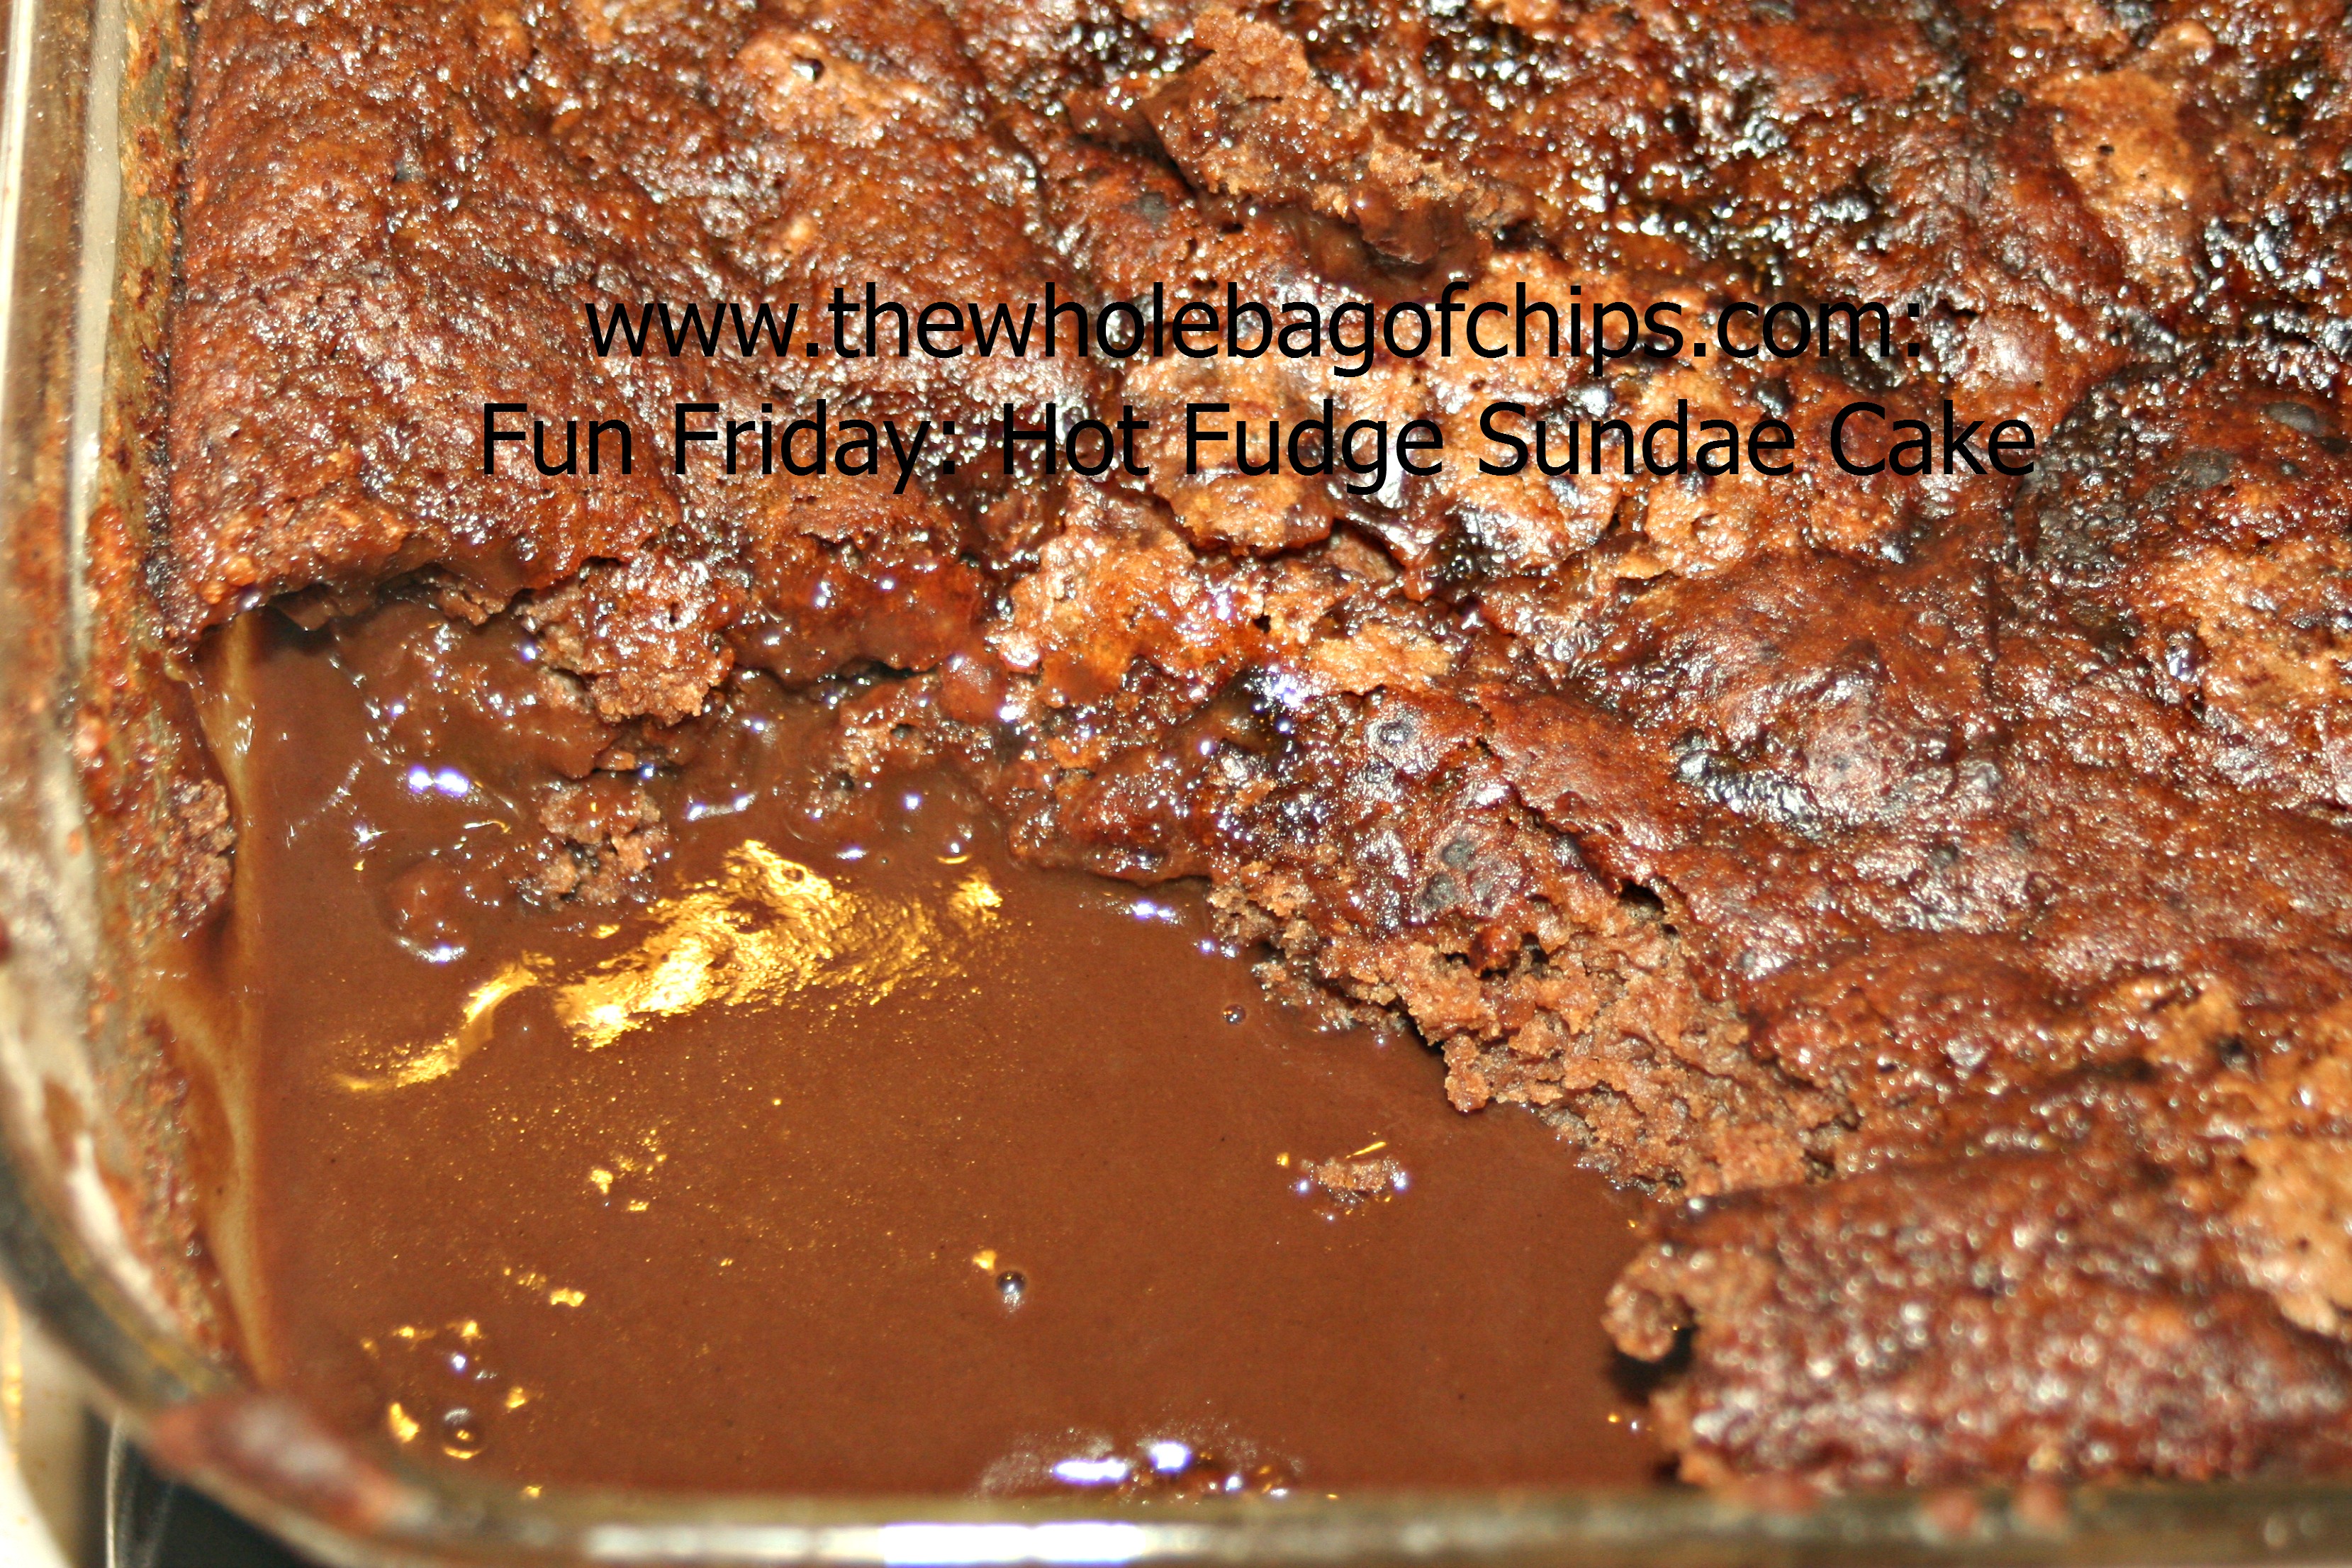
Today’s recipe for Fun Friday truly is a fun recipe! It’s fun to make and fun to eat. Like many recipes, it’s got a touch of science to it, and I always love recipes that show the kids something very cool. This one definitely does that as it creates a soupy, fudgy sauce underneath a crisp yet cake-like top.

The funny thing about this recipe is it’s one I grew up eating all the time. It was a go-to recipe in our house growing up. However, it’s been so long since I’ve made it myself, that none of my kids (the oldest being 14) even remembered ever having it.

I was recently reminded of it when a friend sent me a link to a similar recipe; she thought it was something I’d like. She was right, I love it! Seeing the link jogged my memory and I went to my oldest cookbook, a Campbell’s Soup photo album type of recipe binder and I pulled out my mom’s recipe for Hot Fudge Sundae Cake.

Elizabeth came into the kitchen, as she often does, and asked if she could help me. And, as she often does, she made almost the entire thing herself, with just some direction from me. It’s a great recipe for kids to learn to make themselves.

First group of dry ingredients get mixed right in the baking dish!

First group of dry ingredients get mixed right in the baking dish!

This recipe is a favorite because it’s a one-dish recipe. You make the entire thing in an 8×8 or 9×9 square baking dish. I used a glass Pyrex dish. You can mix the ingredients in four steps: dry, wet, dry, wet, and then you’re done!

Below is my mom’s recipe for Hot Fudge Sundae Cake, just as I copied it off her recipe card and put it into my first cookbook all those years ago. I hope you’ll give it a try this weekend and you too, will see what a fun, easy recipe it is!

INGREDIENTS and DIRECTIONS

                Step 1:  Preheat oven to 350 degrees.

 In an ungreased 9×9 square baking dish mix together the following ingredients with a fork:

1 cup flour

¾ cup sugar

2 TBL. Baking cocoa

2 tsp. Baking Powder

¼ tsp. salt

Spread evenly in baking dish.

                Step 2: In a two-cup measuring cup mix together the following ingredients and pour over first five ingreidents.

½ cup milk

2 TBL canola oil

1 tsp. vanilla

Spread batter evenly in baking dish.

Before the water goes on top, this is what your baking dish looks like.

Before the water goes on top, this is what your baking dish looks like.

  Step 3: Sprinkle the following two ingredients over batter:

1 cup brown sugar packed

¼ cup baking cocoa

                Step 4: Pour the following over all:

1 ¾ cup Hot Water

Bake 40 minutes at 350 degrees. Let stand15 minutes and serve.

Spoon sauce over ice cream if desired.

The secret is in the sauce. Underneath the crispy chocolate cake is a fudgy sauce to top your ice cream and cake!

The secret is in the sauce. Underneath the crispy chocolate cake is a fudgy sauce to top your ice cream and cake!

New on SheKnows: My Touchdown Turkey Sausage Taters

30 Jan

Be sure to check out my newest post today on SheKnows! It’s my new recipe for Touchdown Turkey Sausage Taters, and it’s out just in time for this weekend’s big Superbowl game!

I was happy to have had the opportunity to work with SheKnows and Jimmy Dean on this, the first of two posts for their products. You can be on the lookout for the next post on SheKnows to come out in the coming weeks. Until then, be sure to check out my post on SheKnows!

Wait til you see the great recipe that I created with the Jimmy Dean Turkey Sausage Crumbles!

Wait til you see the great recipe that I created with the Jimmy Dean Turkey Sausage Crumbles!

Superbowl Week: Chili and Loaded Chili ‘skins

29 Jan
Chili with shredded cheese, sour cream and chips

This chili looks almost too good to eat!

ORIGINALLY POSTED JANUARY 27, 2012:

Don makes a great chili, he really does. I’d never even HAD chili until I met him and had his. I also had never had peppers or onions because growing up my dad didn’t like either, so we steered clear of them when cooking. Now though, I eat all of those things and I especially love my husband’s chili. It’s perfect for Superbowl Sunday.

INGREDIENTS

5 lbs ground beef or ground turkey or ground pork (or any combination of the three)

2-3 cloves of garlic, chopped

2 six ounce cans of tomato paste and 2 cans of water

2 twenty-eight ounce cans of diced tomatoes

3 twelve ounce cans kidney and/or black beans

2 green peppers, chopped

1 large onion chopped

4-6 TBL chili powder

1 tsp. oregano

Salt/Pepper to taste

Sour cream, cheddar cheese, chips for topping

DIRECTIONS

1.) Combine and cook meat, garlic, oregano in large cooking pot

2) Add chopped peppers and onions

3) Add all other ingredients and cook on low for two to five hours.

If you’d like to cook this in the crock pot, cook up the meat first and then throw it all into the crock pot to cook on low for the 2-5 hours.

This is the sort of recipe you can make according to your taste. The spicier you like things, the more spicy ingredients you can add to it (hot sauce, chili powder, chili peppers etc.) The more mild you like it, the less you add.

****************************************************************************************************************

BONUS RECIPE: LOADED CHILI POTATO SKINS

Loaded chili potato skins

A bonus appetizer that you can use some of your chili to make.

We love potato skins and chili seems to lend itself to an additional appetizer idea: Loaded chili potato skins.

Cook up a bunch of baked potatoes ahead of time. Let them cool a bit.

Cut them in half and hollow them out, leaving about 1/4″ to 1/2″ of the potato in the skin.

Add some of your chili and some cheddar cheese to the inside, and bake them until cooked through.

Broil at the end to crisp up.

Add your favorite toppings: sour cream, guacamole, etc.

Monday Musings: Where will you find love?

27 Jan
Where will you find love over the next few weeks?

Where will you find love?

I found a great social media project on Facebook this weekend and it made an impact on me, so I thought I’d share it with you.

It’s the Find the Love project on Facebook and it was started by a mother who lost her daughter three years ago, just 21 days after giving birth to her. With the three-year anniversary of her daughter Sofia’s birthday this week, mom Lori has put out a challenge to the world: Find the Love in every day.

Sofia Dente didn’t live long…only 3 weeks. But in that time she ignited a love unlike no other.

In honor and celebration of the 21 days Sofie was with us on this Earth, we are launching her “Find the Love” Project.
This 21 day photo project will encourage all of us to take a moment each day to focus and find the love that is so abundantly around us.
Sofie was able to teach and inspire so many to find love in the darkest and most difficult days. It’s so easy for all of us to go about or daily lives and miss beautiful examples of love. For 21 days, to honor her sweet life, join us in sharing photos that inspire love to you,” Lori wrote on the Find the Love Facebook page.

During the weekend I started seeing #FindtheLove posts coming through my timeline and with my curiosity piqued, I had to check out the page. I’m so glad I did.

Lori’s page serves as a reminder not only to take the time to reflect each day on something wonderful, something that means love to you, but to me it also served as a reminder to take the time to appreciate the things we have for as long as we have them. Lori’s story is a tragic one, but she’s turning her daughter’s legacy into one of love and she’s honoring her by reminding the world to count their blessings every day.

I encourage you to participate in the Find the Love project too, even if you only do it yourself, without posting photos on her page. Take a minute every day to find something that makes you stop and take a minute. And if you have a chance, take a look at the Find the Love page and enjoy all of the great photos that have been posted.

It’s a great feeling, reminiscent of the 30 days of Gratitude project which takes place each Thanksgiving.

We need more feel-good projects in our world and the Find the Love project is just that.

#Findthelove

Fun Friday: Paula’s Whole Bag of Chips Bars

24 Jan
These were delicious, especially when topped with ice cream!

These were delicious, especially when topped with ice cream!

If you’re a longtime reader, you know that I often reference my friend Paula’s blog, My Soup for You. It’s a great blog and it’s so much more than soup!

Most recently I was honored when I saw that Paula had posted a new dessert recipe on her blog, and lo and behold, she named it after my blog! When I saw the post for The Whole Bag of Chips Bars, I was so flattered, and of course I had to make Paula’s recipe right away!

The recipe is a healthier dessert treat, but it includes of course, The Whole Bag of Chips! It also uses I Can’t Believe It’s Not Butter, an ingredient I now use instead of butter in all of my baking, and white wheat flour, another staple in our pantry here at home.

I hope you’ll head on over to My Soup for You and take a look at all of Paula’s recipes, but most especially The Whole Bag of Chips Bars! She wrote up the nicest post, you’ll want to read it!

Here is her recipe, just as she has it on her blog.

Enjoy!

Whole Bag of Chips Bars
1 cup I Can’t Believe It’s Not Butter
2 eggs
1 cup sugar
1 1/2 tsp vanilla
2 1/2 cups white wheat flour
1 tsp baking soda
1/2 tsp salt
splash of milk
A twelve ounce bag of baking chips of your choice – I used semi-sweet chocolate

1. Combine butter, sugar, eggs, and vanilla and mix until nice and velvety and smooth
2. Add the salt and baking soda to the flour, and add that to the sugar etc a little bit at a time because you probably will still have the mixer on and you don’t want to make a mess.
3. Add in a splash of milk and mix thoroughly.
4. Stir in the WHOLE BAG OF CHIPS!
5. Transfer batter to a 9×13 baking pan sprayed well with cooking spray.
6. Bake at 350 for at least 40 minutes. These are very thick bars and take a long time to bake.

Superbowl Recipes: Homemade Salsa(s) and Guacamole

22 Jan
Football Helmet and Football

We are big Patriots fans here!

ORIGINALLY POSTED JANUARY 24, 2012:

I hate football. Yup, I’m a buzz-kill when it comes to football season, (and also baseball season) Superbowl, anything like that.

However, I love food. So, featuring Superbowl Week, several days of recipes you can cook for the upcoming Superbowl Sunday feast, works for me.

The cool things about these recipes is 1) none of them are recipes I grew up with and 2) they are all recipes I would not have, had I not had these people come into my life at some point or another. To me, that makes them extra-special in a different way than the ones I treasure from my childhood.

Today I am featuring several recipes at once. The first is a Homemade Salsa recipe from my friend and college roommate, Karen. She first shared this recipe with me when we were in college and I’ve held onto it, making it ever since. She is also the one who introduced me to my husband when we were out back in December 1992. But, that’s a whole other story for another day.

KAREN’S HOMEMADE SALSA

Karen's Homemade Salsa

This is what Karen’s Homemade Salsa looks like when it’s all done.

2 cups peeled and cored plum tomatoes (I buy 18 but it says about 12)
peeling and coring is the most time-consuming part of the recipe. The rest is quick.

1 long green frying pepper (light green)

1-3 chili peppers chopped (Buying one or buying three depends on their size and how hot you like your salsa.)

1/3 cup chopped onion (I use one medium sized onion.)

1 clove garlic, minced

1/2 cup cider vinegar

DIRECTIONS

Combine all ingredients in sauce pan, bring to a boil.

Reduce heat and simmer for 30 minutes.

Serve hot or cold.

*****************************************************************************************************************

This next recipe is from my brother’s mother-in-law, Marianne. She makes a kickin’ guacamole and ever since we first tasted hers, it’s been the one we make as our own. Had my brother not married his lovely wife, we would not have this recipe to share with you! Unfortunately when we made this recipe last weekend, along with the above salsa, I took photos of the salsa but forgot to take photos of the guacamole! So next time I make it, I’ll add a photo here. But, you all know what guacamole looks like….green.

MARIANNE’S HOMEMADE GUACAMOLE

2 Avocados, mashed

1 tsp. salt

Juice of one small lemon (we use half a lemon, even for a double batch. You can always add more, but you can’t add less!)

1/2 of a 6 oz. plain lowfat Greek yogurt or non-fat (We get this at PriceRite for about $1)

chili powder to taste

Mash, mix and eat!

*****************************************************************************************************************

The last recipe is one I haven’t made in a while, so I don’t have a photo yet, but again when I do, I’ll add it in. However, my friend Stacey brought this to a cookout at our house one year, I think a dance recital cookout we were having about ten years ago. It was so good and she said she got it off the side of a can of Bush’s Black Beans. I have made it since then and I think of her every time I do.

STACEY’S BLACK BEAN SALSA

one 15 oz. can Bush’s Best Black Beans, drained

one 11 oz. can white shoepeg corn, drained

one 14.5 oz. can diced tomatoes (basil, garlic and oregano flavor)

one 10 oz. can diced tomatoes and green chilies

one 8 oz. bottle Italian dressing

Chopped onion to taste

DIRECTIONS

Mix all ingredients together.
Refrigerate for at least 1 1/2 hours.

Serve with tortilla chips.

Coming soon to SheKnows…Touchdown Turkey Sausage Taters

20 Jan

Wait til you see the great recipe that I created with the Jimmy Dean Turkey Sausage Crumbles!

Wait til you see the great recipe that I created with the Jimmy Dean Turkey Sausage Crumbles!

As many of you know, I’ve recently joined the founding team of SheKnows Experts as a contributing blogger. You can see my new SheKnows Experts badge on the right side of The Whole Bag of Chips. You can see my profile here.

I’m excited to announce that my next post for SheKnows will appear on their site on January 30, 2014! I’ve been working with SheKnows and the Jimmy Dean company, trying out an exciting product of theirs, the Jimmy Dean Sausage Crumbles in some of my recipes, such as the one you see here, which will be a perfect addition to your Superbowl Sunday menu!

You will love how quick and easy this new recipe is, but best of all, you’re going to love how delicious it is! Be sure to head on over to SheKnows next week to check it out!

Fun Friday: GAK!!

17 Jan
*This* is GAK.

*This* is GAK.

Nope, not a terrifying “acckkk!!”

GAK.

Recently, one of the girls had read about sixth-grader Jordan Hilkowitz, in a “TIME For Kids” magazine at school. The article talked about how he conducts science experiments at home and posts them on his YouTube channel, Doctor Mad Science. She had to visit the site herself when she got home, to see just what Doctor Mad Science, who also happens to be autistic, does on his channel.

GAK.

He does lots of fun experiments on that channel, but GAK was the one she chose.

It’s like Silly Putty, and from the moment my daughter saw it, she had to make it. Every day she asked me, “When can we make GAK?”

I’ve made GAK before, way back in my teaching days. I knew it was easy and the ingredients were simple, but it wasn’t something I could just whip up with her right then and there, or any of the quite-a-few times she asked me, especially the one time she asked me while I was baking Christmas Cookies.

“When can we make GAK?”

Every. Day.

Finally, it was school vacation time and her GAK dreams came true. We had all the ingredients needed, right here at home, and a perfect neon green food coloring to make it happen. In fact, she and her dad made it happen.

It doesn’t take long at all to make GAK, and once you’ve got it, there’s lots you can do with it.

Out came the cookie cutters, tools, plastic containers and all kinds of fun took place for several hours with the GAK. It’s fun like Playdoh, but oozy and gooey.

There are lots of recipes out there for GAK, but the one we used had Elmers Glue and Borax in it, like this one. This site, Lil’ Luna gives great step-by-step directions for you once you have your ingredients. Or you can tune in to Doctor Mad Science and watch him make it right before your eyes.

You can Google it, but in general, you too can make GAK if you have the following supplies:

– TWO 4 oz. bottles of Elmer’s Glue (or that type of white, gooey glue)

– 1 tsp. Borax (found in the laundry detergent section of the store)

– Water

– Plastic Cup

– Bowl

– Food Coloring

The website I listed above, has all the instructions on it, as does Doctor Mad Science. And the site above also has an idea at the bottom of her page for the cutest GAK gift and a tutorial to go with it. I hope you’ll check both sites out and try making GAK with your kids too! It’s a great craft, it’s a science experiment and it’s fun and easy! Your kids will love it!

Another fun gift from the holidays

13 Jan
They opened these Nerf Rebelle gifts from Santa so fast, with such excitement, I barely had time to snap this photo of the box!

They opened these Nerf Rebelle gifts from Santa so fast, with such excitement, I barely had time to snap this photo of the box!

This year, two of the girls asked for “weapons” on their Santa lists.

They’d seen commercials and ads for the new Nerf Rebelle Heartbreaker Bow and the Nerf Rebelle Pink Crush Blaster; both in perfect “girl colors” of pinks and purples, blacks and turquoise.

With the advent of strong female characters like Merida and Katniss in recent movies such as Disney’s “Brave,” and “The Hunger Games,” it wasn’t all that shocking to us that they’d instantly fall in love with such toys.  A bow and arrow, with a female pulling back to aim, was nothing unusual to see, although many years ago such a thing was unheard of.

Being Girl Scouts, my kids have shot a bow and arrow many times at camp. They’re actually quite good at it, and we’ve seen many “bulls-eye” hits between them. They enjoy archery very much and it’s always a favorite activity at camp. It was even part of the physical education curriculum at our middle school for our oldest daughter.

So on the one hand, when I could’ve been shocked that they were asking for these “weapons” along with their dolls, dollhouses and Snap Circuits, on the other hand, I was rather thrilled. I was actually happy that Nerf had come up with “weapons” that were attractive to girls and that let girls do something that’s exciting, active, and sporty, rather than stereotyping those types of activities as being just for boys. I equated this gift item on their lists to them to asking for a squirt gun or a Super-Soaker pool toy, which we’ve never had a problem with.

On Christmas morning, they were so excited to see their Nerf toys among the gifts that had been delivered. They were definitely a favorite choice all throughout the school vacation weeks, even though they’re designed to be outside toys. We have a decent-sized hallway and one of the kids’ doors has vinyl decals in the shape of circles on the door; a perfect target. Being Nerf, the “ammunition” was soft-tipped and completely safe, as long as no one was aiming at anyone’s eyes; a rule we set right away.

Although this gift request was one that initially made me do a quick double-take, it turned out to be a favorite, and I’m glad that Santa delivered. It’s nice to see the girls imitating Katniss and Merida when they play and it’s nice to see them utilizing skills that they’ve learned as scouts. It will be lots of fun to bring these toys outside in the springtime. We have a fenced-in yard and the fence would be an easy target for practicing.

If you have a daughter and she expresses interest in the Nerf Rebelle toys, you too, may hesitate as you consider whether or not you’re “weapons” people, but I encourage you to give it some thought, and maybe give it a try too. You might be surprised as you see your mini-Katniss and Merida characters utilizing skills you might not have even known they had.

Fun Friday: Chocolate Chip Zucchini Cake

10 Jan
I was actually shocked at how much everyone liked this cake!

I was actually shocked at how much everyone liked this cake!

Last week we had some very cold weather here; colder than our normal winter weather tends to be. When the weather gets cold, the first thing I think of doing is baking. I like the warmth of the kitchen when the oven is on, and the warmth of the atmosphere in the house when something delicious is baking as everyone is coming home.

On this particular day, I wasn’t sure what I wanted to make for an after school snack but I happened to be thumbing through an old issue of “Food Network Magazine” from July/August 2013. Being a summertime issue of the magazine, it was featuring recipes with zucchini; a garden staple for many.

It just so happened that I had two zucchinis that I’d bought to use for Christmas dinner and hadn’t used. This recipe would be perfect for making use of at least one of my zucchinis. Even better, it wasn’t just any zucchini cake, it was a *chocolate* zucchini cake! When I looked at the ingredients I actually had them all and it looked rather healthy, considering that it was a cake. I knew I could healthify it even more by making the flour a mix of white and wheat.

I decided to try it.

Well, it was d.e.l.i.c.i.o.u.s!!!!!!  Everyone loved it! They enjoyed it with a nice, cold glass of milk, which made me even happier. I’d definitely make it again, and I think I was a little bit shocked at just how rave the reviews actually were.

The only thing that I didn’t love about the recipe was that it used a lot of bowls. Not having a ton of work space, I prefer recipes that don’t need a ton of space. With so many bowls, this one took up some space. However, it was so delicious, it was well worth the extra bowls!

I am posting the recipe below, just as it appears in their magazine and on their website.

Besides changing the flour to include both wheat and white, I used a bigger baking dish and therefore doubled the ingredients for the frosting so that it would frost the whole cake.

Next time you’re looking for a healthier cake recipe, I recommend this one!

Thanks to “Food Network Magazine” for sharing such a great recipe!!

Look at that healthy, secret ingredient in the chocolate cake batter!

Look at that healthy, secret ingredient in the chocolate cake batter!

FOOD NETWORK MAGAZINE’S CHOCOLATE ZUCCHINI CAKE

IngredientsUnsalted butter, for the pan (*I used a fat free cooking spray instead*)
1 1/2 cups all-purpose flour, plus more for the pan (*I used a mix of 1/2 cup wheat, 1 cup white flour*)
1/2 cup plus 1/3 cup semisweet chocolate chips
1/4 cup unsweetened cocoa powder (not Dutch process)
1/2 teaspoon kosher salt
1/2 teaspoon baking soda
1/4 teaspoon ground nutmeg or allspice (*I went with nutmeg*)
1 1/4 cups sugar
1/2 cup plus 1 teaspoon extra-virgin olive oil (separated)
2 large eggs
1/2 teaspoon vanilla extract
1 medium zucchini, grated and squeezed dry
1 teaspoon honeyDirectionsPreheat the oven to 350 degrees F. Butter the bottom and sides of a 9-inch-square cake pan (I used 11×7). Dust the pan with flour, tapping out the excess.Toss 1/2 cup chocolate chips with 1 tablespoon flour in a small bowl. Whisk the remaining flour, the cocoa powder, salt, baking soda and nutmeg in a medium bowl; set aside.Beat the sugar, 1/2 cup olive oil, the eggs and vanilla in a large bowl with a mixer on medium speed until smooth and pale, about 3 minutes. Add the flour-cocoa mixture; beat on low speed until combined, about 2 minutes (the batter will be thick). Add the zucchini and beat until combined, about 2 more minutes. Fold in the flour-coated chocolate chips with a wooden spoon.Transfer the batter to the prepared pan and bake until a toothpick inserted into the center comes out clean, 30 to 35 minutes. Transfer to a rack and let cool completely.

Make the glaze: Combine the remaining 1/3 cup chocolate chips, 1 teaspoon olive oil and the honey in a microwave-safe bowl. Microwave on medium-high power in 30-second intervals, stirring, until the chocolate is melted. Spread over the cake, then cut into pieces. (*I doubled this glaze recipe*)