 It is with mixed emotions that I share this week’s article. My emotions are mixed because it is the last of the sightseeing articles for our trip. The next and final article will chronicle the final week, the ride home to Rhode Island, and it will run in next week’s paper. This week’s article that I share with you today follows our journey out of California, through Nevada, into Arizona (again), through Utah and into Montana and South Dakota. It shares the exciting things we did while we were in Montana at Yellowstone National Park and in South Dakota at Mount Rushmore. We had a great time and made more wonderful memories together. I hope you’ll click on this link to read the Cranston Herald article for this week!
Archive | Kids RSS feed for this section


#crosscountryadventure2015: This week’s Cranston Herald article is up!
6 Aug#crosscountryadventure2015: Watch the video
6 Aug
Twenty-nine states traveled in thirty-four days, staying overnight in seventeen of them. (Graphic created by Don Cowart II)
There are still a few #crosscountryadventure2015 posts left to go, but today’s means a great deal to me. For months leading up to our trip, our oldest daughter Caroline kept talking about her goal of making a video of the trip. Photo and video work are her passion, and she was really looking forward to doing this. She bought specific songs on iTunes before we left, working out the soundtrack in her mind. Throughout the trip, she took quick snip-its of video showing the changing landscape, the major landmarks we visited, and even some of the family we got to see during our trip. Clearly you can’t capture the entire five weeks’ trip in any less than, well, five weeks, but she sure did try. In eight minutes she has given an amazing, make-me-cry-every-time video of our trip. The first time she showed it to me, I only looked at the cover photo and started to cry, so she knew it was good. At that time, the video was not finished and only covered up through California. Last night she finished it, capping off weeks of compromised storage space on her phone as she accumulated video after video, and worked for many hours editing video and pictures through her phone as we traveled. I can’t thank her enough for this video. It will forever hold a spot in my heart.
#crosscountryadventure2015: The Cowarts go to Hollywood
30 Jul
This week’s article is filled with all of the exciting things we got to see and do during our visit to California. Click here to check it out!
#crosscountryadventure2015: Tips for planning your own trip
27 JulSo many people have said to us that they would love to take a trip like this one at some point in the future. I thought I’d share some tips with you, including things we’ve done or learned along the way.
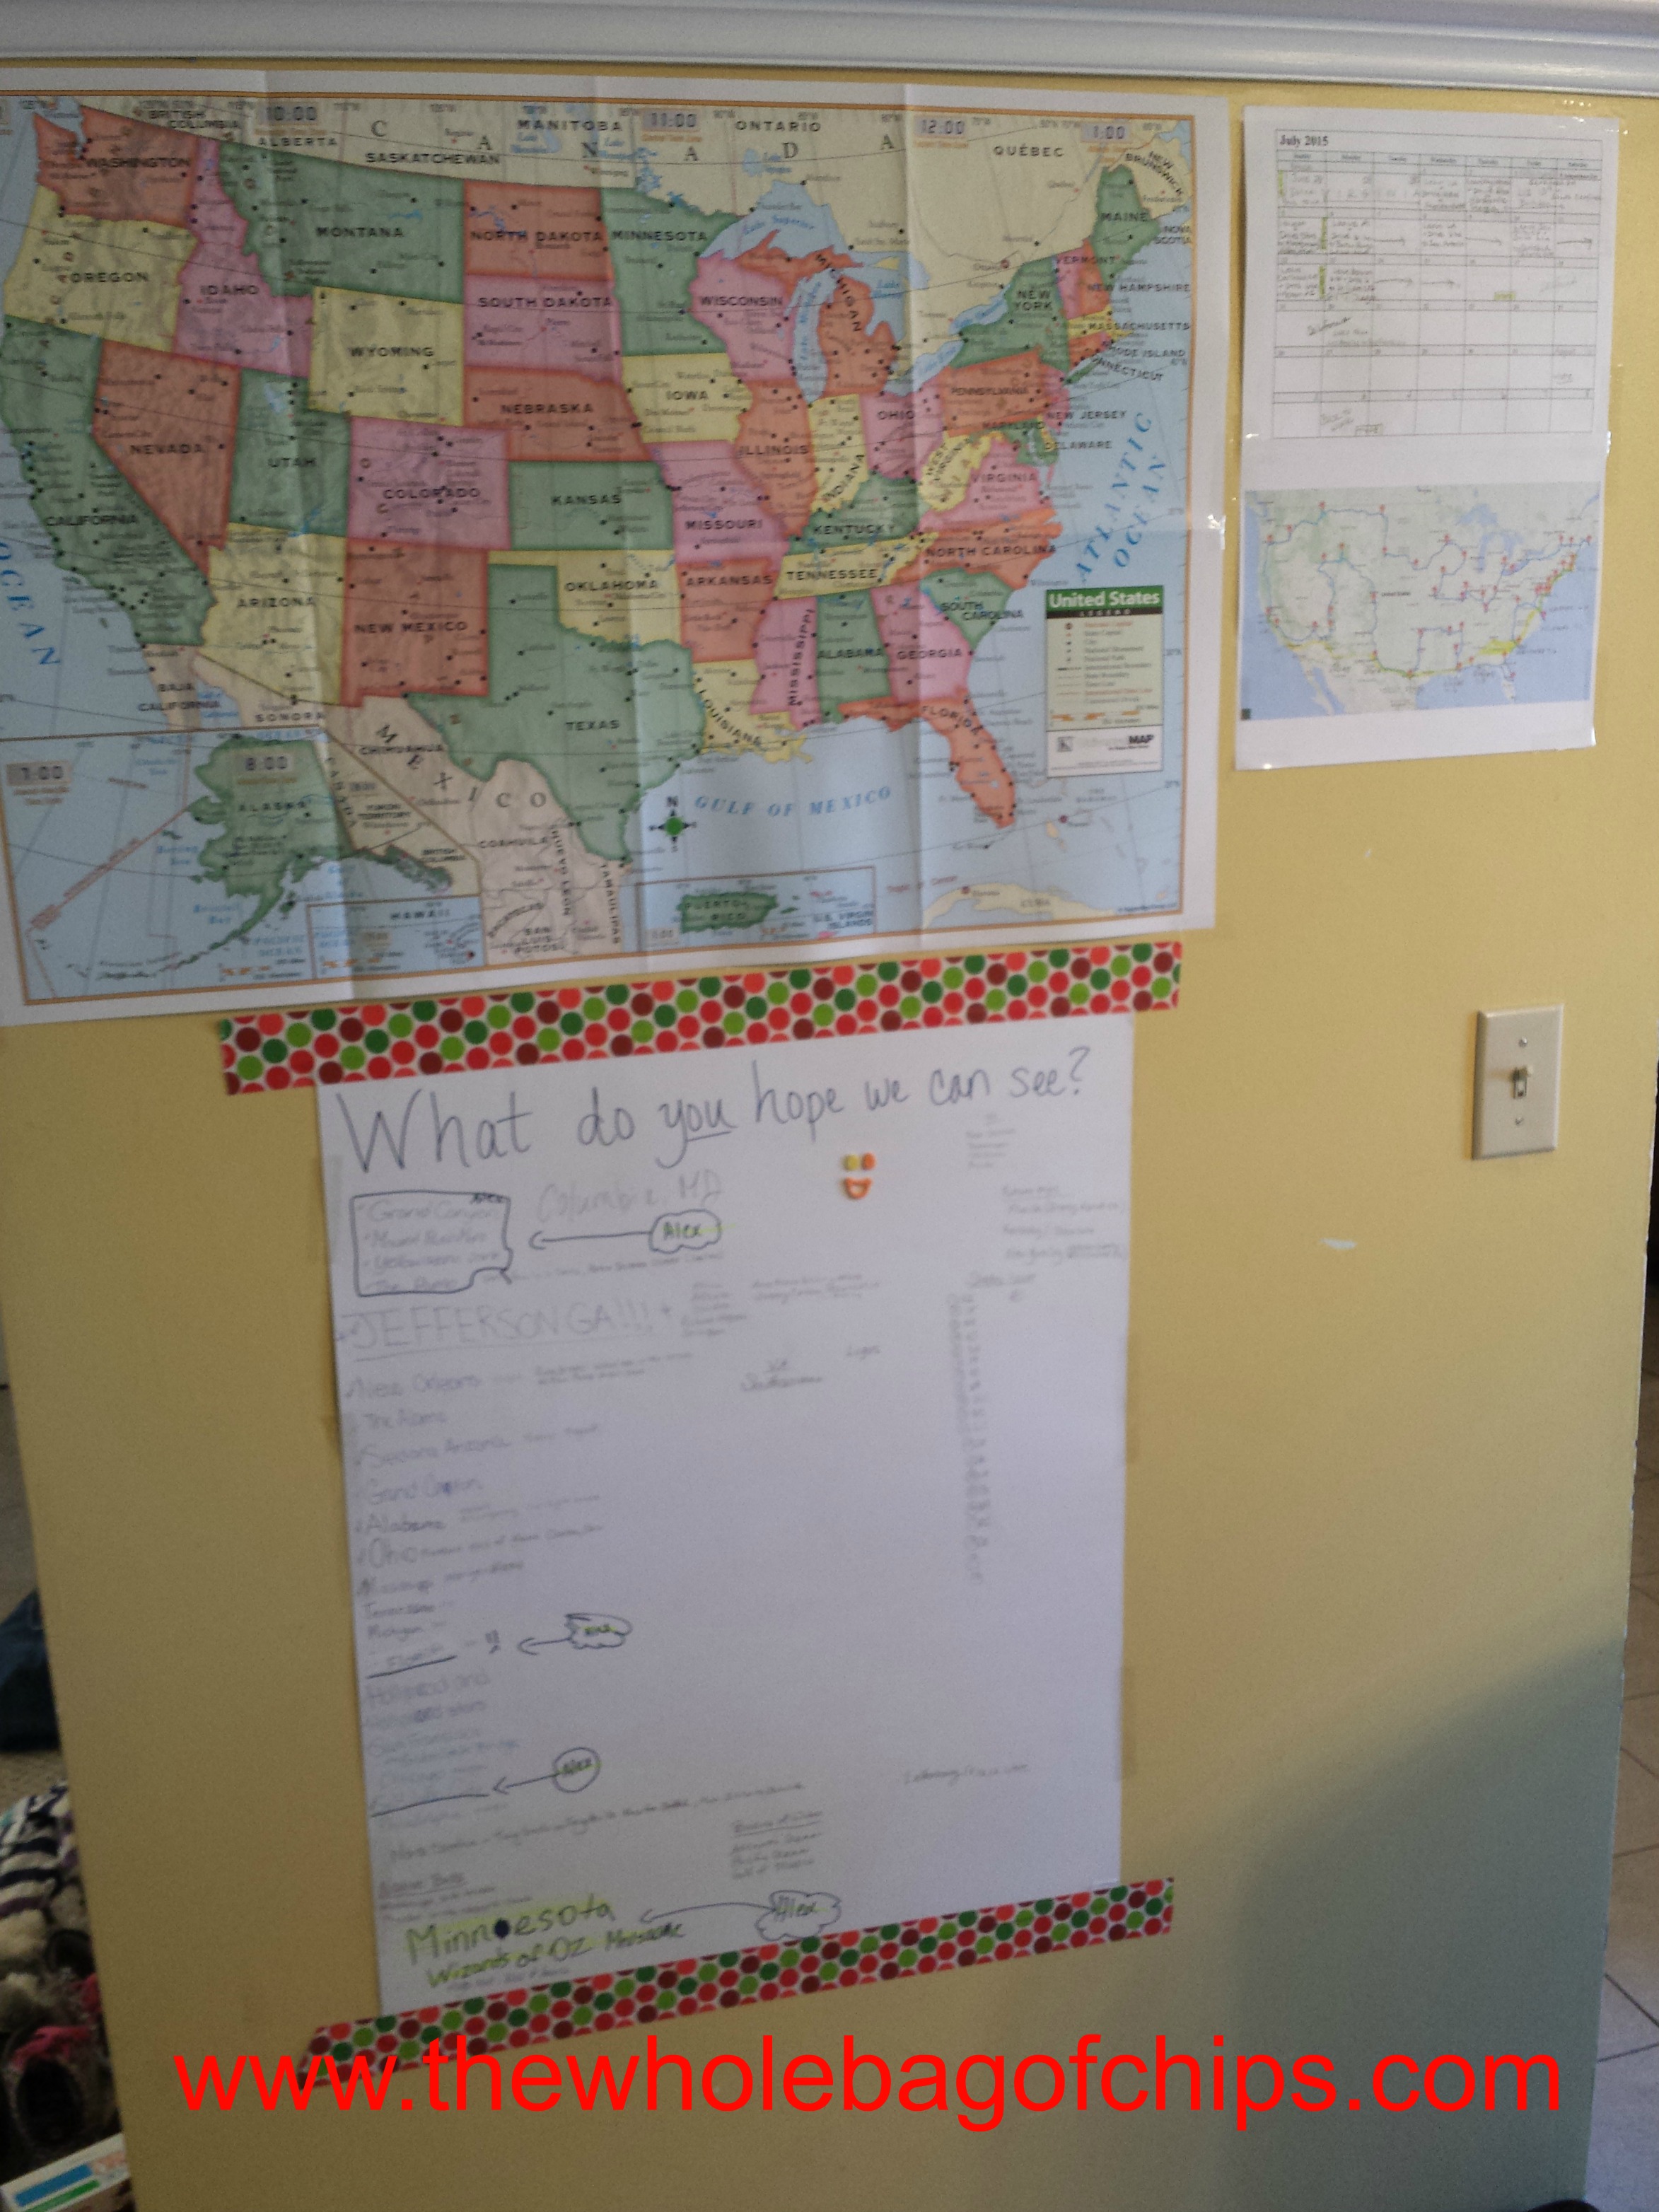 1) Get everyone involved: If you’re bringing kids along and they are school aged, get them involved in the route planning by asking them what they’d love to see. We kept a large map and blank poster board on our wall and asked our kids to tell us what they hoped we could see. We let them know that just because it went on the list didn’t mean we could absolutely do it, but we’d do our best to make it happen. We tried to hit at least one place each person had requested, but many of the requests overlapped, like the Grand Canyon. We all wanted to see that. Our family and friend visits were worked in as well.
2) Be flexible: We had our calendar, we knew the date when we had to be in California, so we had a deadline, but my husband cautioned me against planning where we’d stay at every single stop because we might get delayed along the way or arrive earlier than planned along the way. I took his word for it, the planner that I am, and we only made our reservations for Virginia, for Fourth of July weekend, and for Los Angeles. As it turned out, we did modify our schedule a bit, and picked up an extra day along the way, which we were able to spend in Arizona with our friends, and another extra day which then allowed us to arrive a day earlier in Los Angeles than we’d initially planned. We struggled with finding a spot to stay overnight for three nights in Yellowstone National Park, so many campgrounds were now full, but had we booked it a month ago or more, our dates would not have been correct, so having a reservation would not have helped us. We opted to just stay two nights instead because that’s what we could find. So ultimately, he was right.
 3) Be spontaneous, and be aware of your family’s habits: We knew several things we definitely wanted to do, like visiting the Alamo and the Grand Canyon, and we had specific plans for days when we were with our family, but we couldn’t possibly plan out every single minute of every single day ahead of time for the entire five weeks. It was nice to be able to wake up and do nothing some days or to wake up and say, “What should we do today,” making that decision as a family. We tend to be later risers and night owls, so we never planned to be up and out at the crack of dawn, because that wasn’t realistic for us. There’s a lot of us also, and one bathroom, so it takes us some time to get organized and out the door. We are much better at later arrivals for things whenever possible, and with the pressure to rush out the door off, it kept everyone happy, at least for the most part.
4) Divide and conquer: With an undertaking such as a trip like this one, there was no way we could make any one person responsible for the entire thing. We did sit many nights and plan out some of it together, but we also split up the responsibilities. I took on the bulk of the organizing of the camper inside as well as the family’s needs, while he took on the bulk of organizing the route (since he’d done this trip before) and finding the campsites, as well as taking on figuring out the hardware and equipment needs for the truck and camper. Working as a team is much easier than one person doing everything or both of you trying to do every single task together. Our kids were old enough to be involved in the organizing and setting up of the camper as well, so our team was more than just the two of us.
 5) Remember that it’s camping: Yes, you have all the comforts of home in an RV, but you also have the potential for ants, a mouse, beetles, and the like. It’s not the Four Seasons, and we didn’t want it to be, but don’t be shocked if you see a bug, or if there’s dirt on the floor or if you shower in your flip flops at the campground’s showers. If you don’t like those types of things, this type of camping across the country trip isn’t for you. Our group consists of an Eagle Scout and four Girl Scouts. We’ve all tent camped and hiked before, and we like meeting and greeting new and different wildlife. We knew we’d be okay on a trip like this.
6) Be patient: Close quarters, long hours driving, tight spaces, many weeks away from home. There will be short tempers and meltdowns and frustrating situations. It’s important to be as patient as possible as often as possible. They say patience is a virtue, and this trip is a great way to practice it. Nothing will go 100% perfectly and you deal with things as they come, just as you would at home.
7) This is a driving trip: You’re going to spend a lot of time in the car, you’re going to spend a lot of money on gas. To think of the trip without knowing those things going into it would be silly. We saved lots of money in other ways, but we were up front with knowing gas would cost money and even a great deal of money in some places, and we’d be using a lot of gas because we would be spending five weeks on the road. We also knew going into the trip that we’d be pulling a camper and driving a large vehicle, so we knew our gas mileage wouldn’t be fantastic, but again, these were all known facts way ahead of time, so no surprises there and we took it all into consideration.
8) Camping is cheap: Although gas is expensive at times, lodging is very inexpensive. Campsites varied in price from as little as $15 a night to as much as $75 a night, depending on where we stayed, with an average price of $25-$30 a night, usually. We ate out on occasion as we do at home, but we ate in much more often, just as we would at home. Had we stayed in hotels, we would not have had such inexpensive lodging and not have had the ability to cook such great meals as we do now. At $3900 to own outright, our camper was our hotel and our ability to cook meals for five people a dog and a frog, for five weeks all wrapped in one, without having to spend money on airline tickets which would not allow us to experience the entire country from East to West and South to North as we have. And when we get home, we have the ability to go anywhere else we want to go with our camper from here on in, because we own it. Who knows what adventures lie ahead for us?
Adventure is all part of the fun!
#crosscountryadventure2015: Wild West: The OK Corral, Grand Canyon and beyond
22 Jul
From Texas to Arizona last week!
This week’s Cranston Herald article is online now! Click here to read about our Arizona adventures. Stay tuned for more adventures as we move along on our journey!
#crosscountryadventure 2015: Into the west and through the Lone Star State
15 Jul
I’m so excited to post the third article in my travel series which is being run in today’s Cranston Herald. You can read it here.
#crosscountryadventure2015: Binders, binders and more binders Part II
14 JulIn my previous binder post I talked about the kids’ binders I’d created, but today’s post is about my own organizational binder.
 My organizing initially started as a little, yellow two pocket folder that I kept on top of my microwave for about a year. Any time I saw something that I wanted to keep aside for the trip, I stuck it in the folder. Pretty soon though, when we got into the nitty gritty of the trip planning, I outgrew my two pocket folder. I needed some serious organization to make this trip go off without a hitch.
My binder is 3” thick and I’m pretty married to it on this trip. I carry it with me in and out of the car every morning and every night, and I take it with us everywhere. It’s got a whole ream of loose leaf paper in the back for any notes I want to make throughout the weeks we’re gone, as well as empty page protectors for any receipts or memorabilia I want to save.
Additionally, it’s chock full of very full page protectors.
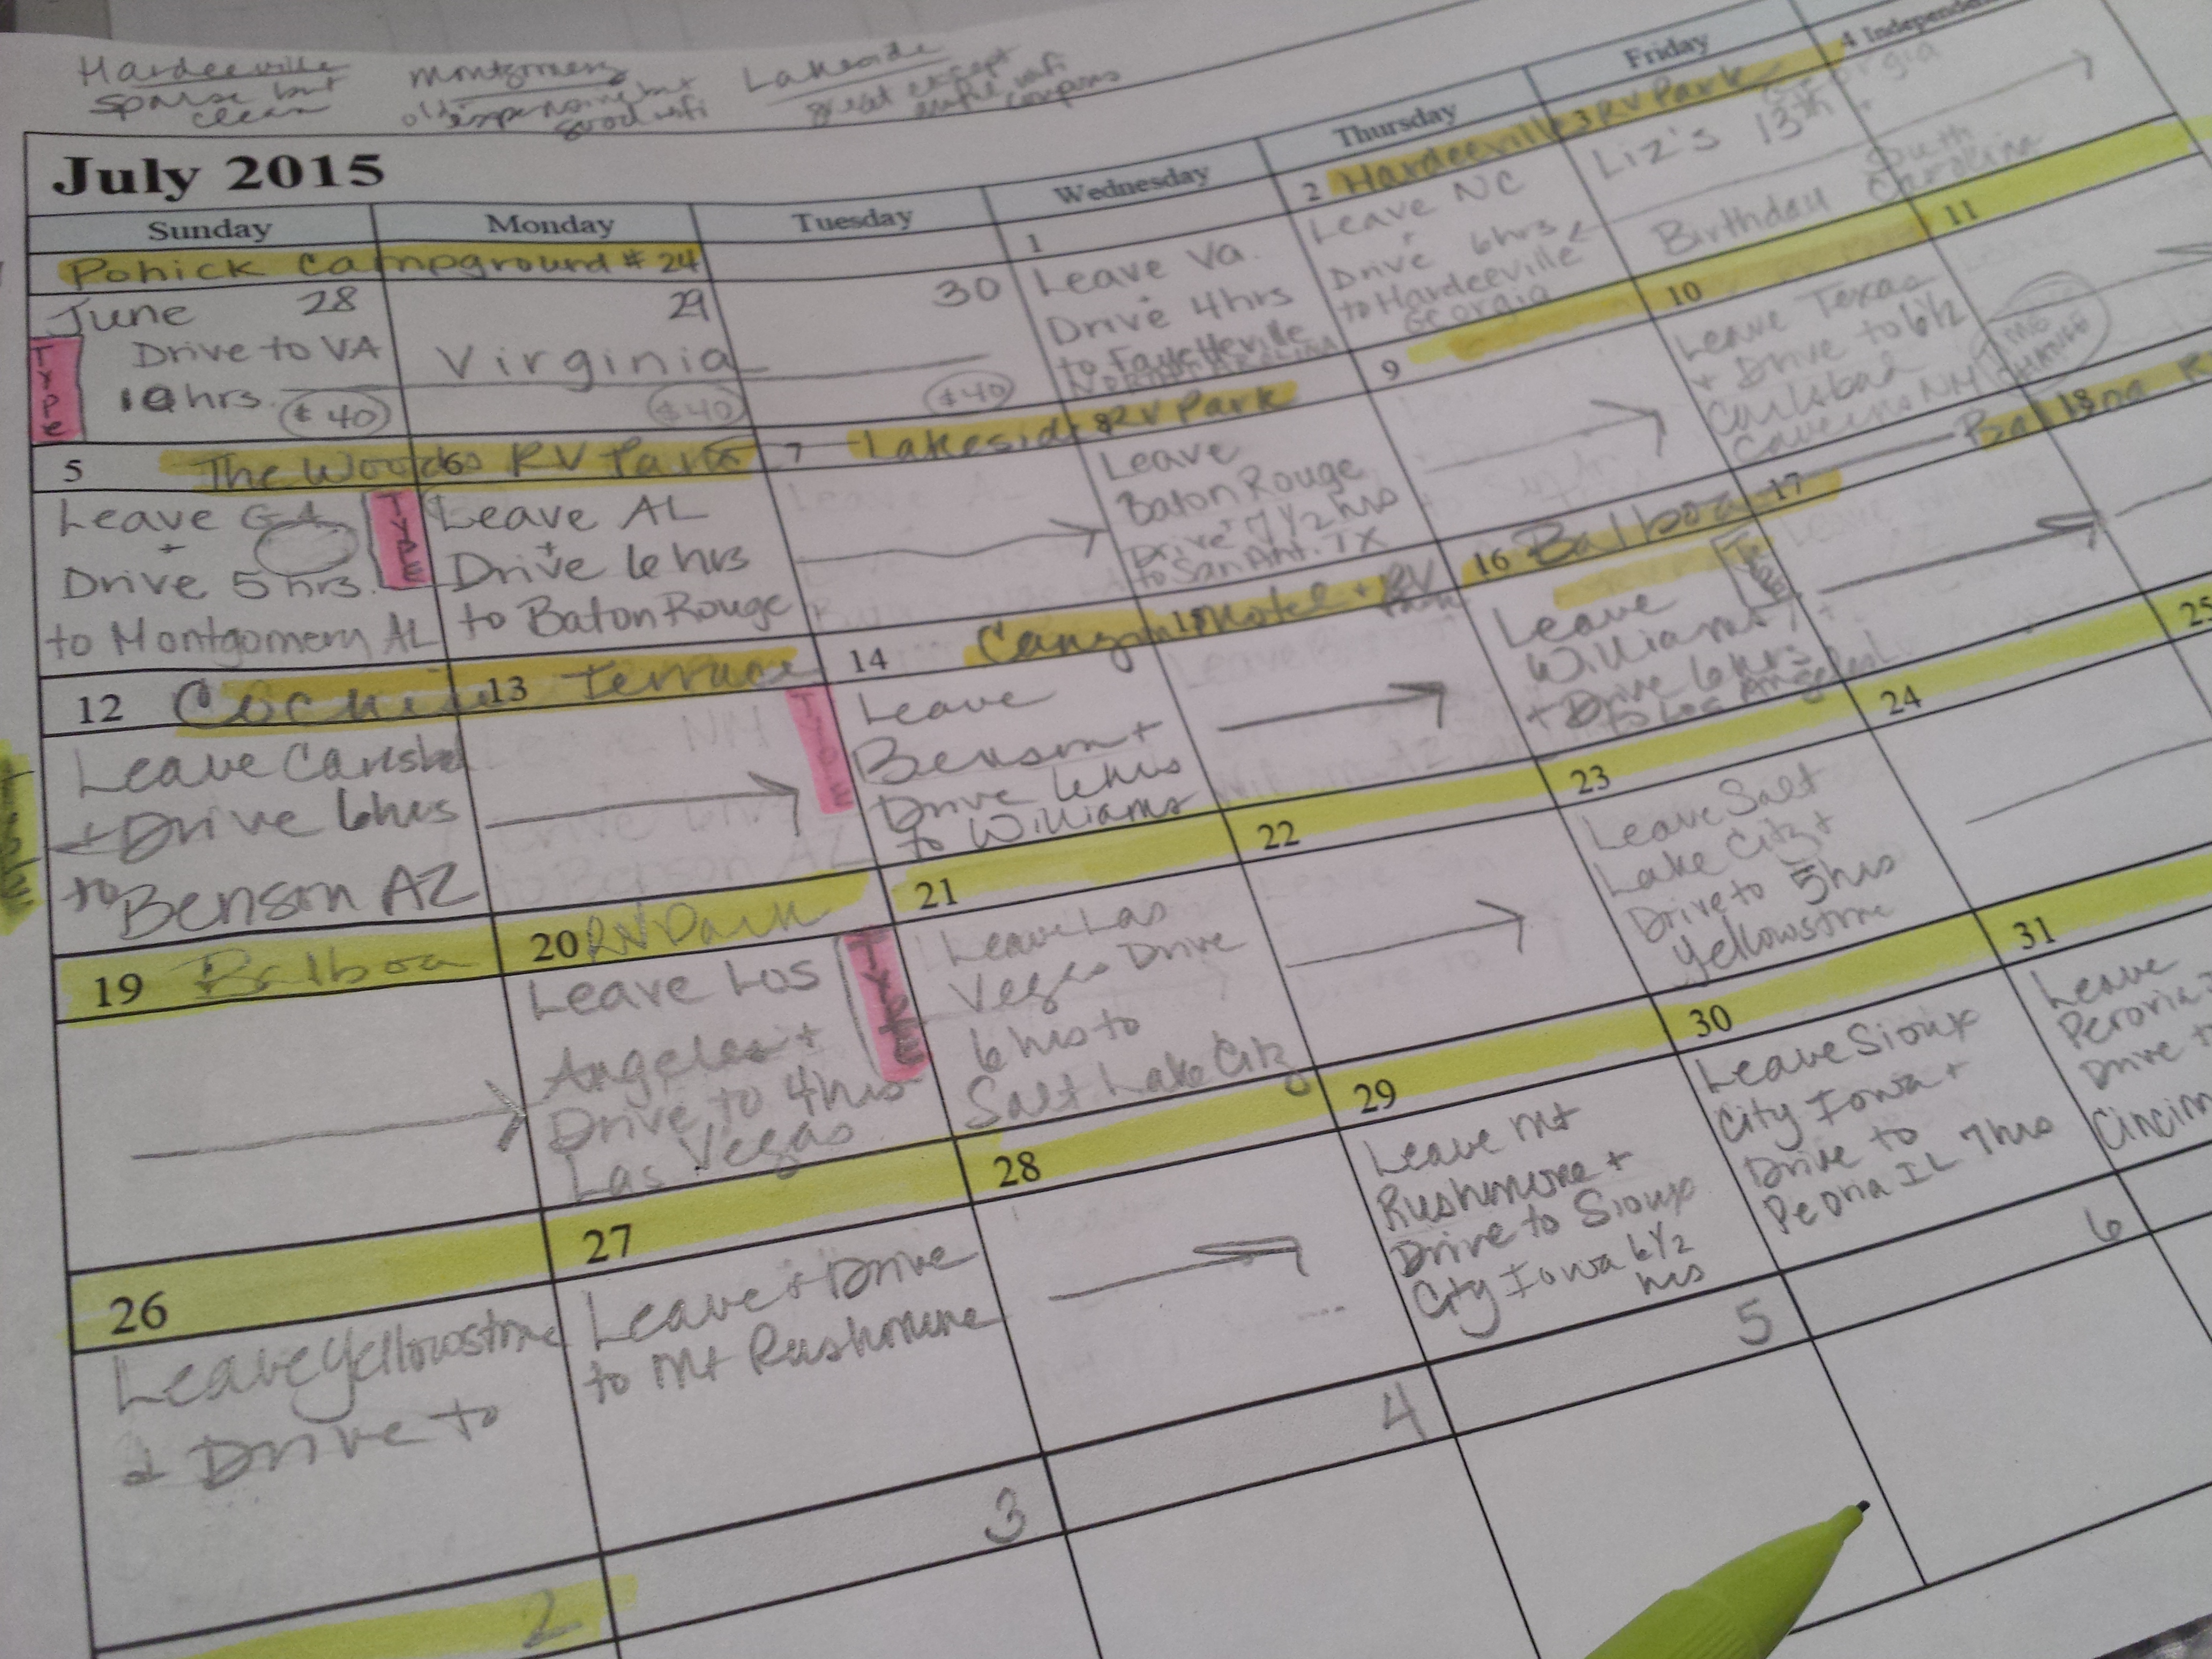
My very first one has our calendar in it. It shows when we’re pulling into and out of each state and where we are staying. It was on our dining room wall for months as we planned, and before we left I slid it into a page protector and put the giant wall map into the front binder pocket along with a smaller road atlas that I got at the dollar store that shows major highways in every state.
The rest of my page protectors are full of lists. Any time I saw a list of the quirkiest things to see in every state or the best landmarks in all 50 states, or the biggest pieces of food in every state, or anything of the sort, I printed the list out and put it in my binder. No matter where we went, if there was something not to be missed whether it was historical, wacky, weird or edible, I had a list of it. I didn’t know if we’d see all of it, any of it, or none of it, but I was ready.
 As people who’d done this trip before or had visited various places we were going to sent me their tips and tricks, I printed them out and put them into a page protector. I have one friend’s blog of her family’s cross country trip printed and in there.
Additionally, I printed out some activities I can do with the kids too. I have a list of interview questions to ask them and some “Would you rather” type questions and some road trip games to play. I thought it’d be fun for me to spring some of those on them throughout the trip as well, especially on the back end of the trip when they might get tired of driving and driving and driving.
My binder, as well as my kids’ binders, also work well a lap desk in the car for any time we need something to lean on, which was not my intention, but an added benefit to having something so sturdy, so close by when in the car.
My binder, although mostly all business, will be something I’ll save forever too. It’ll have my notes and lists in it so that I too can look back on this trip forever, remembering all the planning that went into it as well as all the amazing things we did while we were on it.
#crosscountryadventure2015: Binders, binders and more binders Part I
13 JulThis might be my favorite post of all, as far as my pre-trip planning and organizing goes. I’m totally in love with my binders, so get ready for a gushing blog post about these travel binders.

Recently, my sister in-law sent me several boxes of binders leftover from her grad school days. They were large, white three-ring binders and along with they came a ton of page protectors.

Additionally, at some point in the past year, they’d also sent us five Nickelodeon drawstring backpacks that were much better quality than the normal nylon ones we often receive from places and events. As soon as the backpacks came, I hid them in my closet, for months and months. When the binders came, I pulled out one three inch binder for my own trip organizing (I’ll tell you about mine a different post) and three other large ones for each of the kids which also went into my closet for hiding. An idea had been forming in my mind for a while, as I’d gone looking for travel journals but not found exactly what I was envisioning in my head.
I always say that teaching never leaves you, and what was forming in my head was the absolute best cross-country adventure thematic unit ever for my three kids. I wanted something that was part travel journal, part learning activities and part passing the time activities. I started looking online on blogs and on Pinterest and sure enough, many people had the same ideas and were sharing their resources very willingly, for which I am incredibly grateful. Many of these pages shown were created by me, but more than what I created, were the ones shared by others online. I started a Kid Binder folder on my desktop and each time I found something, I’d put it in the folder to be printed before the trip. I started to type up cute section dividers for each section.
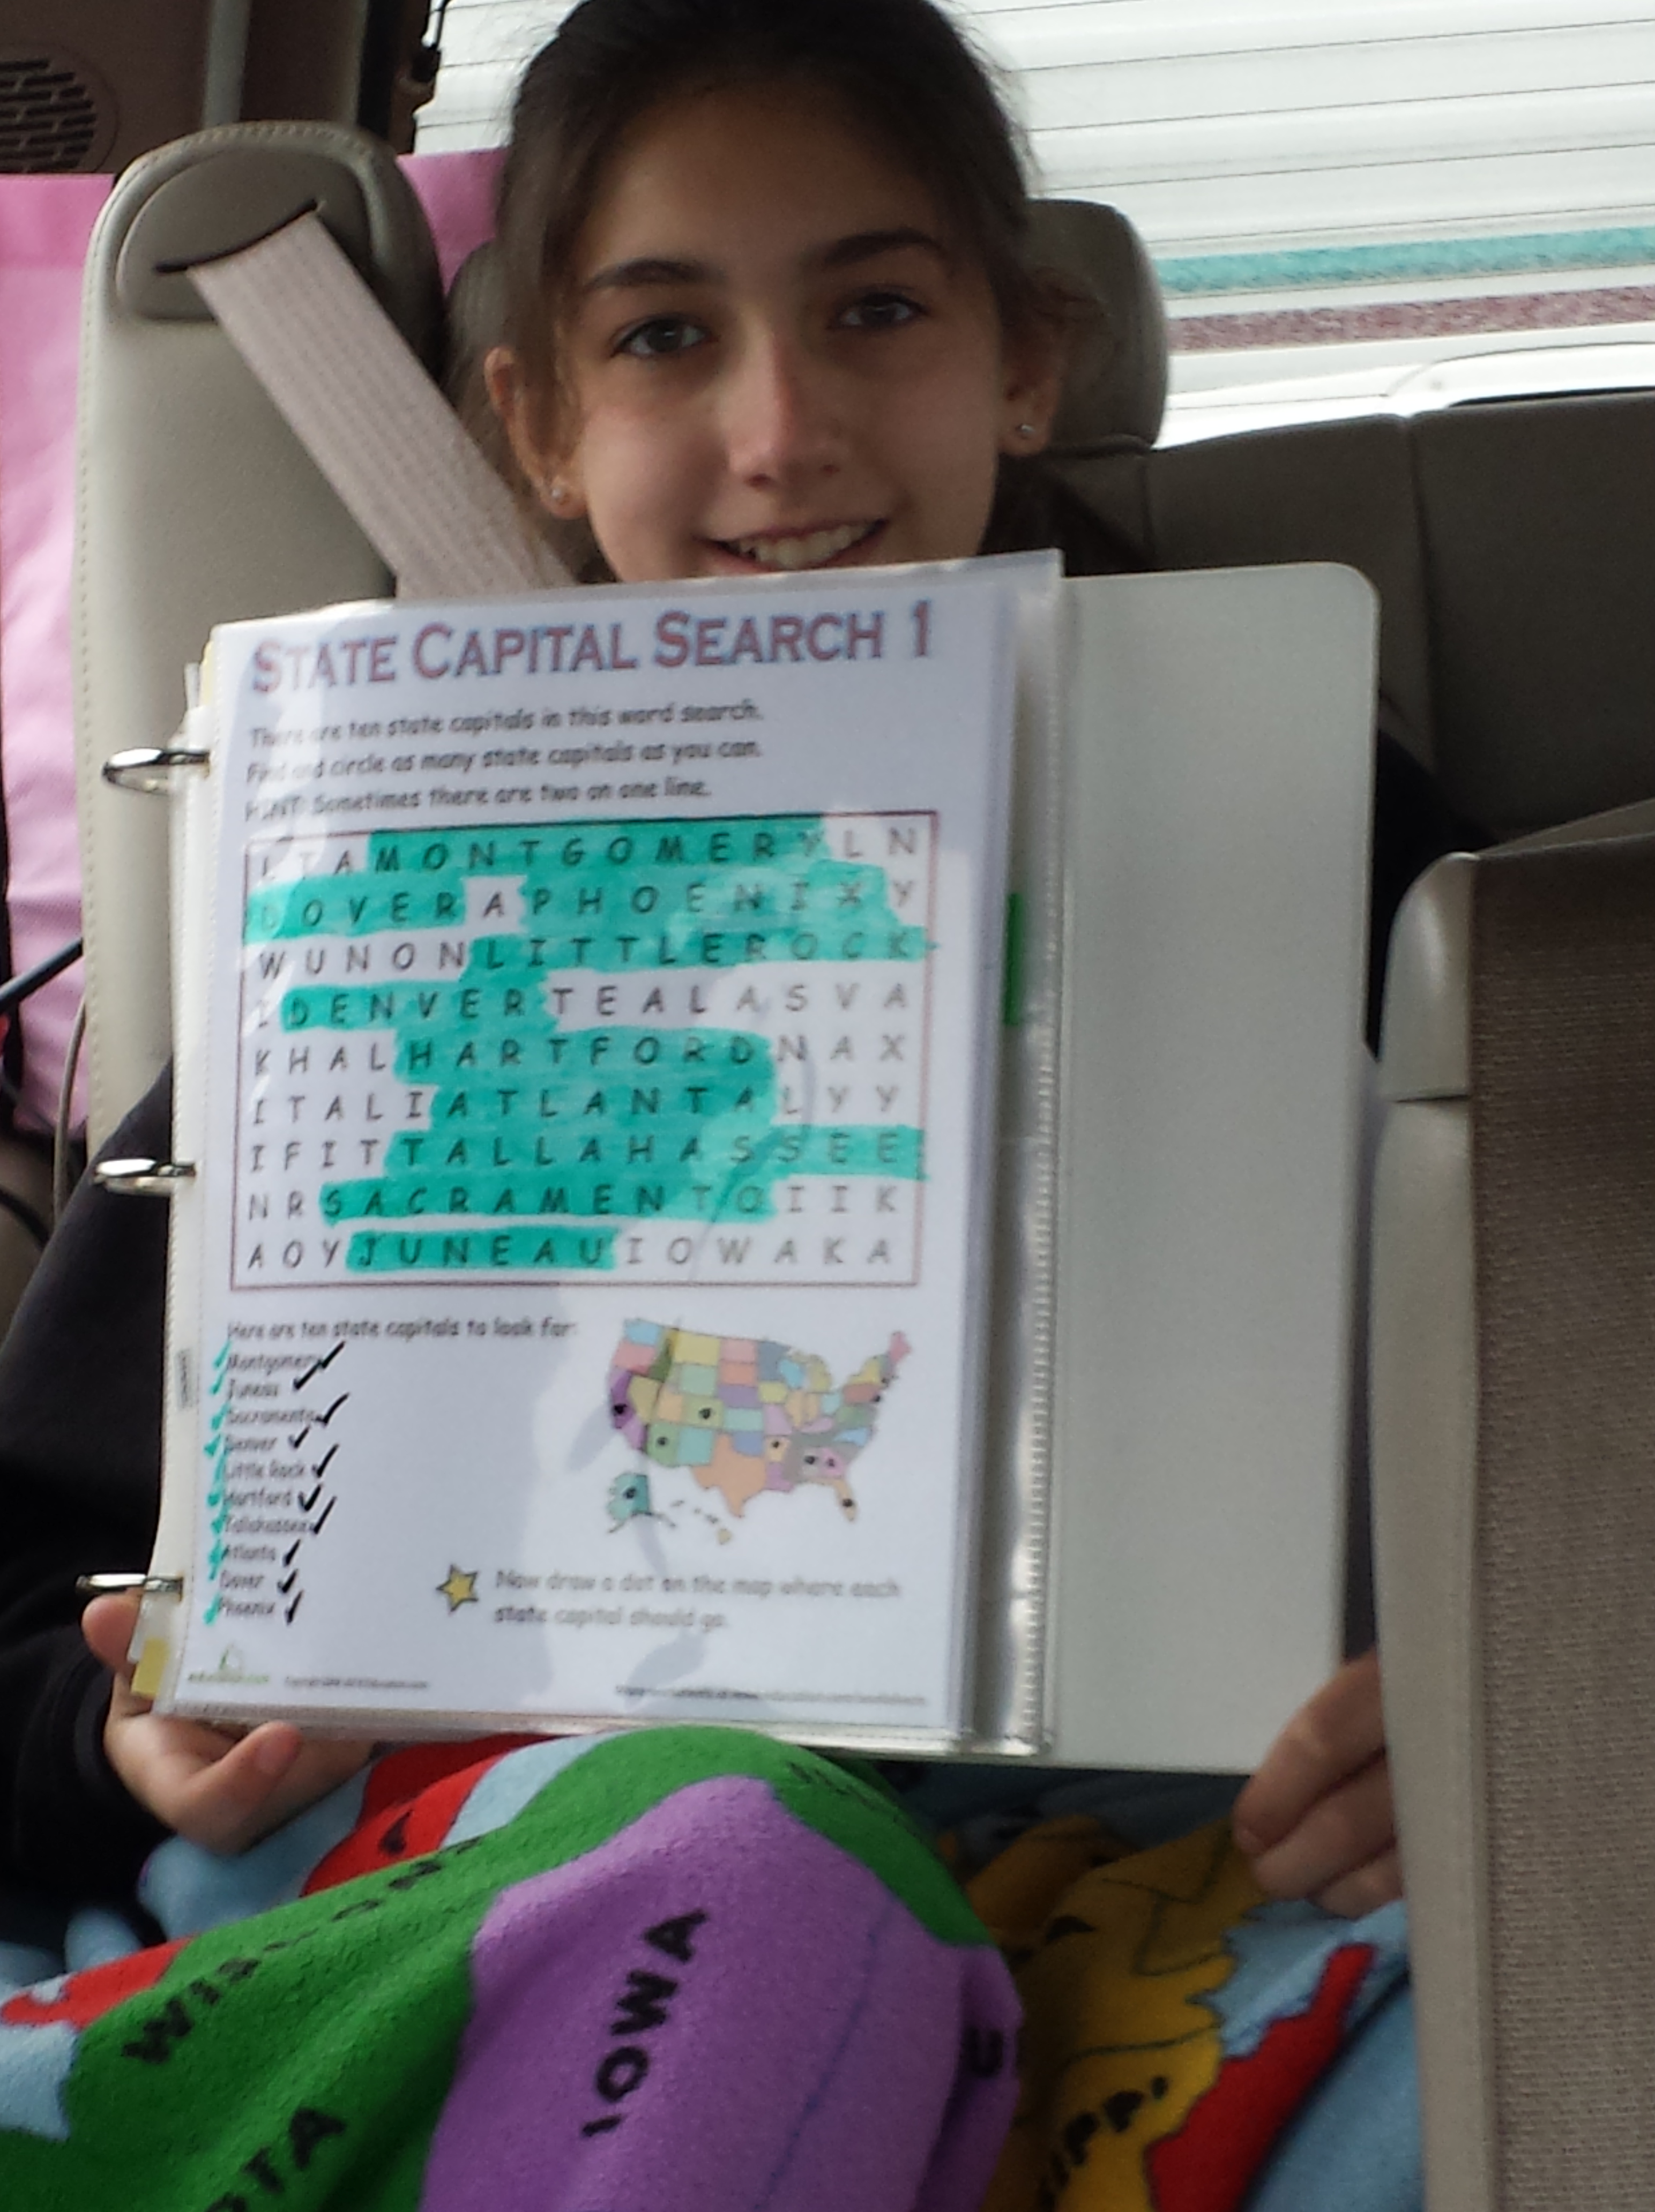
Here’s an overview of what’s in their binders. Everything is in page protectors so you can redo the puzzles and games and over and over again, and each child was given pens, colored pencils, dry erase markers with erasers on the caps, and mechanical pencils that don’t need sharpening:

US States and Capitals: I have maps for filling in where we’ve gone and the dates when we are there, cross word puzzles, word searches, and information about states, capitals and state flags. For them to keep track of landmarks they’ve seen.
Things you might not see again or have seen before: I have information in there about geography terms for the various parts of the country, a place to track the temperatures since they’d be seeing a vast difference as we traveled east to west and back again, and information about types of rocks since I knew they’d be seeing types of rocks we don’t find at home. They also later decided to keep one rock per place we stay and label them with a sharpie marker so that will be a pretty tangible example of the differences in the rocks they’re seeing on this trip.


Journaling: I gave each kid an entire pack of loose leaf paper and I did a list of journaling prompts in case they were stumped on what to write, but I also gave them an entire one-page graphic organizer for a journaling page in case they just wanted to follow that. They could do either format, or a combination of both, whatever worked for them, as long as they journaled.


Bored games: I put in grids for Tic Tac Toe, I had BINGO games and I spy games of all sorts from spying colors of cars, brands of cars, state license plates, restaurant logos, street signs and more. I put in five pages of “learn to draw” pages and some blank white paper. There were several scavenger hunts, including one from my cousin that she received at a campground which you do when you arrive at a campground. Again, all these things could be done over and over again with the dry erase markers by using them inside the page protectors.
Empty page protectors: I wanted them to be able to slide in anything they wanted to save, whether it was maps of areas we visited, a restaurant menu or a ticket to something so I gave every kid 10 empty page protectors.
Photo pages: I bought everyone a pack of 4×6 photo pages that came to sections per page so that they could get postcards and slide them into the slots.

These binders were the best kept secret I think I’ve ever kept for so long. I could not wait to put them together and to give them to the kids. I printed them out just before we left, and assembled them on a night they were sleeping at my mom and dad’s house, since it took some time and I needed some space to spread them out and assemble them. I put them into the backpacks and tied their favorite color ribbon on their backpacks (which coordinated with other things I’d tied their favorite color ribbons on for this trip) since all the packs were the same and we’d need to be able to tell at a glance whose was whose.
On the day before we were leaving (which actually ended up to be the night we left) I brought all the bags out to the camper and watched as they opened them. They were so excited to see them. I’d been seeing them all along so I knew how great they were, but they were seeing them for the first time with fresh eyes and excitement, and they loved them. My oldest daughter said, “You’re the best, Mom, no one else would do this for us!” That made me so happy, and although I know that’s not true, because the resources I got were all shared from other moms who’d done just that, it made me feel good that they realized how great their binders were. It made me proud in the coming weeks as they showed them off to people and it made me excited when they used them during the trip. I know that they can save them forever and show their kids this amazing adventure. They can look back on this trip and all they did, saw and learned, for years and years to come. For me, that’s priceless, that’s the best gift I could give them.
 Below is a list of websites and blogs that I explored when putting my binders together. I tried to remember to list them all as I went along, and hopefully I did not forget anyone. I always like to give credit when I’ve borrowed something from someone else. Thank you to everyone who so willingly shared their creations with us! Although I may not have used every single thing below in my binders, everyone provided me with ideas and inspiration. If by chance I did forget to credit someone, please leave a note in the comments with the link to your blog or site so I can thank you properly!
BINDERS FOR KIDS
Activities from:
http://www.creativemamaonadime.com/2012/07/relaxing-roadtrip-10-activities-for.html
http://www.thedatingdivas.com/tara/the-road-trip-date/
http://www.doverpublications.com/zb/samples/480356/children72f.htm
http://www.thirtyhandmadedays.com/2011/05/funner-in-the-summer-road-trip-bingo-from-oopsey-daisy/
http://www.aprettylifeinthesuburbs.com/summer-road-trip-eye-spy/
http://www.momsminivan.com/print-tictactoe.html
http://www.honestandtruly.com/2015/01/road-trip-scavenger-hunt-easy-oil-changes/
Click to access Restaurant-I-Spy.pdf
http://www.minds-in-bloom.com/2009/10/exploing-would-you-rather-questions.html
Click to access Car-Trip-Games.pdf
http://iheartorganizing.blogspot.com/p/free-printables.html
http://www.thatswhatchesaid.net/2011/i-spy-bingo/
http://bnute.blogspot.com/2011/08/free-printable-trip-journal-page.html
http://www.parents.com/parents/templates/story/printableStory.jsp?storyid=/templatedata/child/story/data/50_landmarks.xml&catref=cat5590004
http://brendajohnston.blogspot.com/2013/11/poster-learning-and-fun-with-velcro.html
http://www.puzzles-to-print.com/printable-word-search/fifty-state-word-search.shtml
#crosscountryadventure2015: Packing tips and tricks for organization
10 JulHow to pack five people for five weeks into a small space?
That is something that many people have asked me and it was the question I faced as the primary organizer of at least my kids and myself over the past three months. Anytime I had a chance, I was on Pinterest looking for tips and tricks, and keeping my eyes open as I ran my normal errands, looking for anything that might jump out at me as a means of efficiently accomplishing this task.
A few things that really worked well for us are the following:

One shoe organizer was used by cutting it into separate rows and stapling it around my bed.
1) Shoe organizers: These were one of my best bets for our packing ease and they’re very affordable at less than $10 each. We had one closet that was a decent size and all three girls were going to be packed into that one closet for the five weeks; clothes and shoes. I hung the first one in the closet for them and all shoes, slippers and flip flops were going into it except running sneakers which are too bulky and would sit on top of the dog’s crate in the entryway.
The second shoe holder I cut into strips, and utilizing a trick I saw on Pinterest and my new best friend, the staple gun, I stapled the strips of shoe holder all around my bed onto the fake wooden frame and I stapled one extra one to the wall near the entrance to the bedroom. This gave us lots of extra shoe storage space. I took a wide variety of flip flop shoes, sneakers and slippers and anything of the kids’ that didn’t fit into theirs could go into an extra space in ours.

The shoe holder on the inside of the bathroom door is a lifesaver.
The third one I hung in the bathroom, making sure it was the kind that had a netted pocket for each of the pockets, rather than plastic (I found these at Walmart) since some of thing things being stored in here would be wet, like toothbrushes. Into these 24 pockets went toothpaste, toothbrushes, hair brushes, hair accessories, makeup sponges, makeup remover, hair gel, face cloths (rolled), razors, dental floss and the like.

You can hang anything with Command Hooks and strips.
2) Command Hooks, strips and a Staple Gun: I seriously could’ve bought stock in Command strips and hooks. I bought them in multiple styles and sizes. I hung all the artwork up with the strips and stapled the posters to the walls and ceiling above the bunks. I used extra hooks to make hooks in our bedroom for hooded sweatshirts and used one to store a casual dress for each of us girls as a just in case outfit. I hung our clock in the kitchen with a command hook and I used them to hold all our sunglasses. You can Command hook or strip absolutely anything.

These have worked out so well, as long as we keep them neat inside. It's been an easy way to pack everything needed for the five weeks.
3) Bins with drawers: These were one of my favorite purchases, and the best-of-all reason is that by using my Savings Catcher Reward dollars at Walmart, I got one whole set of three drawers for free. I had nearly $18 in rewards and the drawers were $17.88 each. I bought two sets so that each girl would have two drawers to themselves and everything would have to fit in those two drawers. My favorite thing of all was my idea to laminate two photos of each kid and use double-sided tape to stick them on. This way at one glance any of us could see whose drawers were whose, and the kids loved the personalization.

Each of the girls and I have a bag for socks, underwear and bathing suits. The girls have a ribbon in the favorite color tied to each of theirs so we know at a glance whose is whose.
4) Lingerie bags: As I pondered how to organize four sets of socks, underwear and bathing suits that were similar in look and size, I happened to think of the white mesh lingerie bags that one might use to hand wash delicates. I knew they were approximately $1 each, so one day I went to Walmart and bought 12 of them; four for each of us girls. I put ribbons through the loop of each, using my kids’ favorite colors, which are thankfully three different colors. At any given time any of us could see whose bag was whose. Into the bags the girls and I put socks in one, underwear in another and bathing suits into another. Those bags all went into one drawer along with pajamas and the other drawer contained rolled shorts, shirts and tank tops. With that, all three girls were packed.
5) Plastic baskets: These were great for storing anything and everything. With a moving vehicle you need everything contained and secured as much as possible. Inexpensive plastic baskets can be put anywhere for travel: under the sink, into the cabinet, and even in the sinks and tub.
6) Laundry baskets: I mentioned in a previous post that we were able to use the underneath of our master bed for storage. We bought four laundry baskets and used a bin we already had. Into the baskets we stored extra sets of sheets, extra blankets, and one whole bin of cold weather clothes: sweatpants, leggings, and heavy sweatshirts in case we encountered any cold nights, which we did, on our very first night out. It was cold and rainy and everyone wanted something warm and cozy to sleep in.
7) Reusable grocery bags: These were great for pre-loading of the car and camper. I tried to organize like things together and put them into bags which I’d line up near the stairs for the truck or the camper. I had bags of snacks for the truck, library books, DVDs, electronics, my work bag, and a bag in which I organized all the trip related paperwork, booklets and my binder. I also used one for my daughter’s Which Way USA magazines which were took with us because we had one for just about every state we’d be visiting. On the day in which we actually loaded up all the drawers for the girls, we used the bags to carry out all the rolled up laundry so we could transfer it right into the drawers. I also used one to store my three mesh bags, which I kept on my nightstand.

Meant for use in a kitchen, these stacking shelves have worked well for my small closet space.
8) Wire kitchen stackable shelving: One day when we were in Walmart, I happened to be in the kitchen section and noticed that they sold white wire stacking shelves, similar to my stacking cooling racks that I use when I bake. Our master bedroom had two cabinets that were long, deep and narrow that were our primary closet space and I was hoping to avoid a giant jumbled mess of clothes that would include pretty much everything I needed to bring with me. The closets also narrowed at the top, so they weren’t the same size inside from top to bottom. The kitchen stackable shelves were exactly what I needed. I could store clothes under them, on them and in front of them. I’d have to move things around to get to what I wanted at times, but it was my best option that I could find.
9) Drawstring backpacks: I must’ve packed at least five or six extra of these, not counting the ones that I kept my kids’ travel binders in (those are in another post altogether). I wasn’t sure what I’d need them for, but I knew they packed easily and I’ve already used them a bunch of times. I have used one for treks into town to go sightseeing for the day, carrying sun lotions, the kids’ change purses for their gift shop shopping, and a bottle of water, for example. I also have used them to go back and forth to the public showers at the campgrounds, carrying razors, shampoo, conditioner and soap; wet things that I didn’t want to mix in with my changes of clothes in the bigger beach bag type of bag I was carrying towels and clothes in. The bags are perfect size for the kids to carry as well.
Everyone has to have their own system and know what works well for them when packing for a trip like this, but the most important thing is just to have a system, whatever it is. Know how you’re storing things, where you’re storing things, and make sure everything has a place before you pull out of Dodge on that first day. You’ll want your space to be neat and organized, and easily re-done each time you’re ready to move to a new place.
#crosscountryadventure2015: An early start and a taste of the south
8 Jul
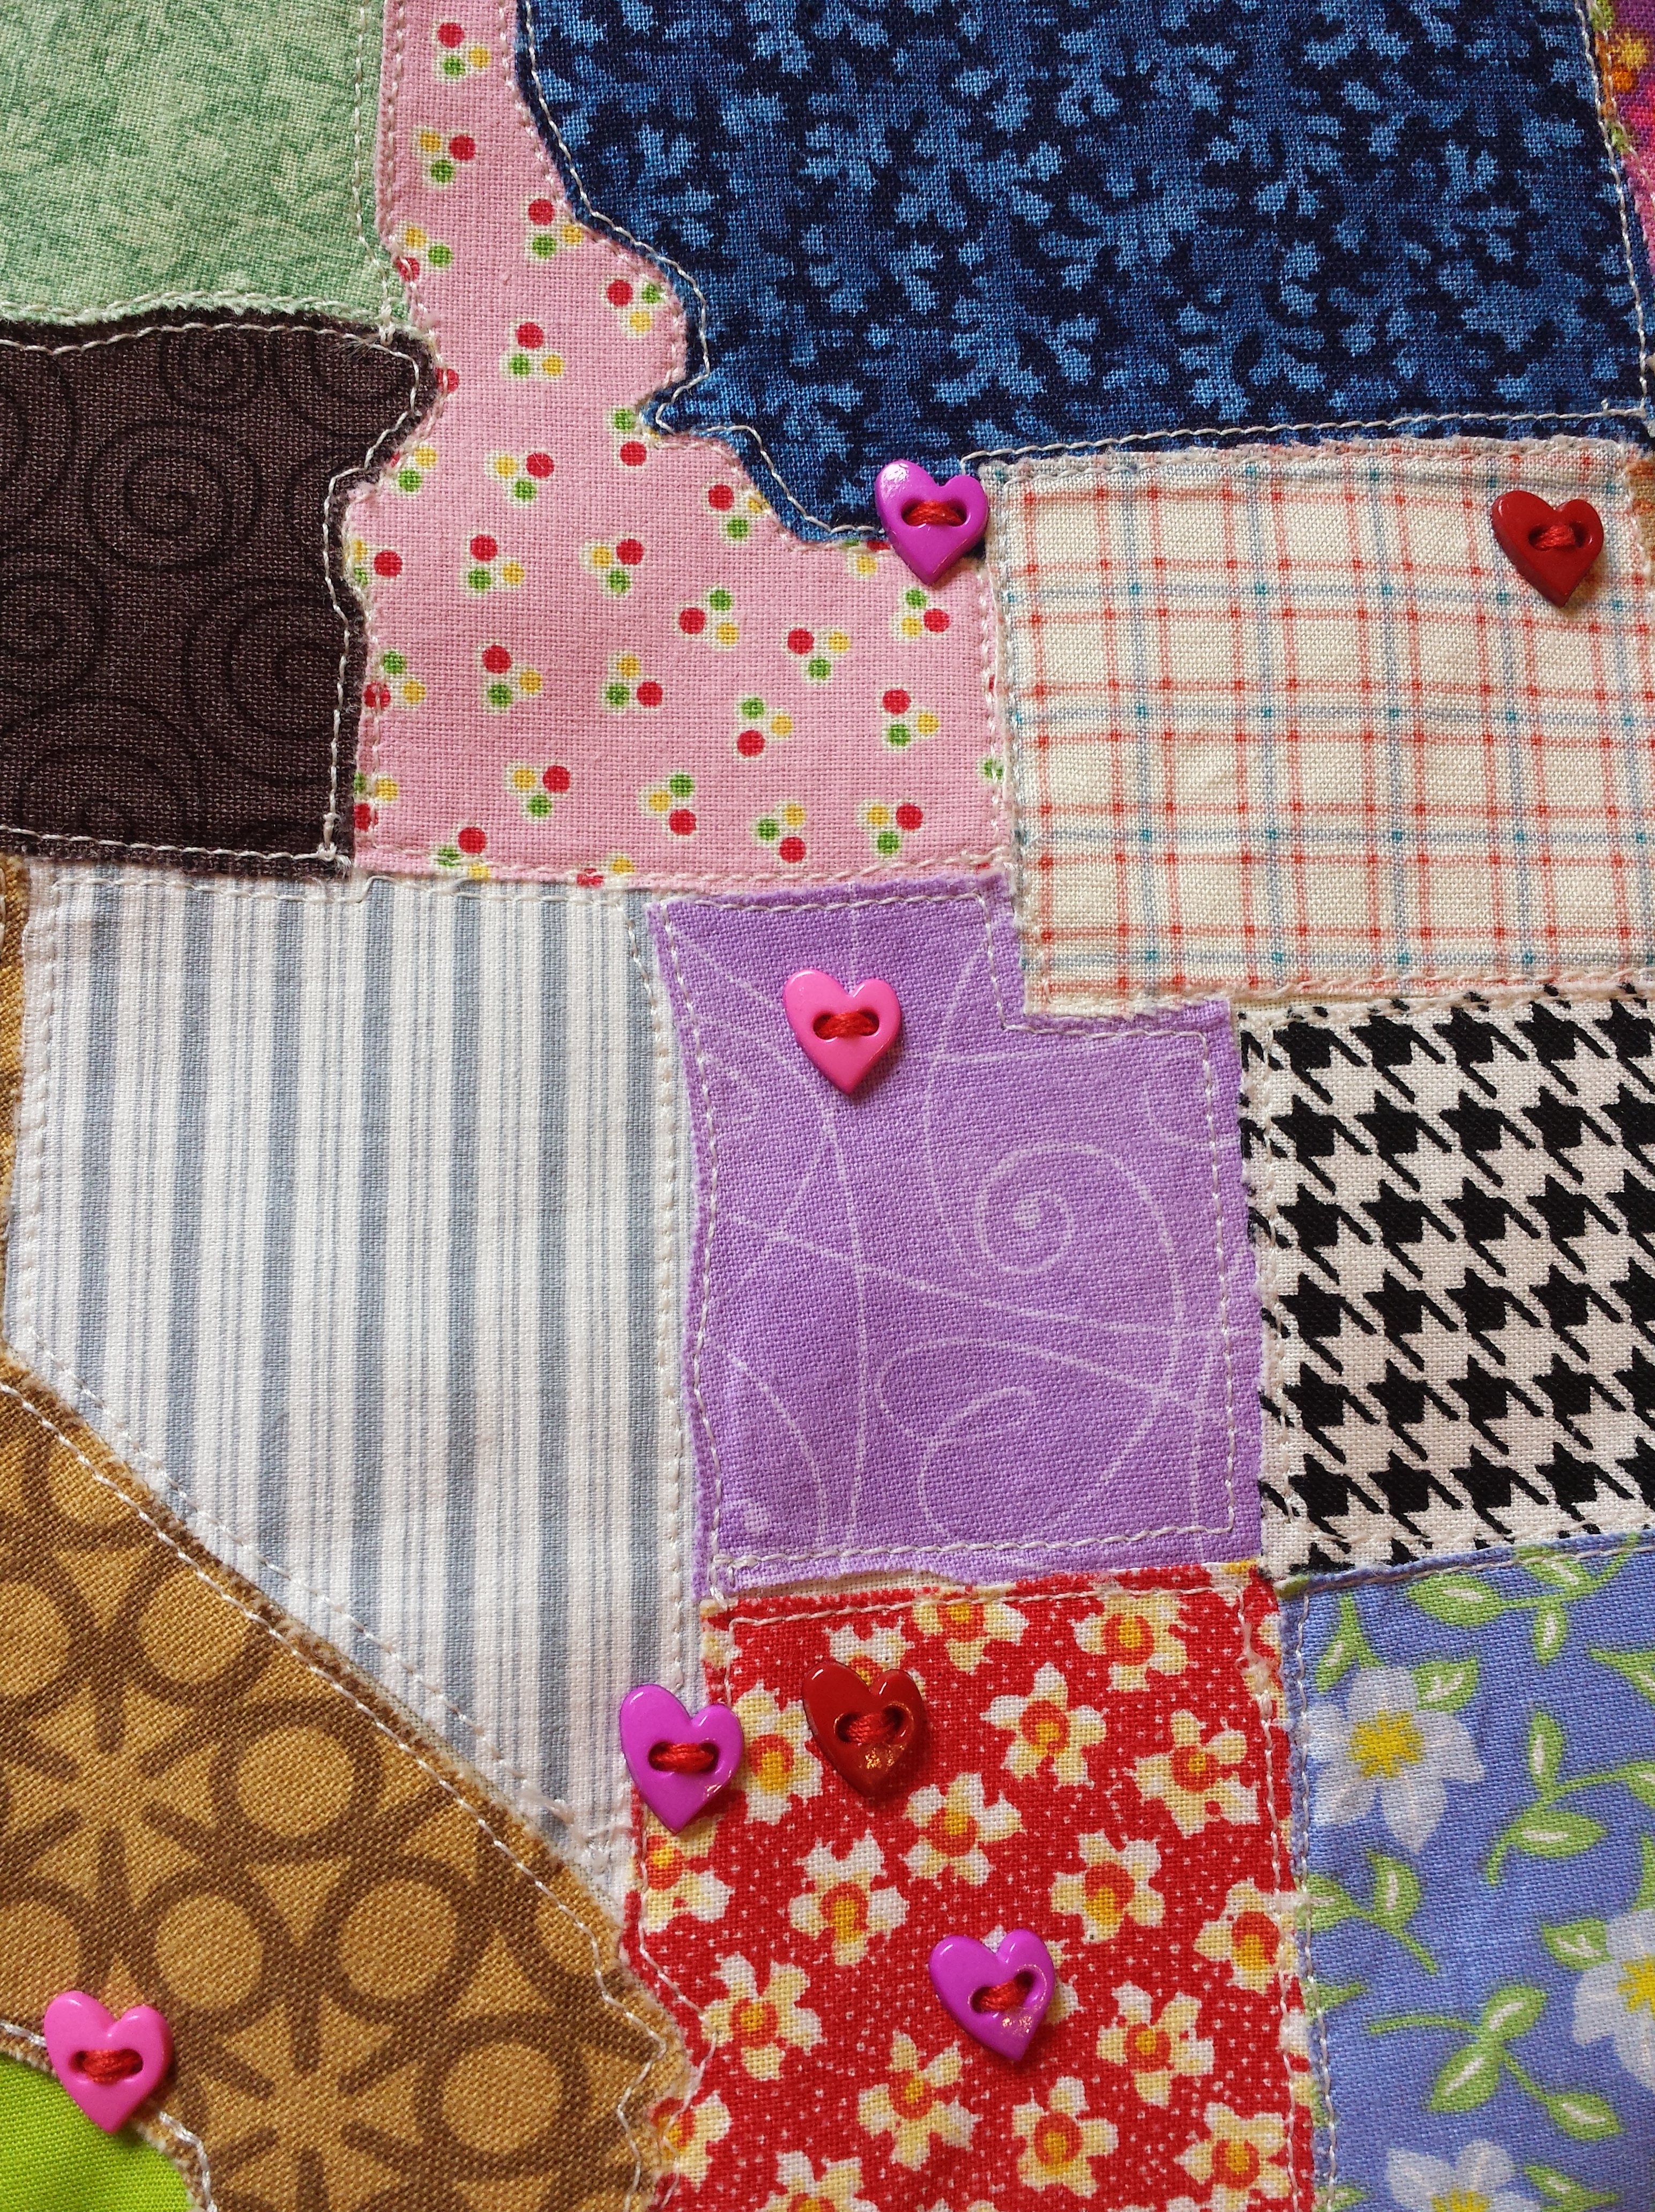
My friend Gina made us a gorgeous full sized map of the country so that we can mark all the places we've stayed on this trip.
Greetings to you from Louisiana this beautiful Wednesday! We are heading out of Louisiana and towards Texas today as we make our way west. We are now into week two of our adventure, and I’m so excited to share my recap of week one with you in this Cranston Herald article that is in today’s paper.
Have a wonderful week, and stay tuned for more blog posts in between this week’s article and next week’s about planning and preparing for our adventure!
SheKnows Expert Contributor
Listen To Your Mother Providence 2014 Alum
No Kid Hungry Blogger

